
Adorable Strawberry Owls: A Whimsical & Easy Chocolate-Dipped Treat Recipe for Parties & Kids
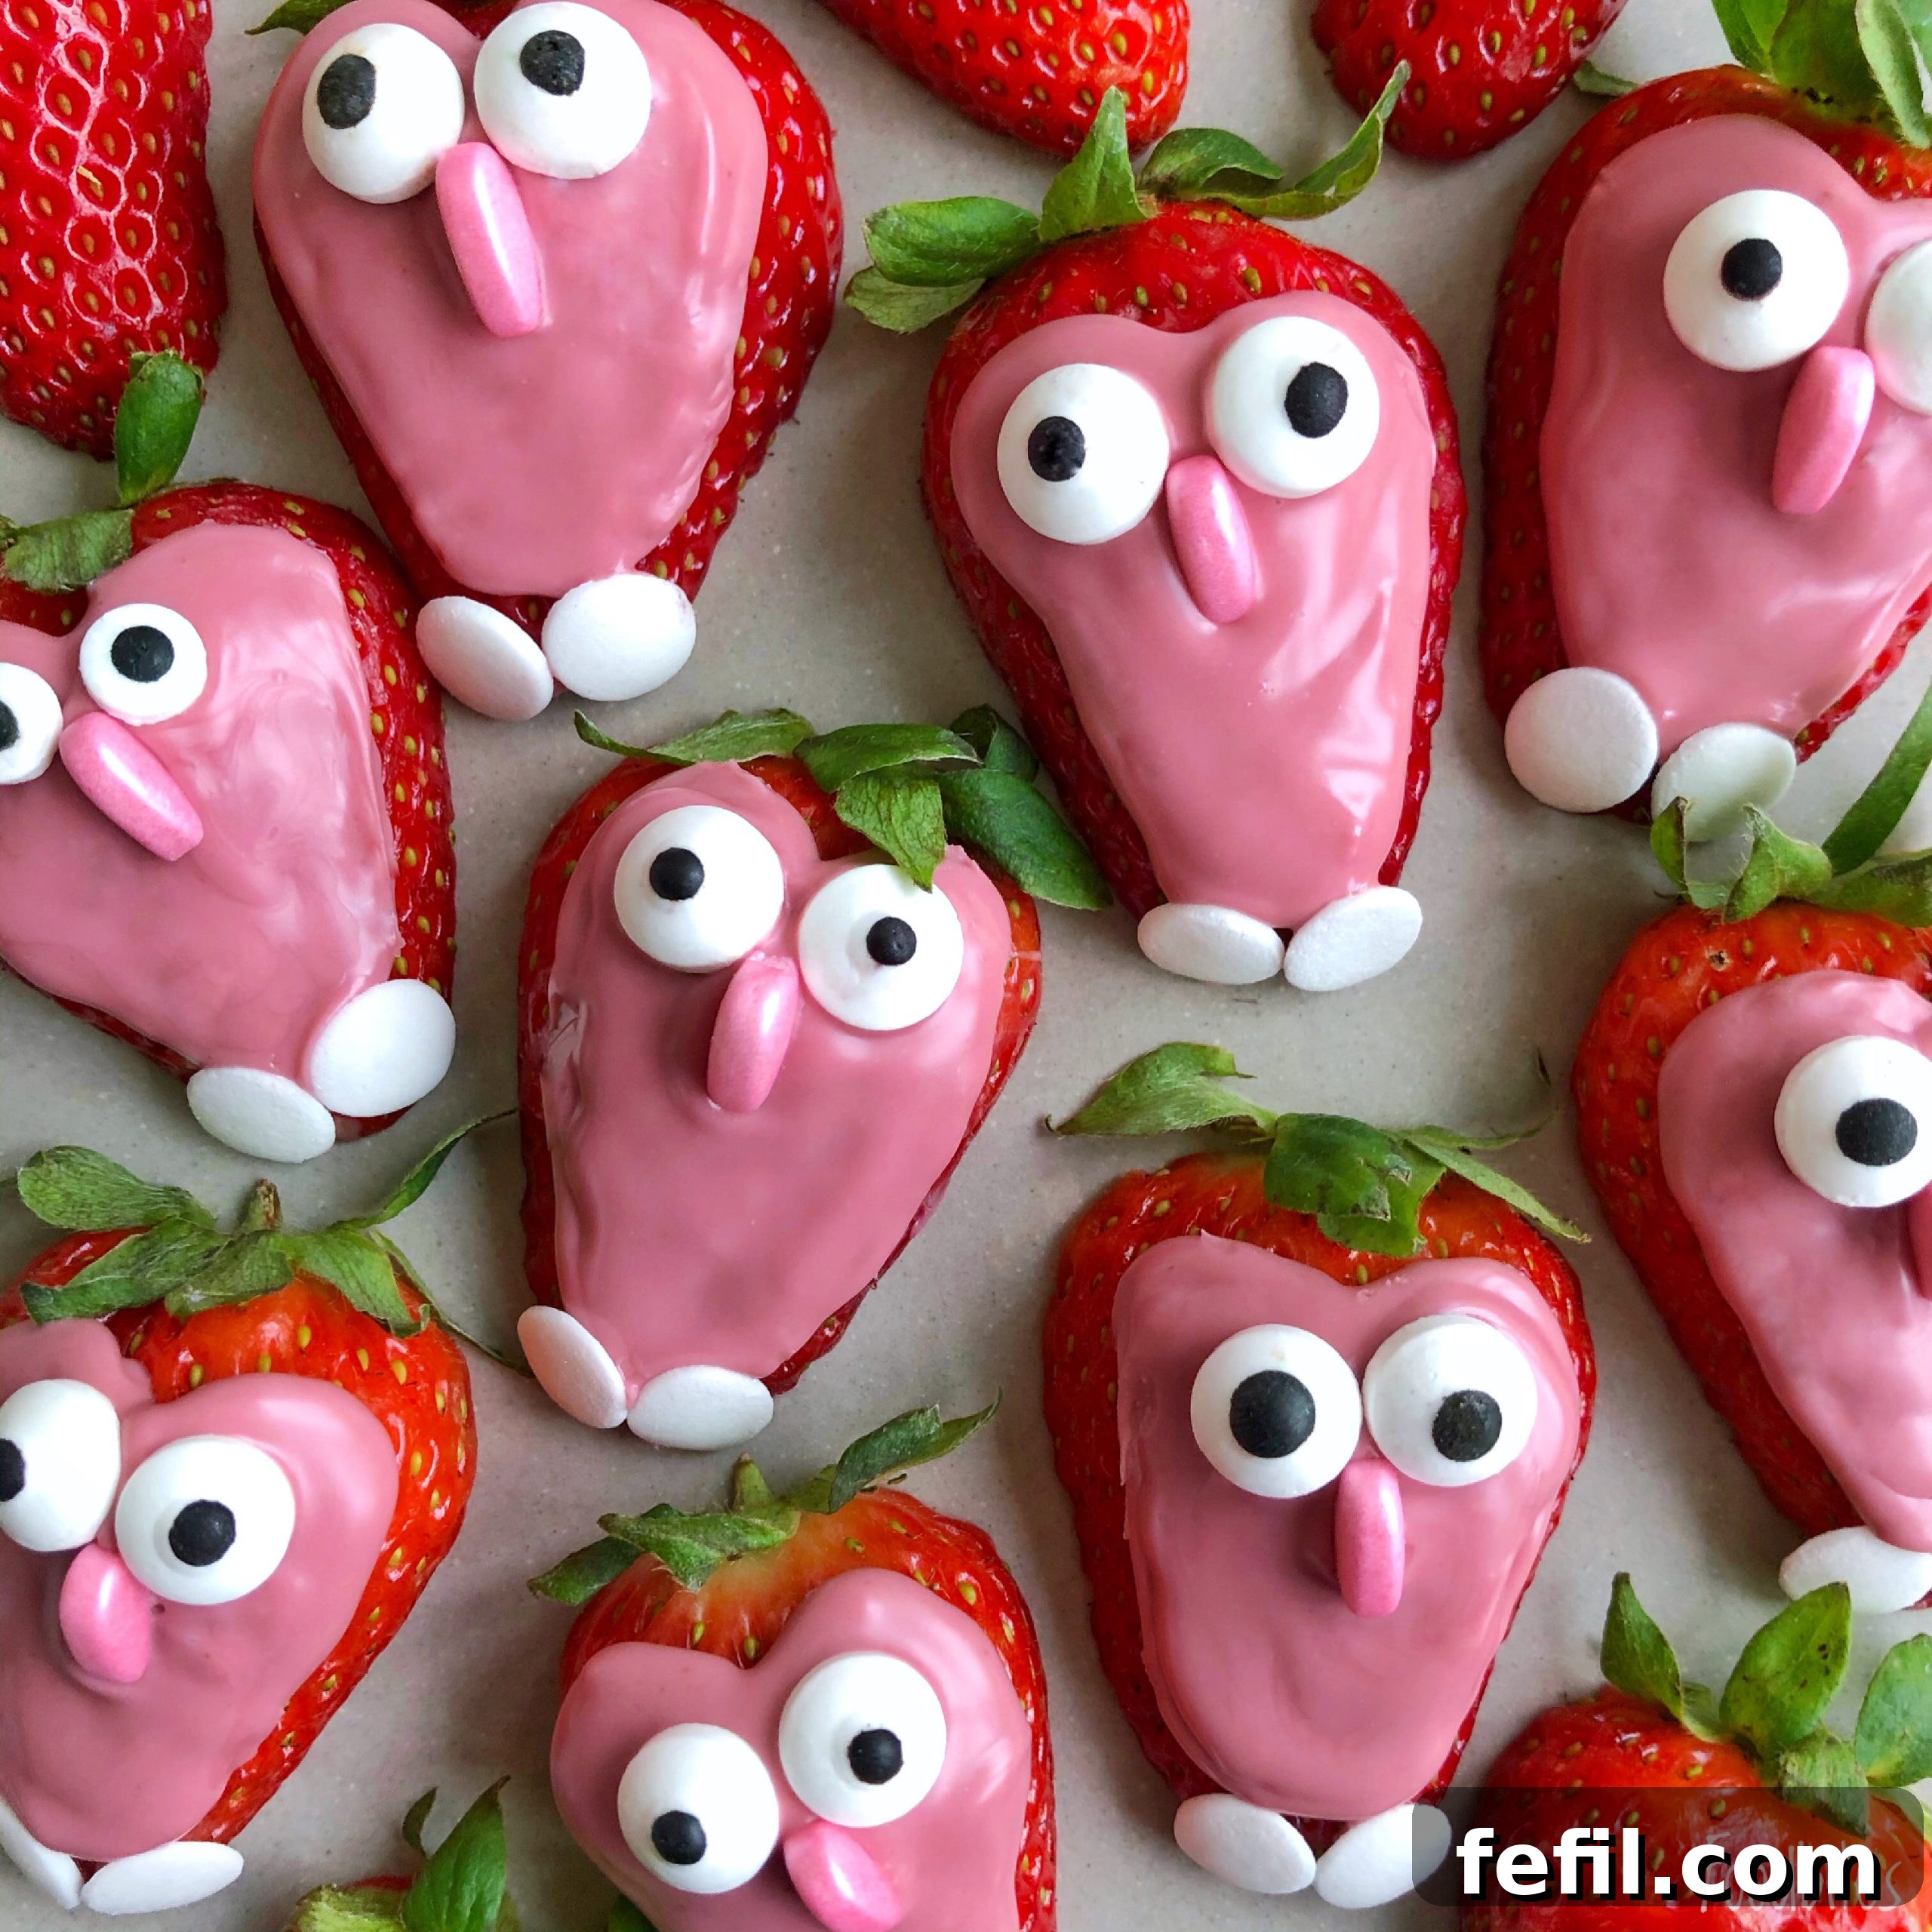
Imagine combining the fresh, vibrant taste of sun-ripened strawberries with the luxurious sweetness of chocolate. Now, picture these delightful bites transformed into the cutest little owls you’ve ever seen! Our adorable strawberry owls are an absolute joy to behold and even more delightful to eat. This recipe isn’t just about making a dessert; it’s about creating edible art that brings smiles, laughter, and a touch of whimsy to any occasion. Perfect for children’s parties, family gatherings, or simply a fun afternoon activity, these chocolate-dipped strawberry owls are surprisingly easy to make and guaranteed to be a hit!
Forget complex baking techniques or hours spent in the kitchen. With just a handful of ingredients and a sprinkle of imagination, you can craft a parliament of these charming creatures. Each strawberry owl, with its sweet candy eyes and tiny sprinkle features, is a miniature masterpiece ready to be devoured. They offer a delightful contrast of textures and flavors – the juicy burst of fresh fruit against the smooth, melt-in-your-mouth chocolate. Whether you’re looking for a unique dessert idea, a creative snack for lunchboxes, or a memorable edible gift, these strawberry owls are an excellent choice that combines health, fun, and deliciousness in one cute package.
Knock, Knock, Hoo’s There? Your New Favorite Whimsical Dessert!
Approximately 9 adorable owls
25 minutes
Rate This Recipe
Print Recipe
Love this recipe? Don’t let it fly away! Save it to your inbox and get weekly doses of delicious, fun recipes!
(Please note: This is a static HTML representation. For a functional email subscription, a backend service is required.)
Ingredients for Your Adorable Strawberry Owls
Gathering your ingredients is the first step to creating these delightful treats. The beauty of this recipe lies in its simplicity, requiring only a few key items that are easy to find. Prioritize fresh, firm strawberries and good quality chocolate for the best taste and texture.
- 9 Large, Firm Strawberries: Choose strawberries that are ripe but still firm, as they will hold their shape better. Ensure they are clean and dry before starting. This quantity will yield 9 owl halves.
- 100-150 grams Ruby Chocolate or White Chocolate: Ruby chocolate naturally provides a beautiful pink color, perfect for a whimsical owl. If using white chocolate, you’ll need a bit more for coloring. Opt for melting wafers or chocolate specifically designed for dipping for the smoothest results.
- 18 Candy Eyes: These edible sugar eyes are readily available in most baking supply stores and are essential for giving your owls their adorable expressions.
- Approximately 27 Small Round White Sprinkles: These versatile sprinkles will be used to create the cute beaks (9) and tiny feet (18) for your strawberry owls. You might want a few extra just in case!
- Optional: Natural Food Coloring Powder (Beetroot or Pitaya): If using white chocolate and desiring a pink hue, a small amount of natural food coloring powder can be mixed in. This is a great alternative to artificial dyes.
Step-by-Step Guide: Crafting Your Whimsical Strawberry Owls
Follow these straightforward steps to bring your strawberry owls to life. This process is enjoyable and a fantastic activity for all ages, especially little helpers in the kitchen!
- Melt the Chocolate: Carefully melt your ruby chocolate (or white chocolate). The safest methods are using a double boiler (a heatproof bowl set over a saucepan of simmering water, ensuring the bowl doesn’t touch the water) or short bursts in the microwave. If using a microwave, heat for 20-30 second intervals, stirring well after each, until the chocolate is smooth and fully melted. Avoid overheating, as this can cause the chocolate to become thick and clumpy.
- Coloring White Chocolate (If Applicable): If you’re using white chocolate and want to achieve that signature pink owl look, gently stir in a small amount of beetroot powder or pitaya (dragon fruit) powder into the melted chocolate. Add a tiny pinch at a time and mix thoroughly until you reach your desired pastel pink shade. Ensure the powder is fully incorporated for a smooth consistency.
- Prepare the Strawberries: After washing and thoroughly drying your strawberries, carefully halve each one lengthwise, from the stem to the tip. This creates a flat surface for stability and a larger “canvas” for your owl’s body. Lay the strawberry halves, cut-side down, on a piece of parchment paper or a silicone baking mat.
- Apply the Chocolate Coating: Using a small spoon, a butter knife, or a clean pastry brush, generously spread the melted chocolate over the rounded, outer surface of each strawberry half. Aim for a smooth, even layer that covers most of the strawberry, forming the body of your owl.
- Decorate Immediately: This is where the magic happens and speed is key! While the chocolate is still wet and pliable, quickly place two candy eyes near the top of the chocolate-covered strawberry. Below the eyes, gently press one round white sprinkle to form the owl’s beak. Finally, place two more white sprinkles at the bottom of the strawberry to create the little feet. The melted chocolate will act as a natural adhesive, holding all the decorations in place.
- Allow to Set: Once all your strawberry owls are decorated, carefully transfer the parchment paper with your creations to a cool place. The refrigerator is ideal for quick setting, usually taking about 15-30 minutes. Ensure the chocolate is completely firm before handling or serving to prevent smudging or losing decorations.
Essential Tips for Owl-timate Success
Achieving perfect, picture-worthy strawberry owls is easy with these insider tips:
- Ensure Strawberries are Bone Dry: This cannot be overstated. Moisture is the archenemy of melted chocolate. Pat, air dry, and double-check your strawberries before dipping!
- Use Quality Melting Chocolate: High-quality chocolate or candy melts will provide a smoother, more consistent coating and set beautifully. Avoid regular chocolate chips unless specifically designed for melting, as they often contain stabilizers that can make them difficult to work with.
- Have All Decorations Ready: Layout your candy eyes, sprinkles, and any other decorative elements before you start melting the chocolate. Once the chocolate is on the strawberry, it begins to cool and set quickly, so you’ll want to place your decorations without delay.
- Work on Parchment Paper: Always use parchment paper or a silicone baking mat. This prevents the chocolate-dipped strawberries from sticking and makes for effortless removal and cleanup.
- Mind the Temperature: Work in a cool room if possible. If your chocolate starts to thicken too much, gently rewarm it for a few seconds. If your room is too warm, the chocolate might take longer to set or become messy.
- Creative Placement: Don’t be afraid to adjust the placement of eyes, beaks, and feet slightly to give each owl a unique personality!
Creative Variations & Customizations for Your Strawberry Owls
While the classic pink strawberry owl is undeniably charming, there’s a world of creativity waiting to be explored! Personalize your flock with these fun variations:
- Chocolate Flavors and Colors:
- Dark Chocolate: For a richer, more intense flavor contrast with the sweet strawberry.
- Milk Chocolate: A universally loved classic that pairs perfectly with fruit.
- Colored Candy Melts: Available in a rainbow of colors, these are excellent for vibrant, easy-to-melt coatings. Think blue owls, green owls, or even rainbow assortments!
- Alternative Eyes & Beaks:
- Mini Chocolate Chips: Can be used as eyes if candy eyes are unavailable.
- Small Candies: Tiny M&Ms or other small round candies can serve as colorful eyes.
- Piped Icing: Use a fine-tipped piping bag with royal icing or melted white chocolate to draw eyes, beaks, or even tiny eyebrows.
- Tiny Orange Sprinkles: Can replace white sprinkles for a more traditional “beak” color.
- Adding Wings & Feathers:
- Almond Slices: Gently press two thinly sliced almonds into the sides of the chocolate before it sets to create delicate wings.
- Coconut Flakes: Lightly toasted coconut flakes can be sprinkled over the chocolate for a feathery texture.
- Edible Glitter or Dust: A touch of edible glitter can give your owls a magical shimmer.
- Themed Owls for Holidays:
- Halloween: Use orange or black chocolate, and perhaps some spooky sprinkles for eyes.
- Christmas: Dip in green or red chocolate, and use festive sprinkles or crushed candy canes.
- Valentine’s Day: Stick with ruby chocolate and use heart-shaped sprinkles for an extra touch of love.
Perfect for Any Occasion: When to Serve Your Strawberry Owls
These adorable strawberry owls are incredibly versatile and suitable for a wide range of events and simple pleasures. Their charming appearance makes them a focal point on any dessert table.
- Children’s Birthday Parties: A guaranteed crowd-pleaser that doubles as both a treat and a fun character.
- Baby Showers & Gender Reveals: Customize the chocolate color to match the theme (e.g., blue or pink chocolate).
- School Events & Lunchboxes: A creative and relatively healthy snack that will surely bring smiles.
- Family Gatherings: A delightful dessert that appeals to all ages and encourages conversation.
- Woodland or Animal-Themed Parties: Perfectly complements any nature-inspired decor.
- Homemade Gifts: Package them beautifully in a small box for a thoughtful, personalized present.
- Just Because: Sometimes, you don’t need a special occasion to enjoy a cute, delicious treat!
Have you embarked on this fun culinary adventure and created your own adorable flock of strawberry owls?
We’d be absolutely thrilled to see your unique creations!
Please share your photos, tell us about your experience, or drop a comment below with any fun variations you tried. Happy decorating!