
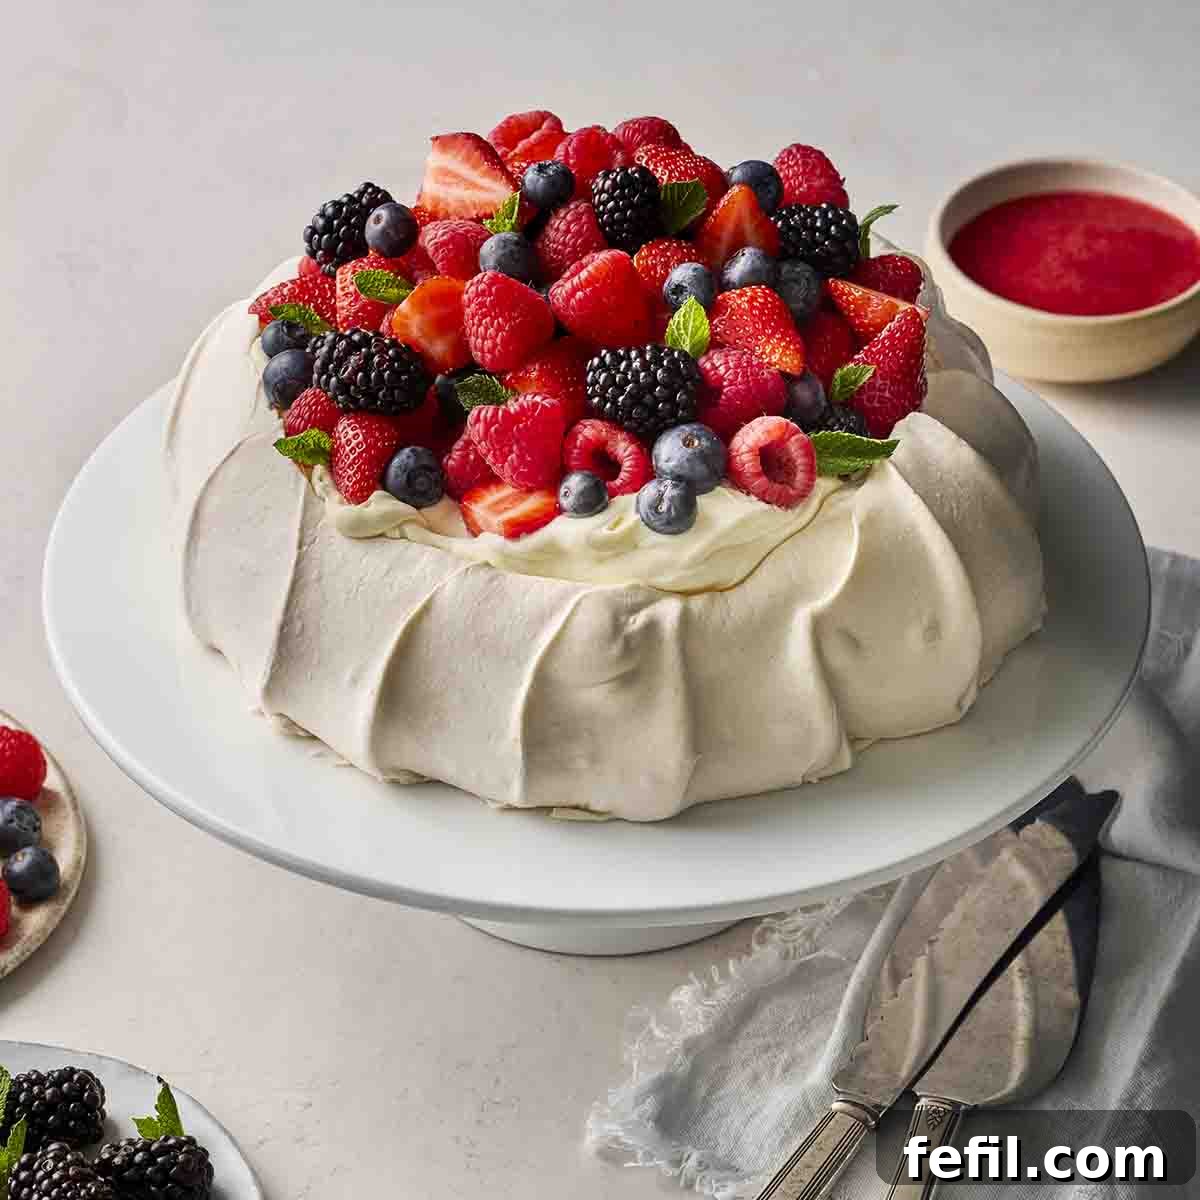
The Ultimate Homemade Pavlova: Your Guide to Perfect Meringue Every Time!
Dreaming of a dessert that’s both elegant and effortlessly delicious? Making your own Pavlova is simpler than you imagine! Follow our expert tips and tricks to craft this iconic dessert flawlessly, creating perfect meringue with a delightful crispy exterior and a soft, marshmallowy interior, every single time.
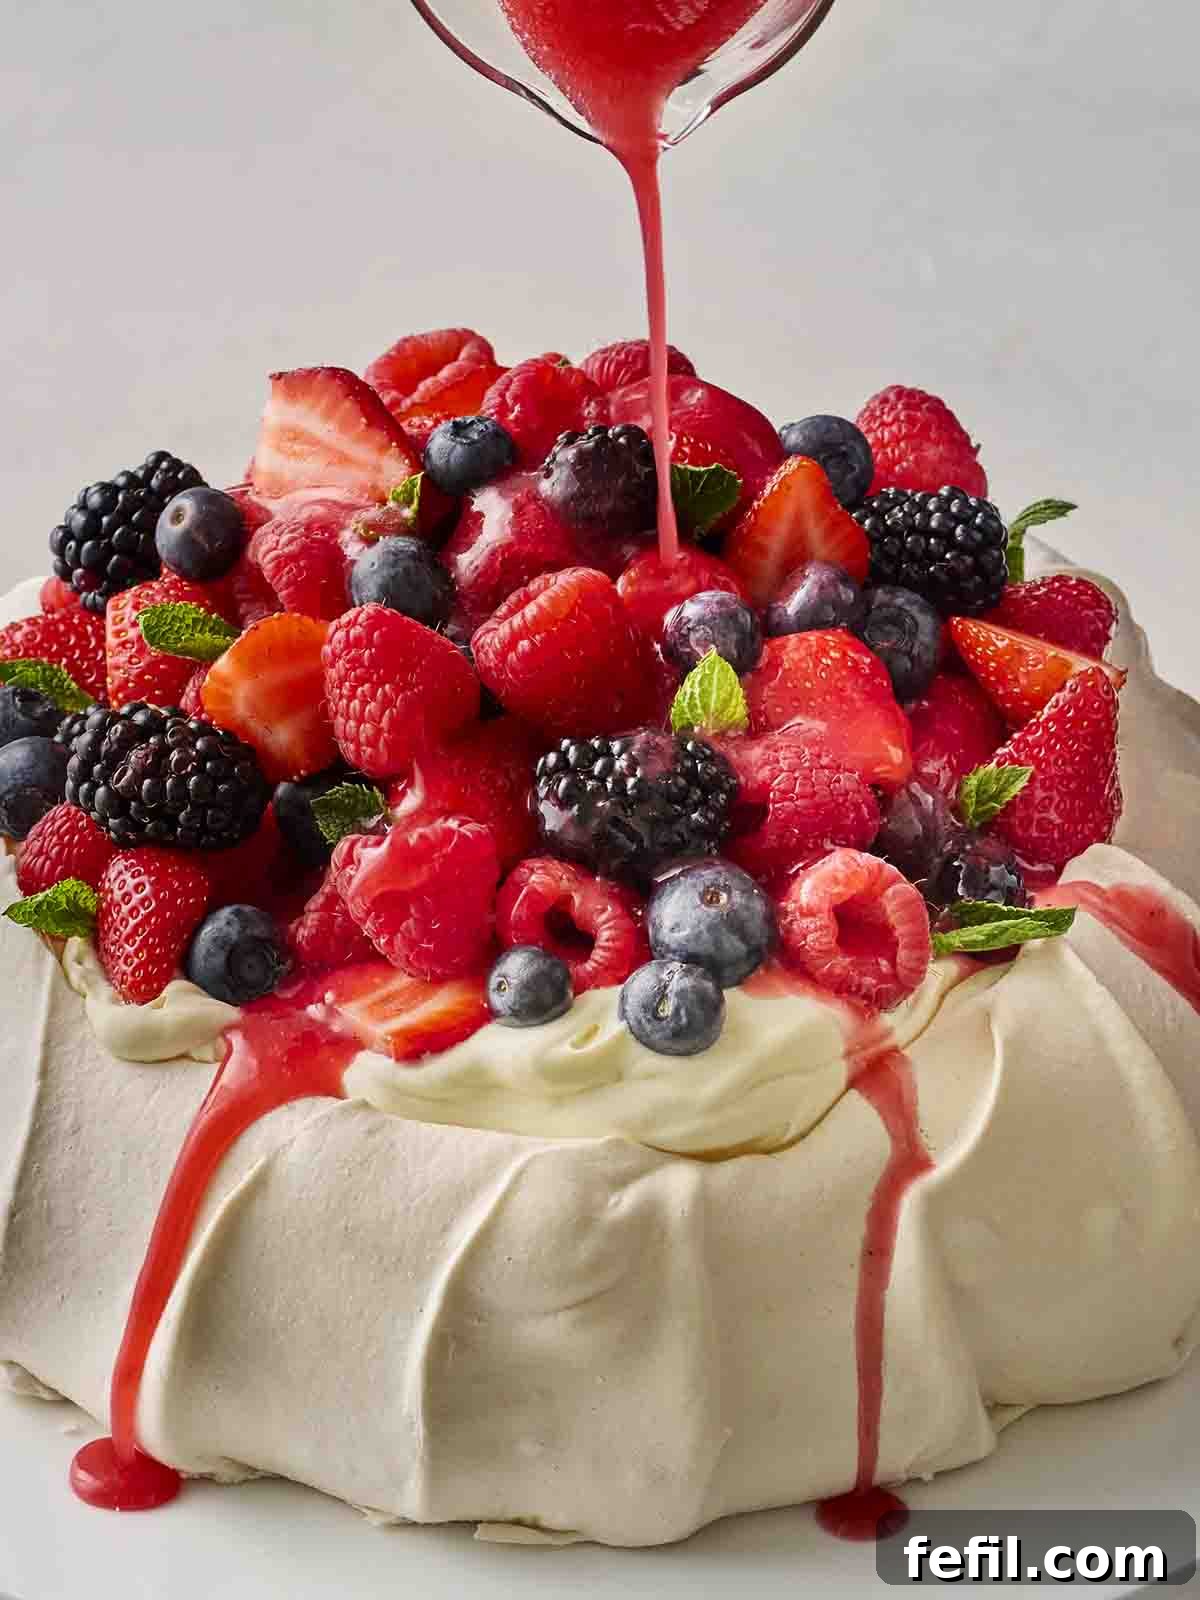
Why Homemade Pavlova is the Epitome of Summer Desserts
Is Pavlova truly the ultimate summer dessert on the planet? We certainly think so! There’s an undeniable magic in its delicate balance of textures and flavors that captures the essence of warm, sunny days.
You simply cannot compare the exquisite taste and texture of homemade meringue to any store-bought alternative. The satisfaction of biting into that delicately crunchy shell, followed by a sweet, slightly gooey, marshmallow-like center, is unmatched. We passionately encourage you – try making it yourself before you ever consider buying one!
If the thought of making your own Pavlova feels a little daunting, put those fears aside. We’re here to assure you that it is incredibly easy and straightforward, especially once you’re equipped with the right knowledge and a few simple techniques. This guide will walk you through every step, ensuring your success. With just a few simple tips and tricks, you’ll achieve perfection, consistently. Follow this comprehensive recipe, and you’ll discover a new favorite dessert that you’ll be proud to serve again and again!
What Makes This the Best Pavlova Recipe You’ll Find?
We believe our Pavlova recipe stands out for several compelling reasons, designed to make your baking experience enjoyable and rewarding:
- Convenience: The meringue base can be prepared ahead of time, giving you valuable flexibility. This means you can bake the meringue a day or even a few days in advance, allowing for stress-free assembly just before serving.
- Irresistible Texture: Prepare for a dessert that’s deliciously divine, offering a harmonious blend of creamy toppings, a satisfyingly crunchy exterior, and a wonderfully chewy, soft interior. Each bite is a textural symphony.
- Effortless Execution: This recipe is incredibly EASY to follow. We’ve broken down each step into simple, clear instructions, making it accessible for bakers of all skill levels, from beginners to seasoned pros.
Understanding Pavlova: A Culinary Delight
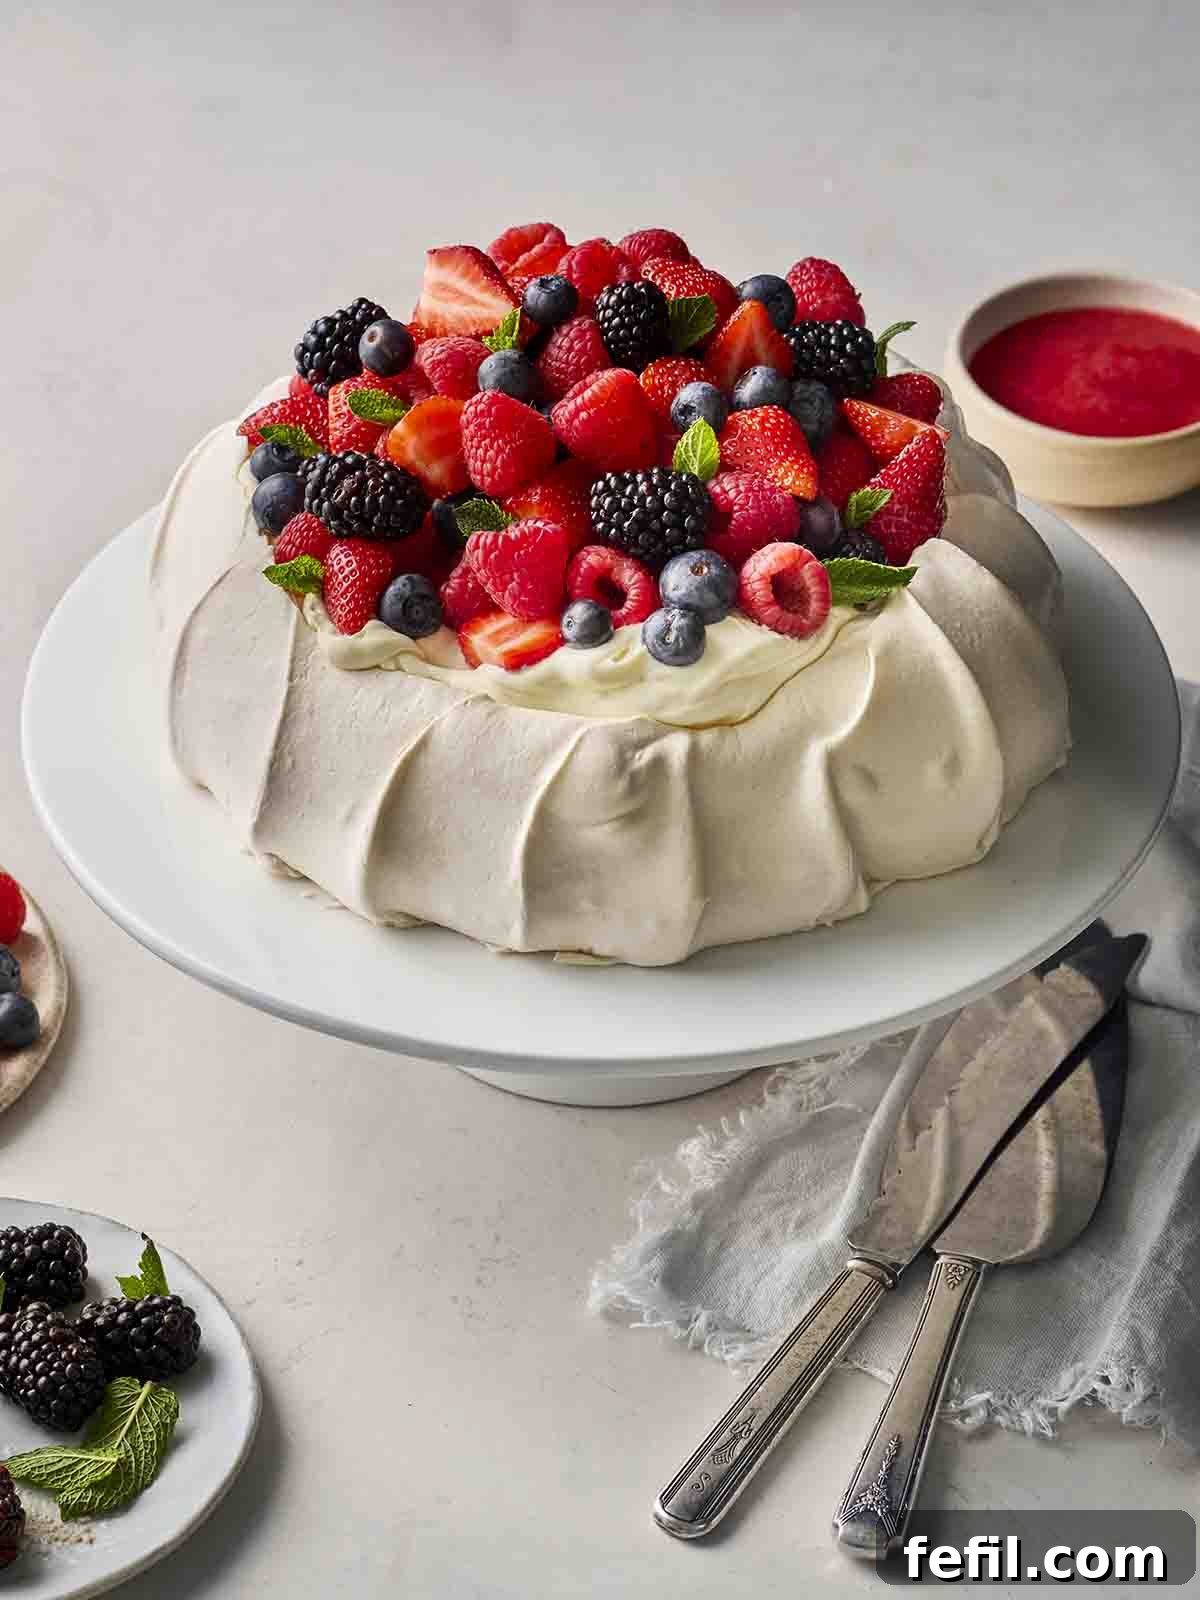
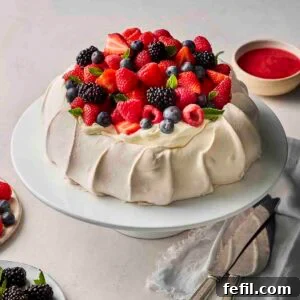
At its heart, a Pavlova is a majestic dessert featuring a delicate meringue base, crowned with luscious whipped cream and typically adorned with an assortment of fresh fruits. This classic combination is precisely why it’s so often associated with summer, offering a light and refreshing end to any meal. However, its versatility means you can easily adapt it for any season – imagine a rich, spiced meringue with poached pears in winter, or perhaps a festive Christmas Pavlova! We craft our meringue with just two core ingredients: egg whites and caster sugar. When these are expertly whisked and baked, they transform into the ethereal, delicate, and utterly delicious base that makes Pavlova so iconic.
The beauty of Pavlova lies in its contrast. The crisp shell gives way to a soft, marshmallowy interior, creating an addictive texture that perfectly complements the creamy topping and tartness of fresh fruit. It’s a dessert that not only tastes incredible but also makes a stunning visual statement, perfect for entertaining or a special family treat.
Gather Your Ingredients: The Essence of Classic Pavlova
Creating an exceptional Pavlova begins with selecting the right ingredients. Here’s what you’ll need for a truly classic rendition:
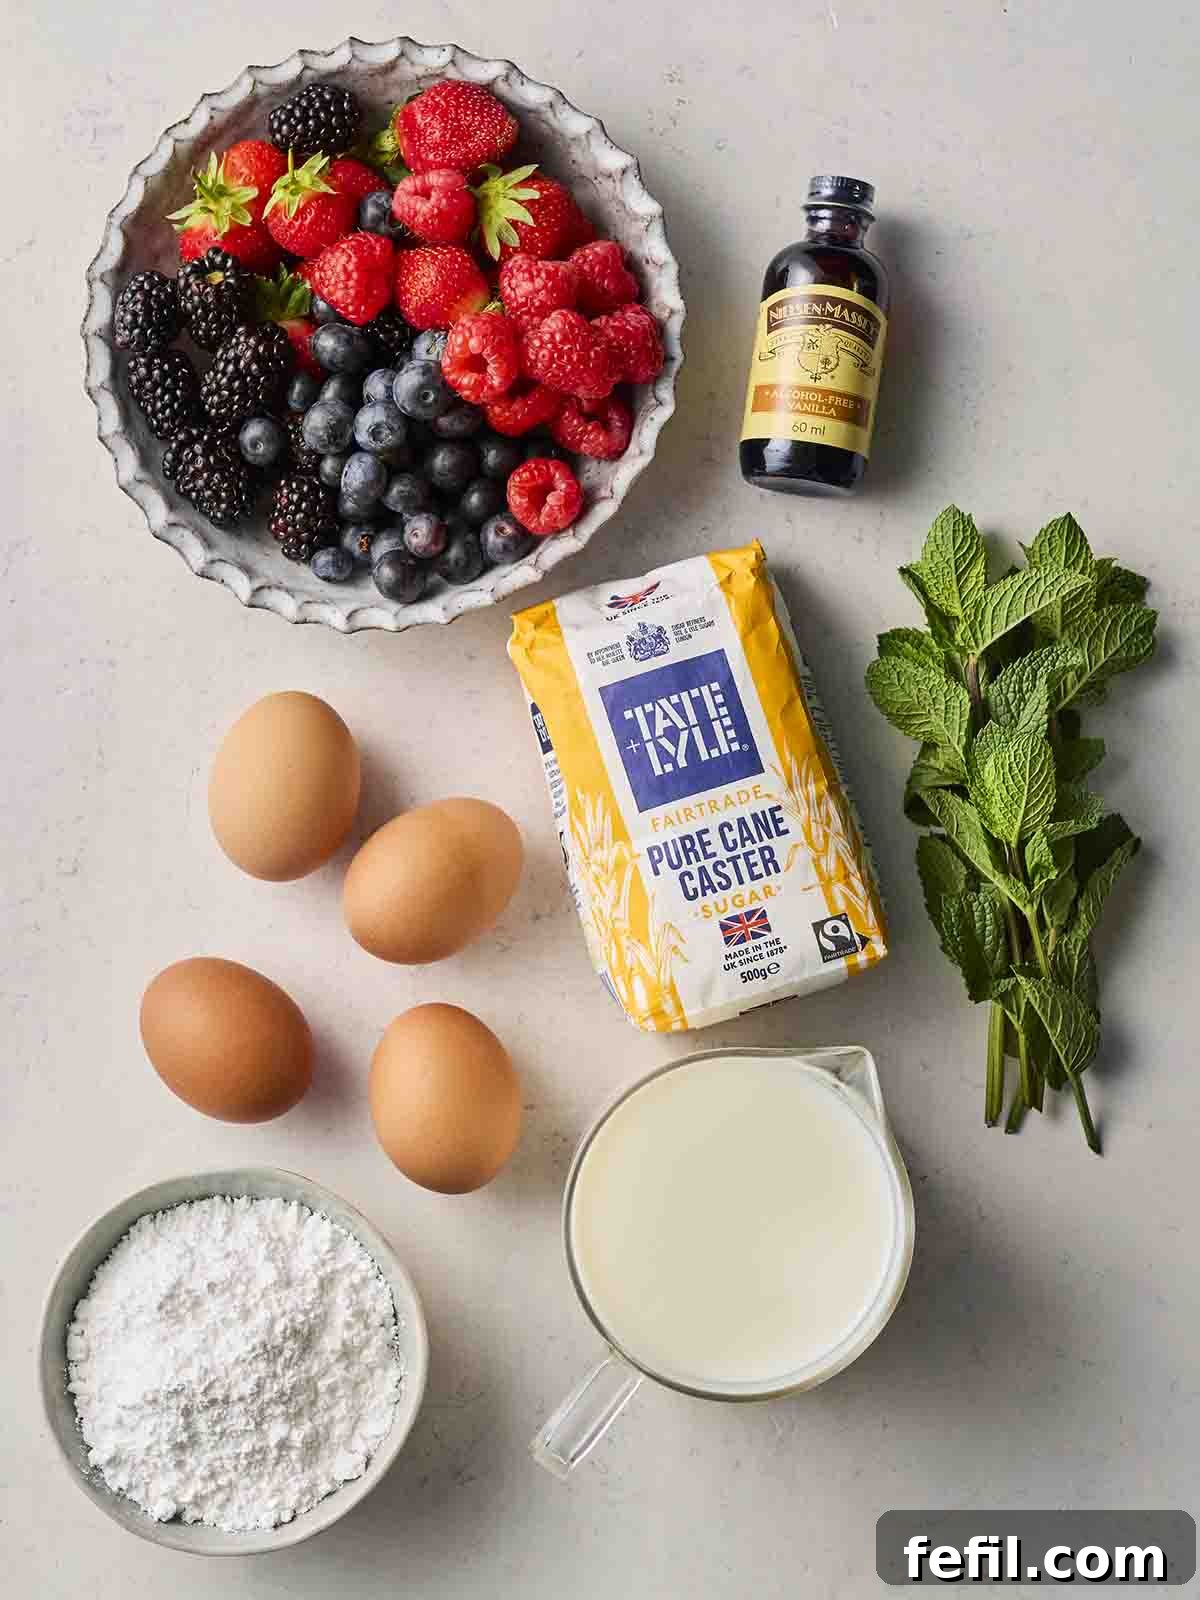
- Egg Whites: For this recipe, you’ll need just 4 large egg whites. Precision is paramount when separating eggs; even a tiny speck of yolk can compromise the egg whites’ ability to whip up to stiff peaks. Ensure your eggs are at room temperature for optimal volume and stability when whipping.
- Caster Sugar (Superfine Sugar): This fine-grained sugar dissolves quickly into the egg whites, creating a smooth and stable meringue. It’s crucial to add it gradually, a little at a time, to achieve the desired glossy, stiff consistency.
- For the Topping:
- Double Cream (Heavy Cream): Ensure your cream is well-chilled for maximum whipping volume. This forms the rich, luxurious crown of your Pavlova.
- Vanilla Extract: A splash of good quality vanilla extract enhances the cream’s flavor, adding a warm, aromatic depth.
- Mixed Fresh Berries: A colorful assortment of strawberries, raspberries, blueberries, and blackberries provides natural sweetness and a delightful tart counterpoint to the meringue and cream. Choose ripe, seasonal berries for the best flavor.
- Fresh Mint: A few sprigs of fresh mint, finely chopped or as whole leaves, offer a refreshing garnish that elevates both the appearance and taste.
- For the Raspberry Sauce:
- Fresh Raspberries: These will be transformed into a vibrant, tangy coulis, adding another layer of fruitiness and visual appeal.
- Icing Sugar (Powdered Sugar): Used to sweeten the raspberry sauce, dissolving easily to create a smooth consistency.
These core ingredients, when combined with care and attention, promise a Pavlova that’s not only visually stunning but also incredibly delicious.
Crafting Your Masterpiece: A Step-by-Step Pavlova Guide
Follow these detailed steps to create a perfect Pavlova that will impress everyone:
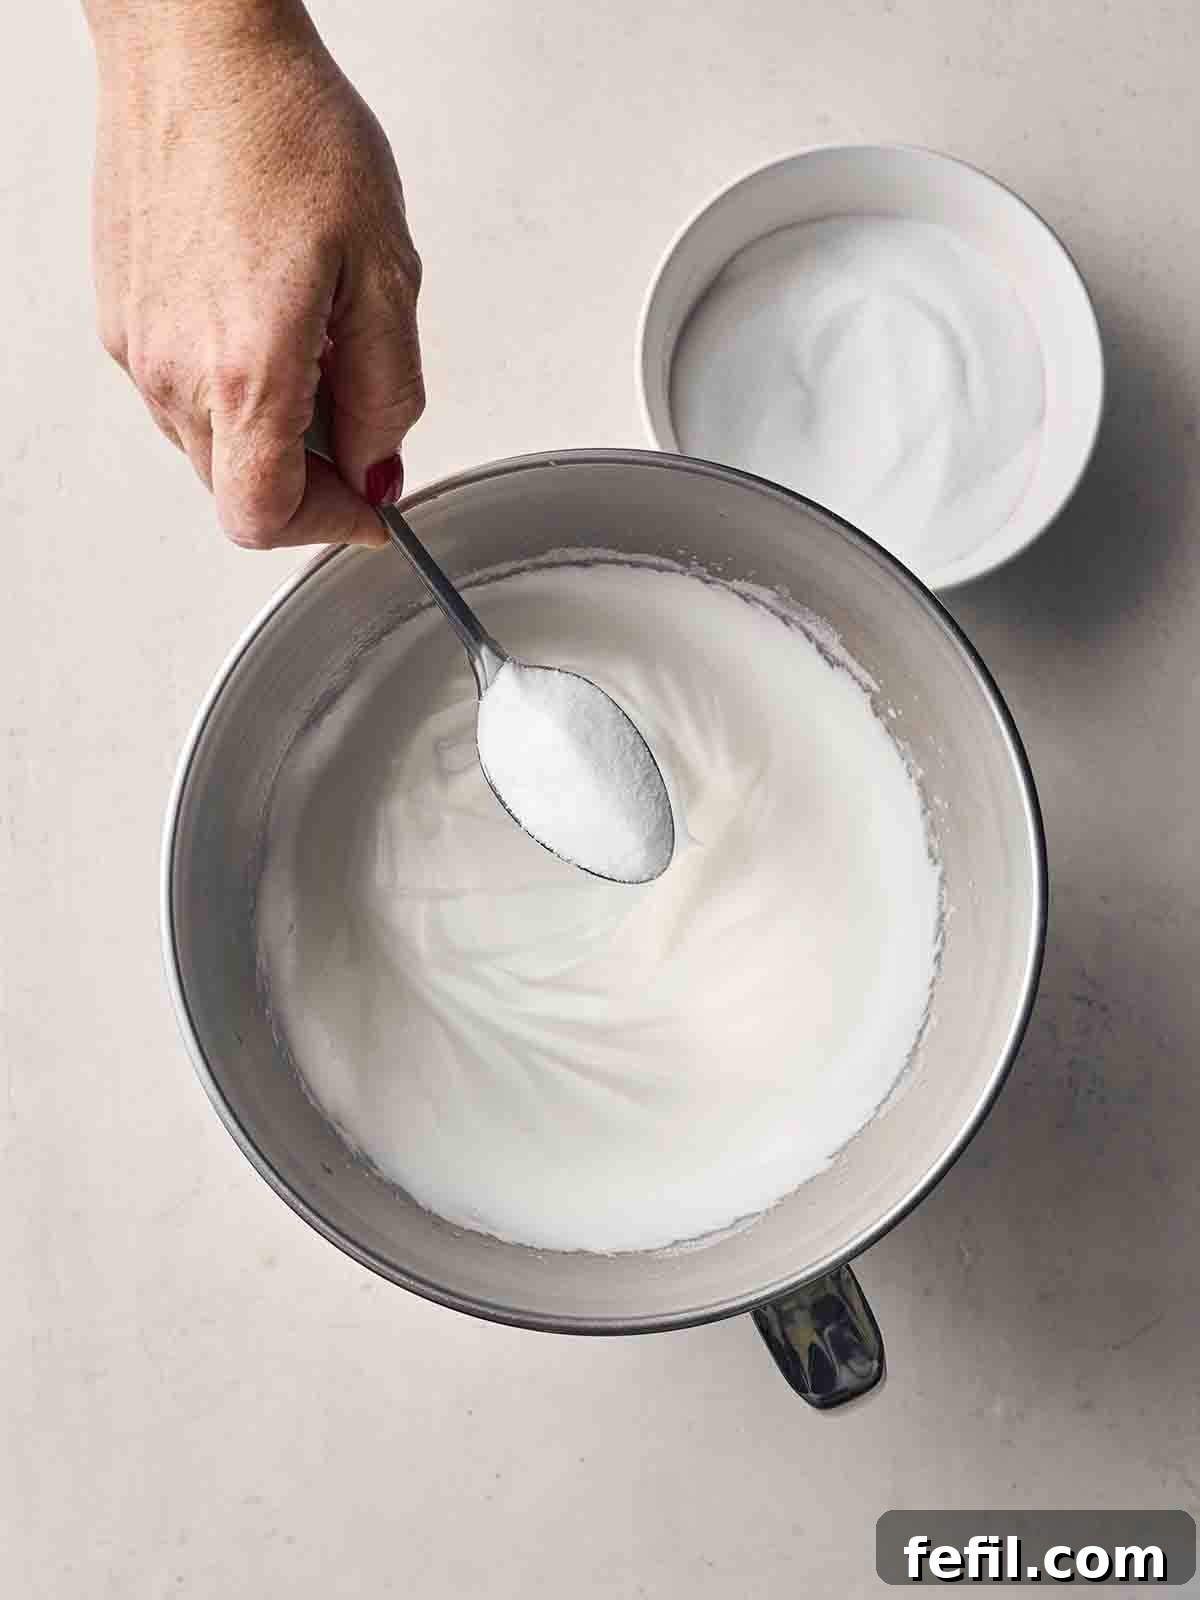
1. Prepare the Meringue: Begin by preheating your oven to 110°C/230°F (fan assisted), 160°C/320°F (conventional), or Gas Mark 3. Line a baking tray with non-stick baking paper. Draw a 22cm (approximately 8.5 inches) circle on the paper. Then, flip the paper over so the pencil marks are underneath and won’t transfer to your meringue. In a meticulously clean, grease-free bowl (this is crucial!), whisk the egg whites using a handheld electric whisk or a stand mixer fitted with the whisk attachment. Whisk until they form stiff peaks that hold their shape. Once stiff, gradually add the caster sugar, one tablespoon at a time, whisking thoroughly after each addition until the mixture is thick, glossy, and the sugar has completely dissolved. Test by rubbing a small amount between your fingers; it should feel smooth, not grainy.
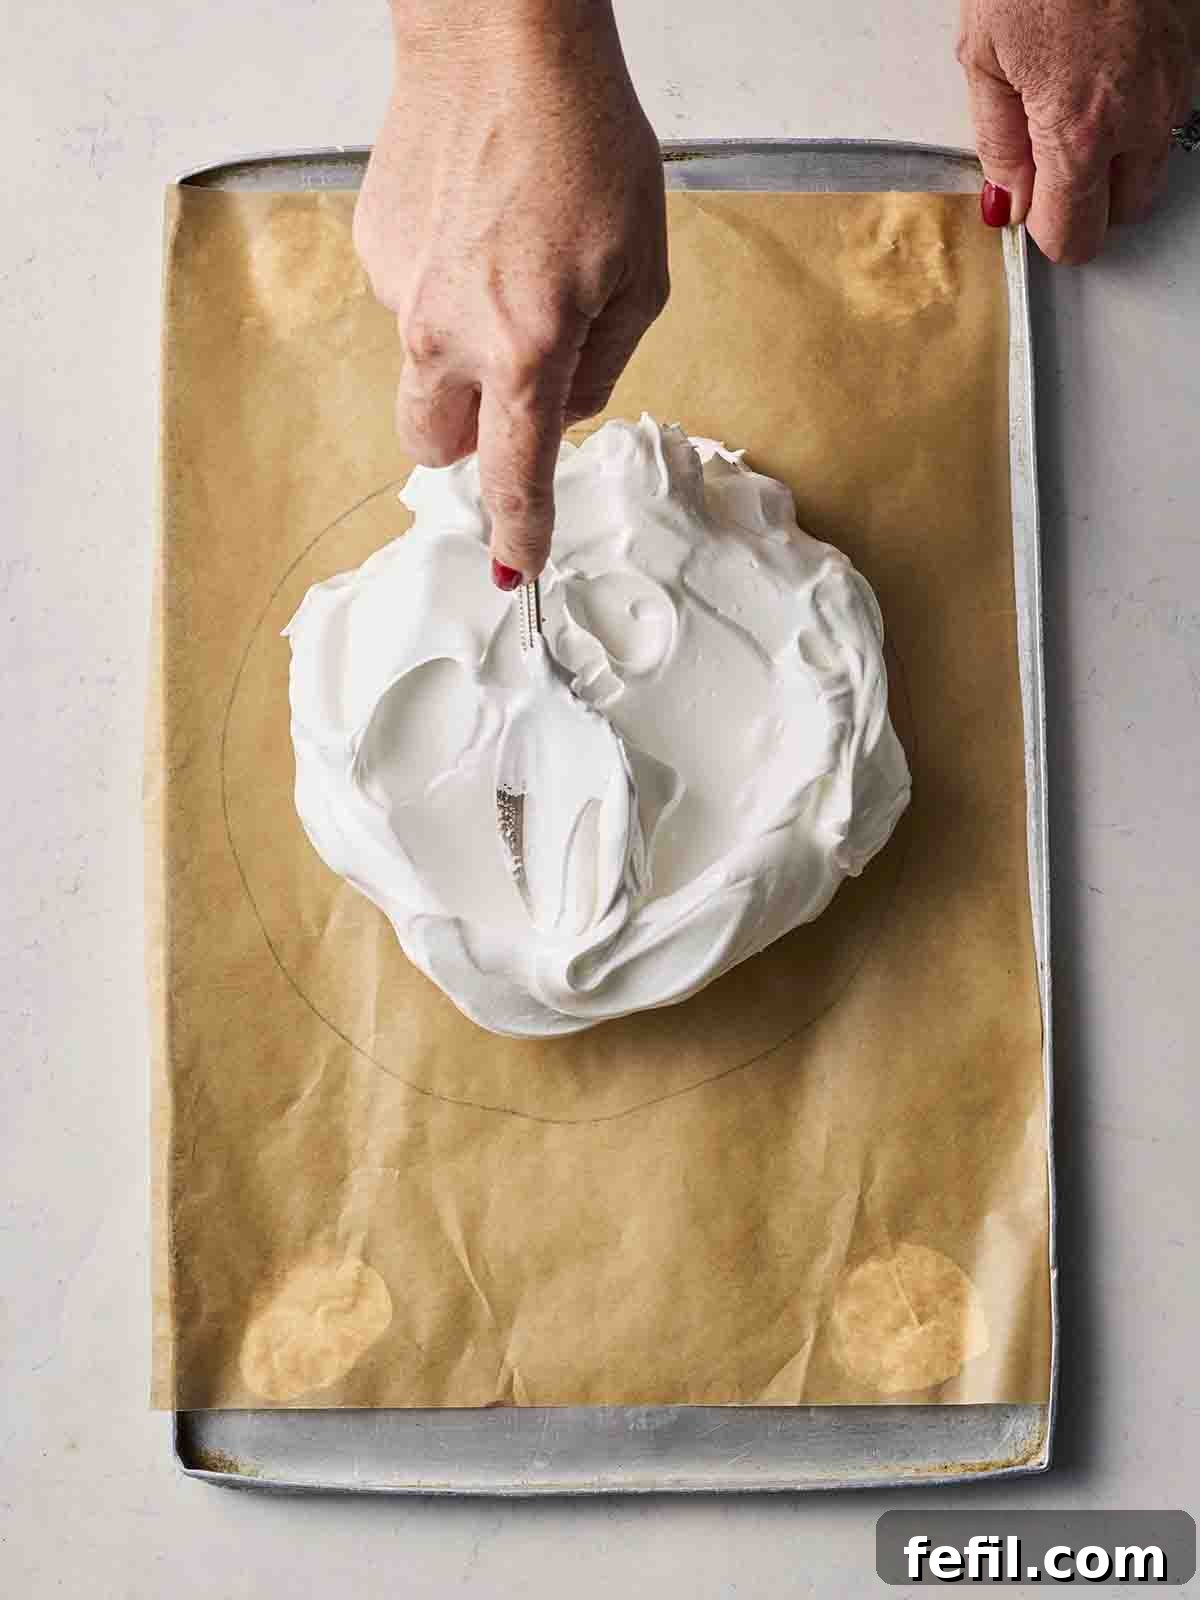
2. Shape the Meringue: To prevent your baking paper from sliding, apply a tiny dot or two of the meringue mixture to the corners of the baking tray and press the paper down. Now, spoon the glorious meringue mixture onto the drawn circle on your baking paper. Gently push the meringue out to the edges of the circle, creating a neat disc. You can create a slight indentation in the center, which will act as a natural bowl for your cream and fruit later, or simply keep it flat.
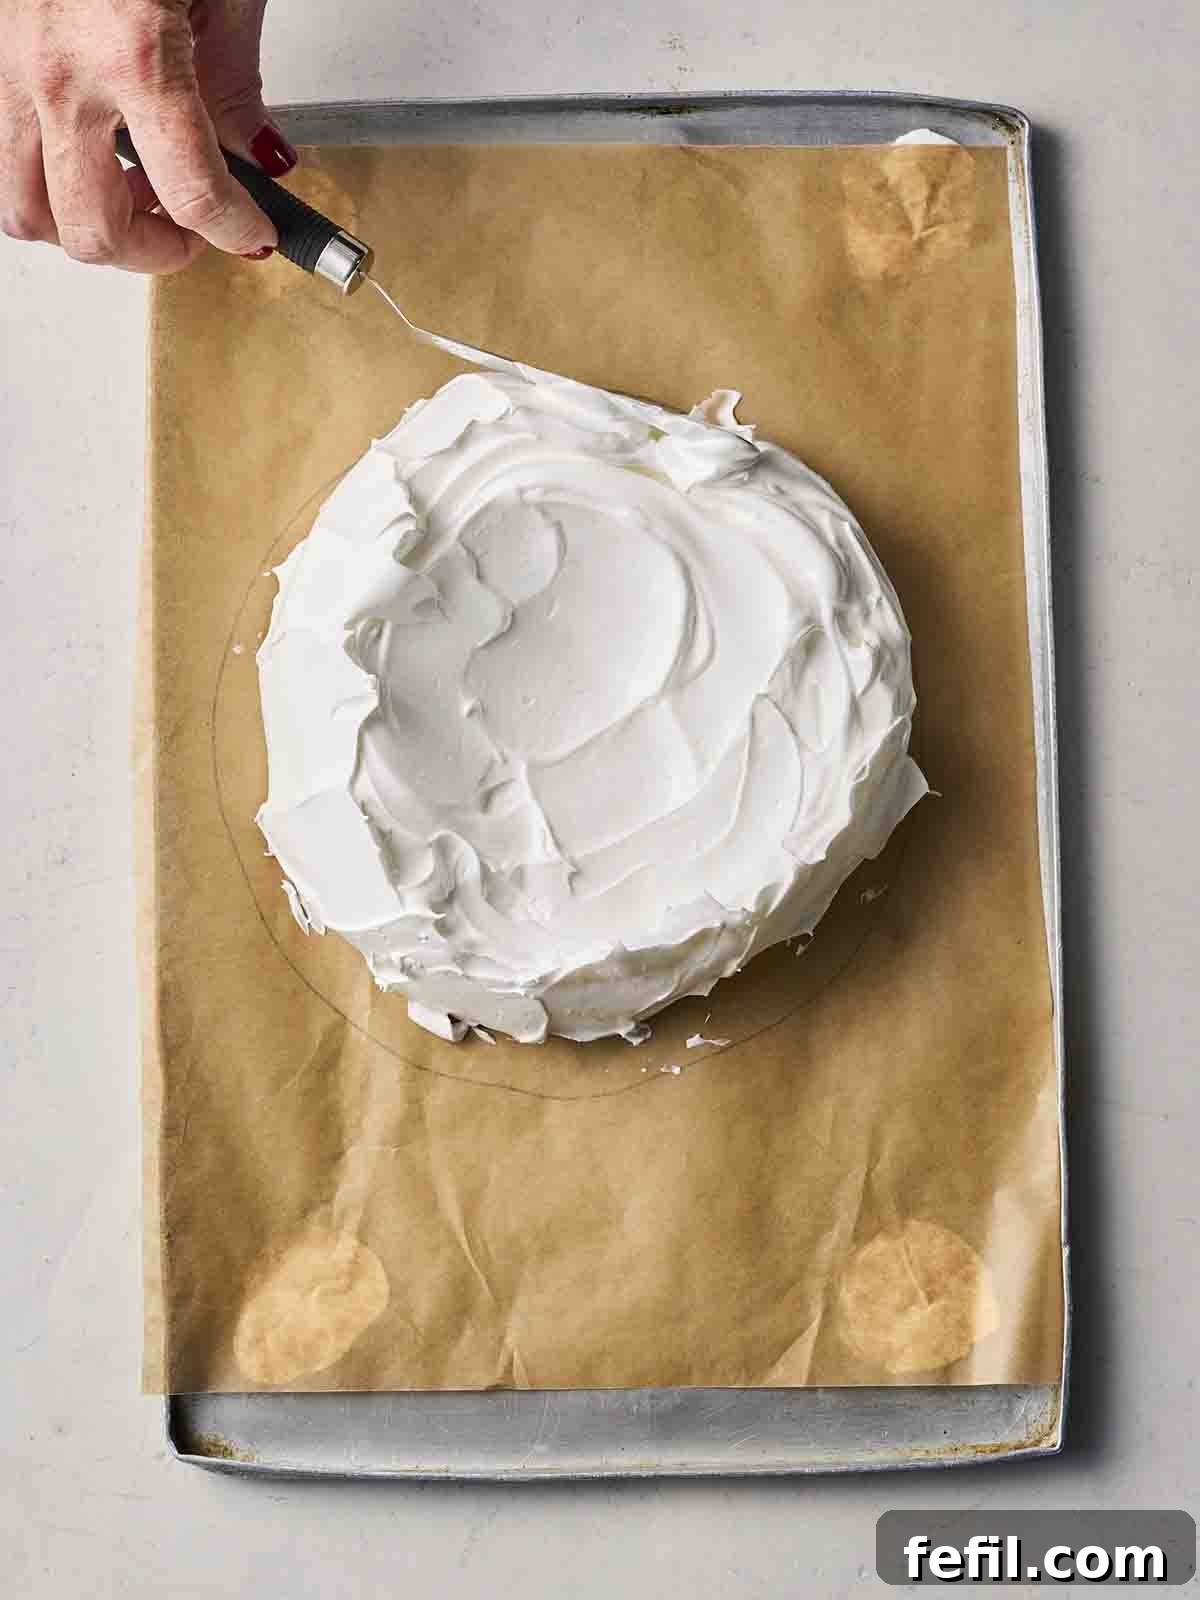
3. Refine and Bake: Using the back of your spoon or a palette knife, gently ‘pull’ the sides of the meringue up, creating appealing peaks and troughs around the edge. This not only adds visual appeal but also gives the meringue structural integrity. Carefully transfer the baking tray to the preheated oven. Bake for approximately 90 minutes. The meringue should appear dry and crisp to the touch. Once baked, turn off the oven but leave the meringue inside with the oven door slightly ajar. Allowing it to cool slowly within the oven helps prevent significant cracking and ensures a beautifully even texture throughout. Do not remove it until completely cool, ideally several hours or overnight.
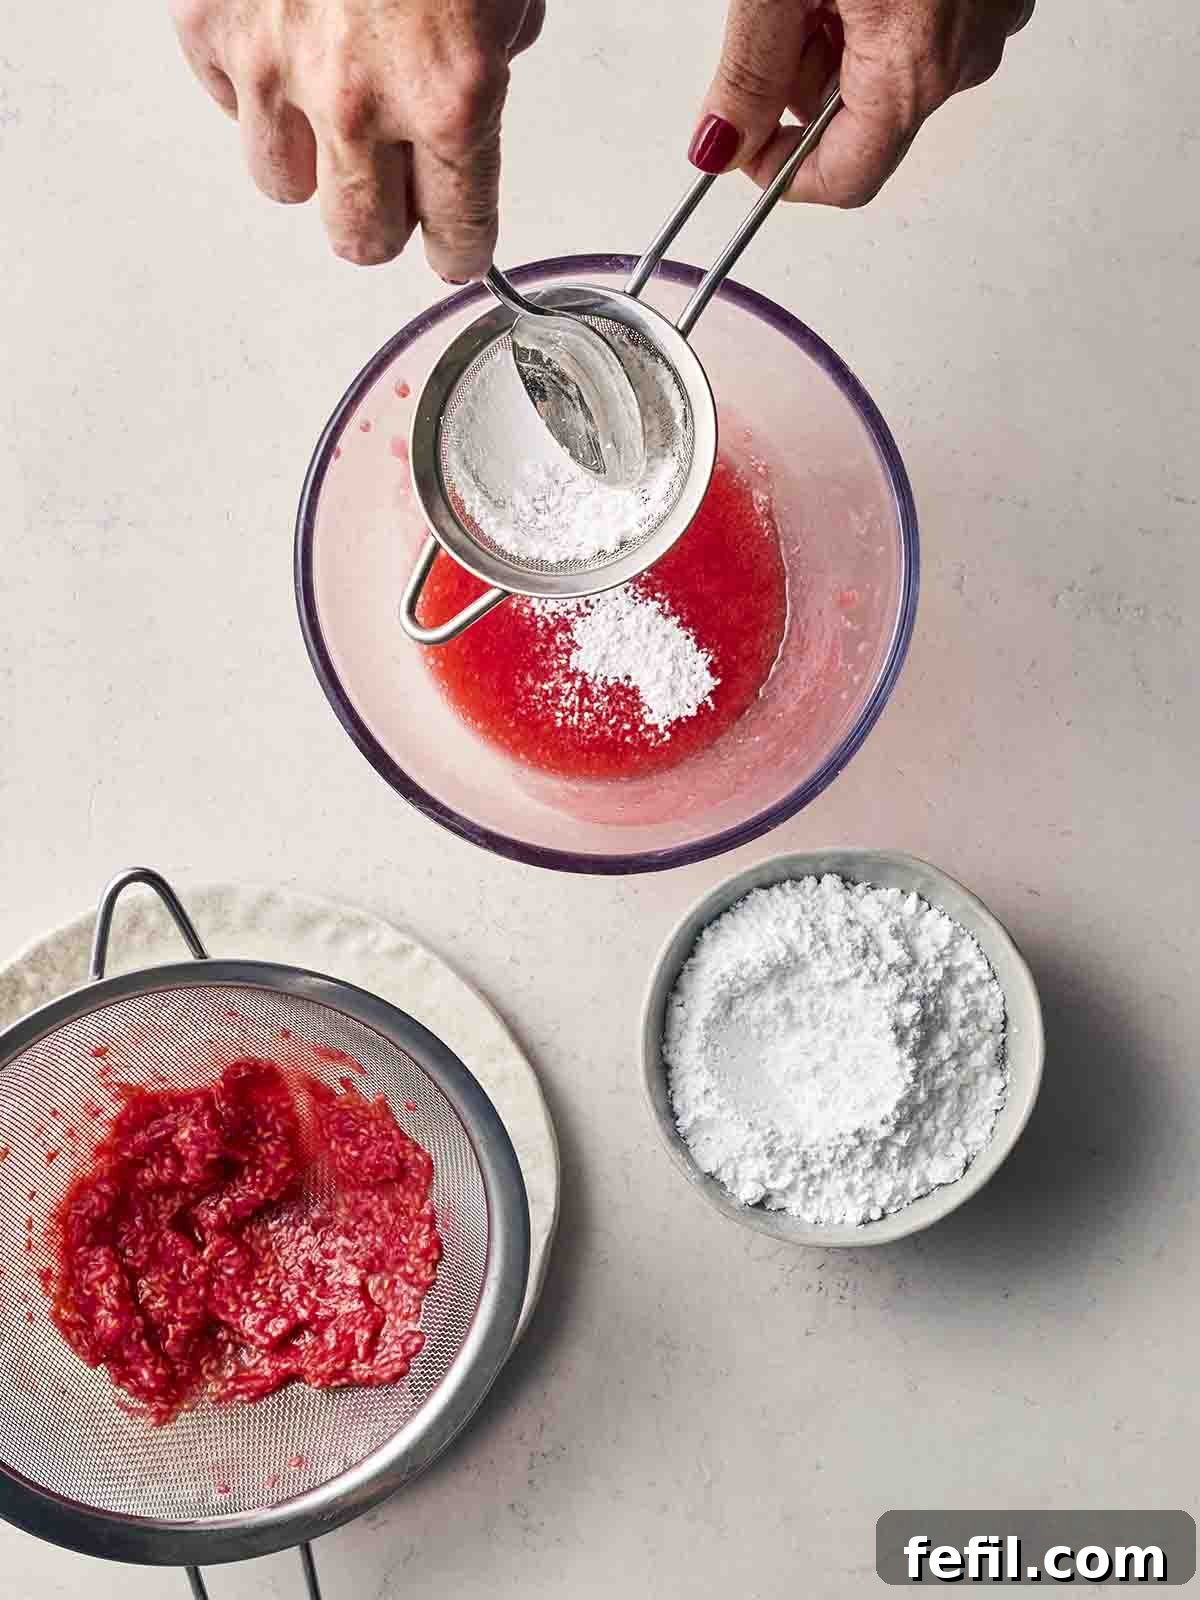
4. Prepare Toppings and Assemble: While your meringue is cooling, you can prepare the delightful accompaniments. For the raspberry sauce, gently mash the fresh raspberries, then press them through a fine-mesh sieve into a bowl to remove the seeds, leaving you with a smooth, vibrant coulis. Stir in the icing sugar until fully dissolved. For the cream topping, whisk the cold double cream in a clean bowl until it forms soft peaks. Add the vanilla extract and whisk briefly to combine. Once the meringue is completely cooled, carefully transfer it to your serving plate. Just before serving, generously spoon the vanilla cream onto the meringue, artfully arrange the mixed fresh berries, drizzle with the homemade raspberry sauce, and garnish with a few fresh mint leaves. Serve immediately and enjoy!
Pro Tip: The Secret to a Flawless Meringue
Our top secret for an exceptionally beautiful and delicious Pavlova is to always bake the meringue low and slow. This gentle baking method is key for several reasons: it helps maintain a brighter, pristine white color, minimizing any yellowing, and significantly reduces the risk of excessive cracking. More importantly, it ensures the inside remains gorgeously soft, chewy, and perfectly marshmallow-like – the hallmark of a truly great Pavlova!
Don’t despair if your meringue cracks a little during baking or cooling. Minor cracks are incredibly common and do not detract from the flavor or overall appeal. Remember, you’ll be generously piling on creamy toppings, fresh berries, and luscious sauce anyway, beautifully concealing any imperfections. It will still be every bit as delicious and impressive!
Storage & Assembling: Keeping Your Pavlova Fresh
The meringue base of your Pavlova must be baked immediately after you’ve finished whipping your egg whites. This ensures the meringue is stable and retains its volume before baking. However, once baked and fully cooled, the meringue base can be incredibly convenient for make-ahead preparations. Store it in a dry, airtight container – such as a large cake tin or a sturdy plastic storage box – at room temperature for up to a week. Avoid refrigeration, as this can make the meringue sticky and soft.
Always keep the cooled meringue in a dry, cool place away from direct sunlight or humidity. The key to a show-stopping Pavlova is to only prepare the sauce and toppings, and then assemble the entire dessert, just before serving. This prevents the meringue from becoming soggy and ensures the cream and fruits are at their freshest, offering the best possible texture and flavor experience.
Essential Pavlova Recipe Tips for Success
Perfectly Whipped Cream
For the fluffiest, most stable whipped cream topping, always use double cream (heavy cream) that is straight from the fridge. Cold cream whips up faster and achieves greater volume and stability, preventing it from collapsing too quickly on your Pavlova.
The Crucial Clean Bowl Rule
This cannot be stressed enough: you absolutely need a VERY clean, grease-free bowl when whisking your egg whites. Any trace of grease, oil, or even egg yolk will prevent the egg whites from foaming up properly, resulting in a flat or unstable meringue. Furthermore, ensure your egg whites reach strong, glossy stiff peaks before you start adding sugar. This foundational step is critical for a robust meringue structure.
Choosing the Right Baking Paper
It is extremely important to use non-stick baking paper or baking parchment for your meringue. Do NOT use greaseproof paper, as the baked meringue will most certainly stick to it, making it impossible to remove without damage. A good quality non-stick parchment will release the meringue effortlessly once cooled.
Explore More Easy Summer Dessert Recipes…
Desserts
Lemon Posset
Sweet Things
Banana Split
Cheesecakes
Strawberry Cheesecake {Easy No Bake Recipe}
Desserts
Banoffee Pie
Frequently Asked Questions About Pavlova
Yes, the cooked meringue base of your Pavlova can be frozen, extending its shelf life for up to a month. It’s important to note that a frozen meringue is quite fragile. To protect it, wrap it carefully in baking parchment and then place it into a sturdy airtight container or tin before freezing. When you’re ready to enjoy it, simply defrost the meringue at room temperature for approximately 2-3 hours. Once fully defrosted, it will be ready to be filled with your freshly whipped cream and fruit toppings.
Absolutely! Classic Pavlova, made from egg whites and sugar, is naturally gluten-free. However, as with any recipe, it’s always wise to double-check the labels of all your ingredients, especially any flavorings or toppings you might add, to ensure they don’t contain hidden gluten.
The delightful Pavlova is named after the legendary Russian ballerina, Anna Pavlova, who captivated audiences during her tours of Australia and New Zealand in the 1920s. Both countries passionately lay claim to inventing this iconic dessert, which remains incredibly popular in both nations. The debate over its exact origin still continues today, with culinary historians often pointing to fascinating historical roots in both places. (Whoever truly invented it, we extend our heartfelt thanks to Down Under for this magnificent creation!) For a deeper dive into the intriguing history and the surprising truth about Pavlova’s origins, you might find this illuminating article by the BBC particularly interesting.
We’d love to hear about your experience! Let us know how your Pavlova turned out and what you thought of this recipe. Please consider rating the recipe using the ⭐️ below.
Also, we’d LOVE to see your incredible cooking creations! If you’d like to share your homemade Pavlova with us, please feel free to tag us on Instagram (@tamingtwins).
Pin
Pavlova {Foolproof Recipe!}
Pavlova is the most impressive summer dessert. With a delicious, delicately crunchy, and gooey meringue, complemented by a creamy, fruity topping, this homemade delight is surprisingly easy when you know the right techniques. Follow our tried-and-tested method and simple tricks to perfect it, every time, ensuring a show-stopping dessert.
20 minutes
1 hour
1 hour 20 minutes
8 Servings
Ingredients
For the meringue:
- 4 Egg whites
- 250 g (1.25 cups) Caster sugar
For the topping:
- 300 ml (1.25 cups) Double cream (Or heavy cream)
- 1/2 tsp Vanilla extract
- 400 g (14 oz) Mixed fresh berries (Strawberries, raspberries, blueberries etc)
- Fresh mint to garnish
For sauce:
- 150 g (5 oz) Raspberries
- 2 tbsp Icing sugar
Instructions
- Preheat the oven to 110℃/230F (fan assisted), 160℃/320F (conventional) or Gas Mark 3.
- Draw a 22cm circle on a sheet of non-stick baking paper. Flip the paper over (so the egg mixture doesn’t touch the pencil marks) and sit it on a baking tray.
- Now, make the meringue. Whisk the egg whites in a very clean, grease-free bowl with a handheld electric whisk (or stand mixer fitted with the whisk attachment) until they form stiff peaks. Then, gradually add the caster sugar, a little at a time, whisking well in between each addition until the meringue is thick, glossy, and the sugar has dissolved.
- Use a tiny dot or two of the egg white mixture to ‘glue’ the paper to the baking tray. Then, spoon the rest of the meringue mix onto the template circle, pushing it out to the edges. Use the back of your spoon or a palette knife to gently ‘pull’ the sides of the meringue up, creating peaks.
- Bake in the oven for about 90 minutes, or until the meringue looks dry and crisp to the touch. Turn off the oven and leave the meringue to cool completely inside the oven with the door slightly open. (Cooling it slowly helps to avoid cracking and maintains its texture).
- Meanwhile, make the sauce. Mash the raspberries and then press them through a fine-mesh sieve into a bowl to remove the seeds. Stir in the icing sugar until smooth.
- For the topping, whisk the double cream in a bowl with the vanilla extract (if using) until it forms soft peaks.
- When ready to serve, carefully transfer the cooled meringue to your serving plate. Top generously with the vanilla cream, fresh fruit, raspberry sauce, and a few fresh mint leaves for garnish. Serve immediately.
Did you make this recipe? Click here to let us know how it went and give it a ⭐️ rating! Your feedback helps us to create more recipes you genuinely love.
Notes
Cream: The cream for the topping should be straight from the fridge; this will help it to whip up to a stable, voluminous consistency.
Making the meringue: We cannot emphasize this enough – you need a VERY clean, grease-free bowl, and ensure the egg whites reach stiff peaks before you start gradually adding sugar!
Baking paper: It’s absolutely essential to use non-stick baking paper or baking parchment. Do NOT use greaseproof paper, as the meringue will inevitably stick to it once baked.
Storing: You can store your meringue base after it has fully cooled in a dry, airtight container (such as a cake tin or plastic storage box) at room temperature for up to a week. Keep it in a cool, dry place until you’re ready to prepare the sauce and toppings, and assemble just before serving for the best results.
Nutrition
Carbohydrates: 37g
Protein: 3g
Fat: 14g
Saturated Fat: 9g
Polyunsaturated Fat: 1g
Monounsaturated Fat: 3g
Cholesterol: 43mg
Sodium: 36mg
Potassium: 90mg
Fiber: 1g
Sugar: 35g
Vitamin A: 561IU
Vitamin C: 5mg
Calcium: 31mg
Iron: 0.2mg
Nutrition information is automatically calculated and should only be used as an approximation. Nutritional values are per portion unless otherwise stated.
Additional Info
Dessert
Family Food
Enjoyed this recipe? Leave a comment and rating below!
Mention @myusername or tag #myhashtag!
This recipe was originally published on 2nd November 2018. It was updated on 27th August 2025 to improve the method and ingredients for our valued readers.