
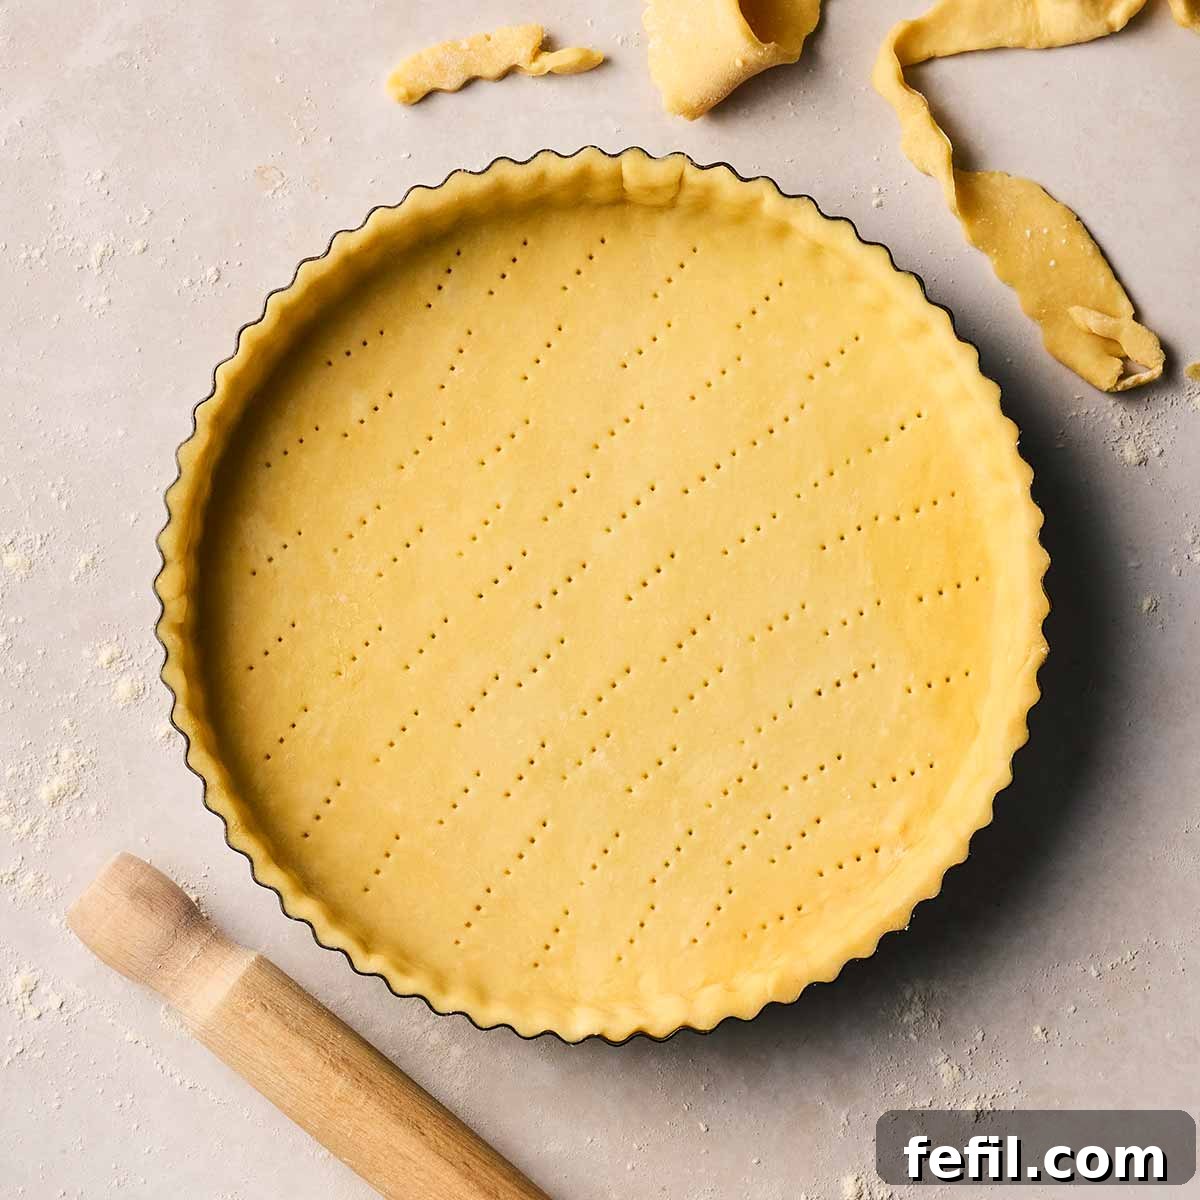
Mastering the Art of Homemade Shortcrust Pastry: Your Essential Guide to Flaky Pie Crusts
Unlock the secret to perfect homemade pies and tarts with this comprehensive guide to Shortcrust Pastry. Whether you’re a seasoned baker or taking your first steps into the world of pastry-making, our easy-to-follow instructions, expert tips, and detailed explanations will ensure you achieve a wonderfully flaky and tender pie crust, every single time. Say goodbye to store-bought and hello to superior flavor and texture!
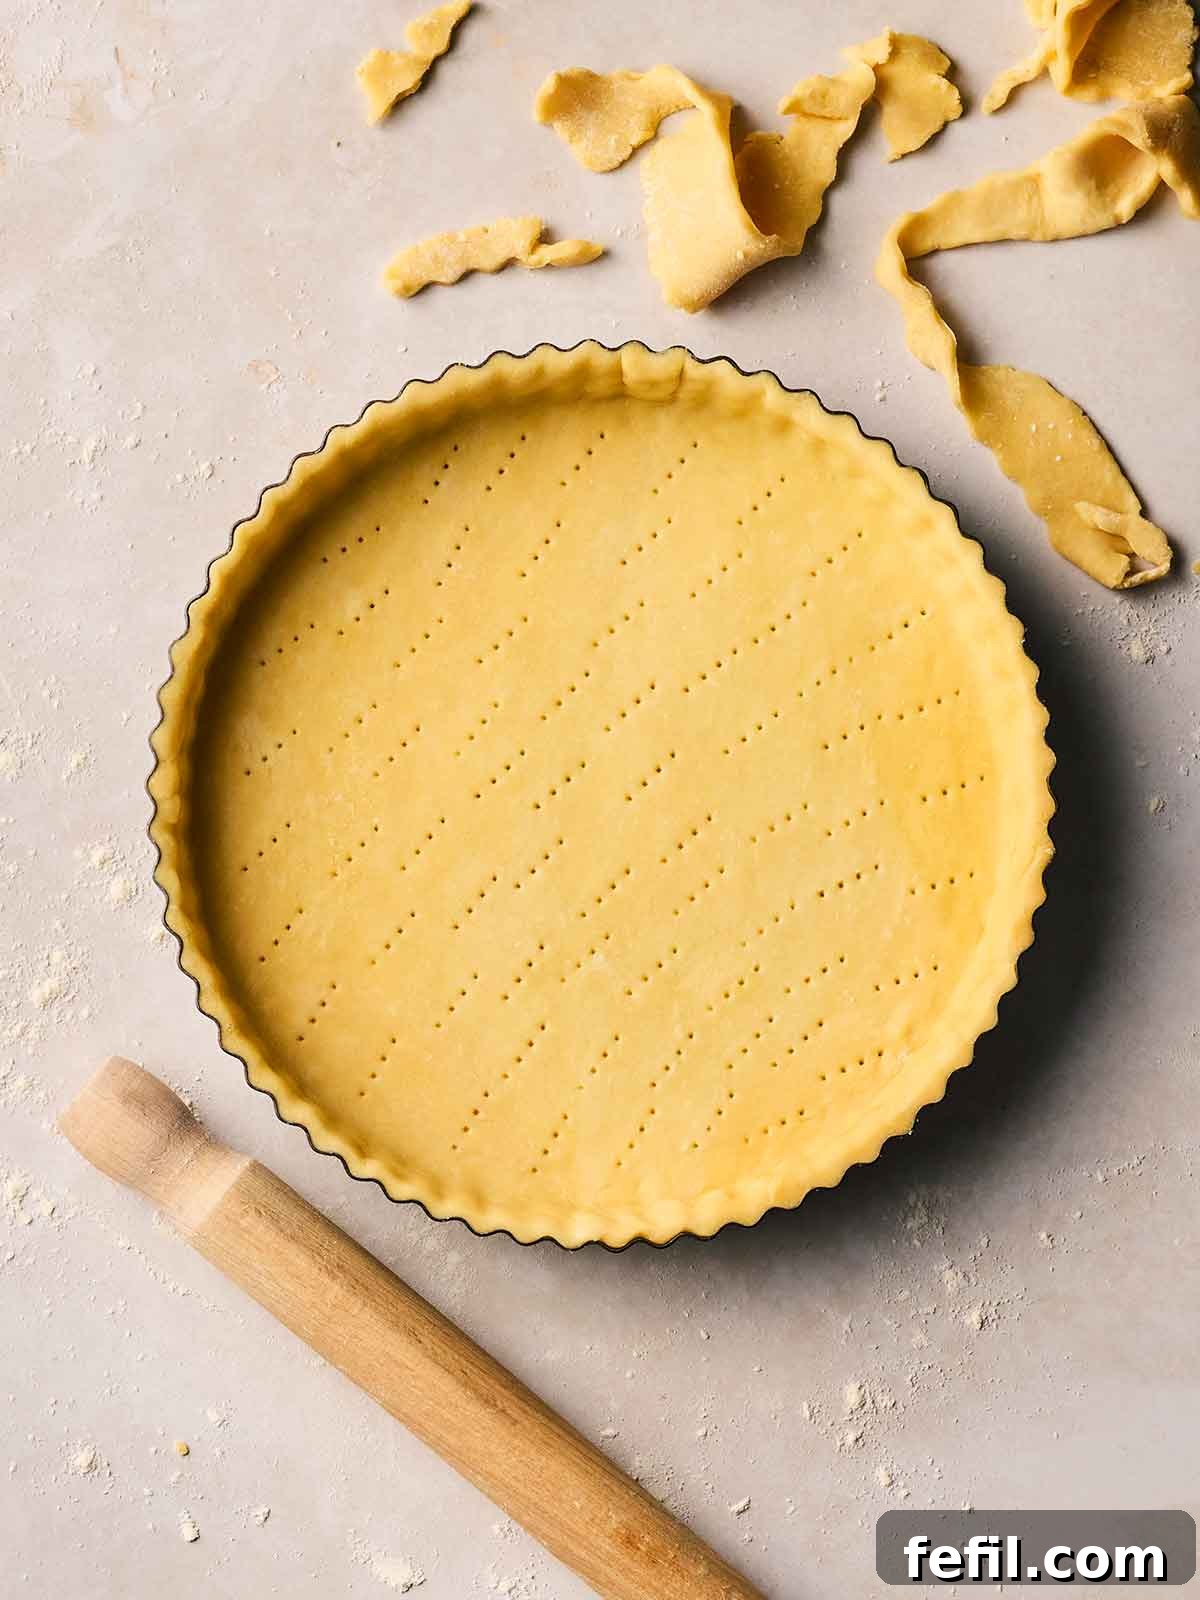
There’s an undeniable charm and superior taste to homemade Shortcrust Pastry (affectionately known as pie crust in the US) that elevates any sweet or savoury bake. While convenience often dictates a quick grab for store-bought puff pastry for midweek meals – a perfectly valid and sensible sanity-saving cheat – there are those moments when only the real deal will do.
This tried-and-tested method is designed to guide you through the process seamlessly, promising delightful results. One of my favorite time-saving hacks is to prepare a batch of pastry crusts by ‘blind baking’ them, then freezing these shells for future use. This means a delicious homemade base is always at the ready for recipes like Cherry Pie or when adding a rich crust to a Crustless Quiche.
Blind baking involves partially or fully baking the pastry shell before adding its filling. This crucial step guarantees a solid, crisp, and thoroughly cooked base, effectively preventing the dreaded ‘soggy bottom’ – especially vital for fillings that are liquid or wet, such as custards, fruit mixtures, or quiche fillings. Crafting homemade shortcrust pastry might seem daunting due to its perceived variables and multiple steps, but we’ve meticulously broken down each element into actionable tips and a clear guide to make it effortlessly achievable for you.
Why You’ll Adore This Easy Shortcrust Pastry Recipe
- ⭐️ Versatile Foundation: A simple, adaptable dough that works beautifully for both sweet and savoury culinary creations.
- ⭐️ Effortless Meal Prep: Perfectly suited for making ahead, allowing you to save precious time when you need it most.
- ⭐️ Impressive Homemade Touch: Consistently delivers delicious, impressive homemade crusts that will wow your family and friends.
- ⭐️ Foolproof Method: Designed with beginners in mind, ensuring success with clear, concise steps.
- ⭐️ Superior Taste & Texture: Achieves that desirable flaky, buttery texture and rich flavor that only homemade pastry can offer.
Expert Tips for Shortcrust Pastry Success
The Right Tools for the Job
Having the correct equipment can significantly streamline your pastry-making process:
- ✅ A 23cm fluted flan dish is ideal for creating classic round pies and quiches, providing both structure and an attractive finish.
- ✅ Baking beans (also known as pie weights) are indispensable for blind baking. They prevent the dough from rising or puffing up unevenly during the initial bake. If you don’t own baking beans, dry rice, lentils, or even ceramic beads make excellent substitutes, as demonstrated in many video guides.
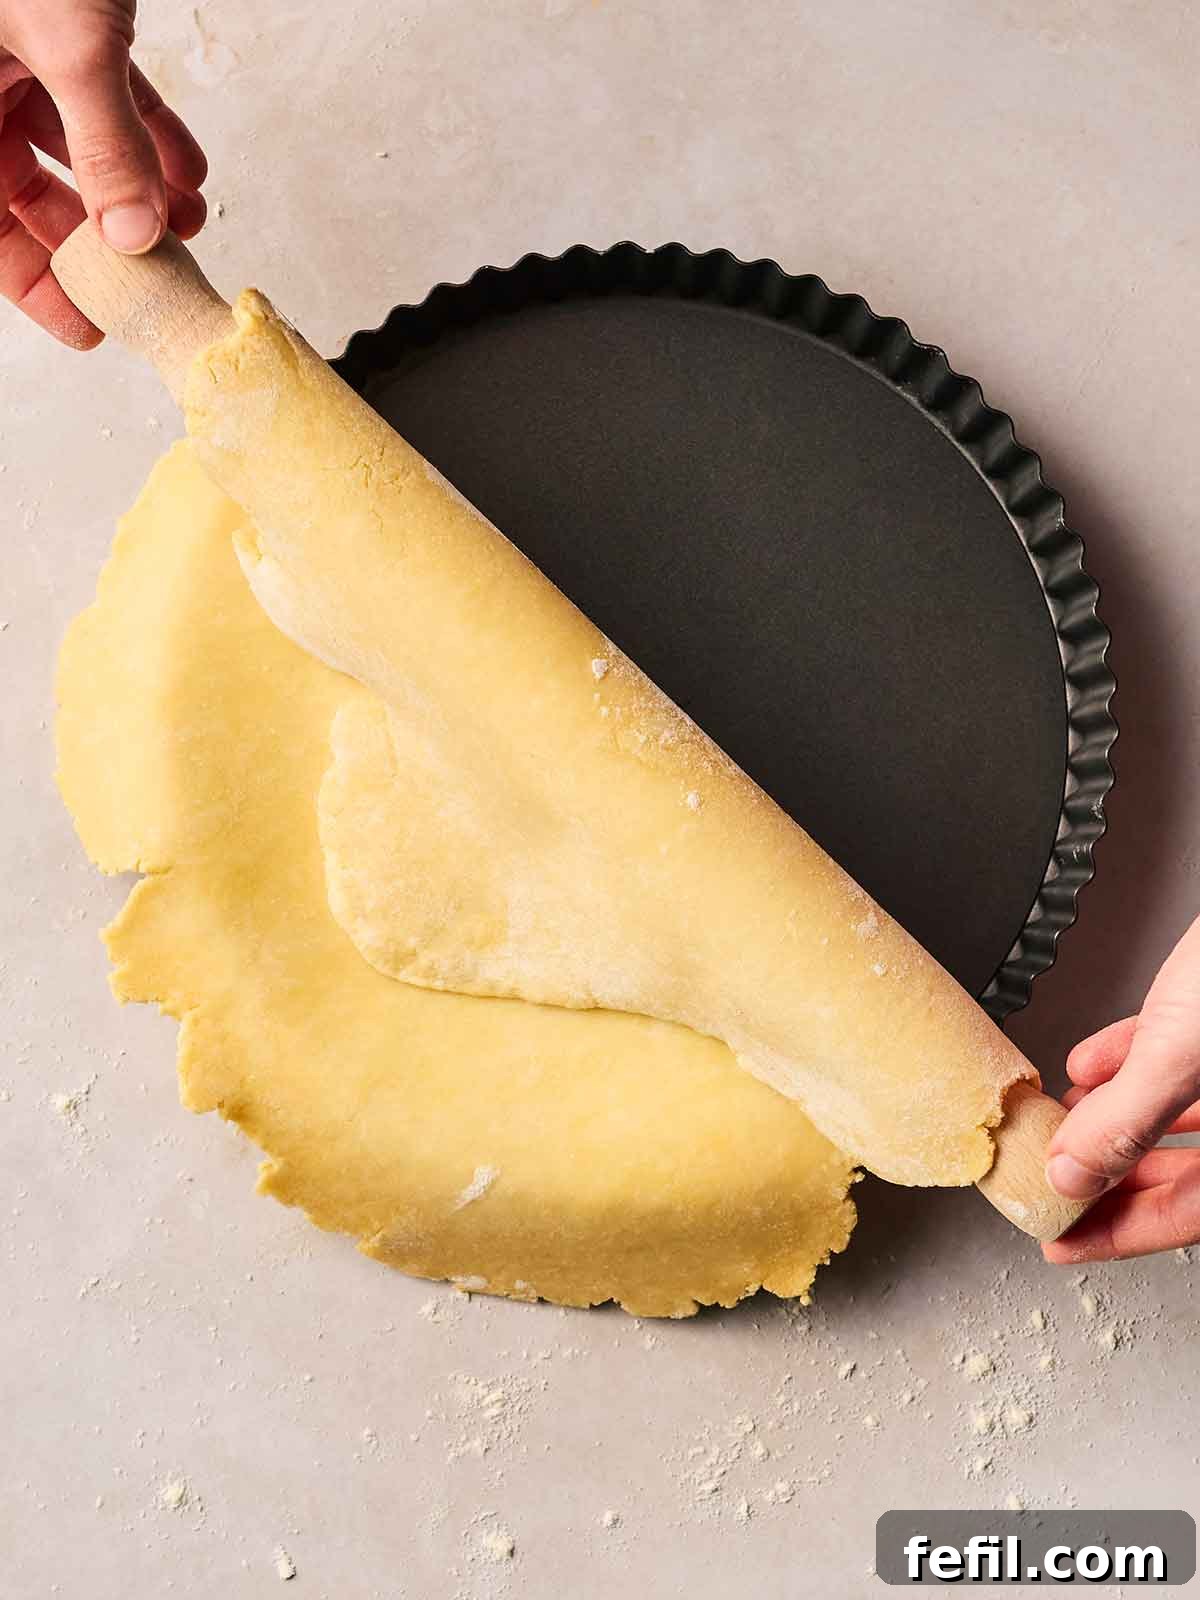
- ✅ A sturdy, weighty rolling pin is your best friend for achieving an evenly thick pie crust, aiming for approximately 3mm for optimal results.
- ✅ Always line your pastry with a sheet of parchment or baking paper before adding your weights. This prevents the weights from sticking to the pastry and makes for easy removal.
The Crucial Role of Chilling
While the active prep time for this pastry is around 15 minutes and the bake time about 30 minutes, patience is a key ingredient. The dough requires two distinct chilling periods:
- Firstly, for at least one hour after you’ve initially formed the dough.
- Secondly, for another 30 minutes once it has been rolled out and carefully placed into your dish.
This double chilling process is paramount. It allows the gluten in the flour to relax, which is essential for preventing the pastry from shrinking during baking and developing a tough texture. Additionally, chilling ensures the butter firms up again, contributing to that desirable flaky consistency. Which brings us to our next point…
Cold is Your Best Friend!
My grandma used to say I had “good hands for making pastry” because they were often cold. And she was right! The golden rule for exceptional pastry is to keep every element as cold as possible – this includes the butter, the water, your hands, and even the room temperature if you can manage it. Cold ingredients delay the melting of butter and inhibit gluten development, resulting in a tender, flaky crust that’s easier to handle.
Tailoring for Sweet Shortcrust Pastry
If your culinary vision leans towards a dessert, transforming this base into a sweet shortcrust pastry is incredibly simple. Just sift in 4 teaspoons of icing sugar (confectioners’ sugar) alongside the flour and salt during the very first stage of the recipe.
Cool Completely Before Using
It’s vital to allow your blind-baked pastry shells to cool down completely before you introduce any filling or proceed with further baking. Rushing this step can lead to a pastry that is soggy, greasy, and prone to breaking easily. This is precisely why preparing and cooling pastry shells in advance is a fantastic strategy.
Quick Note: For recipes with very long baking times, such as a traditional Apple Pie with a top crust, you might want to skip the blind baking altogether or reduce the second blind bake stage significantly to prevent the pastry from becoming overdone.
Embrace Quality Ingredients
When a recipe features only a handful of ingredients, the quality of each one becomes profoundly impactful. For shortcrust pastry, opting for the best quality butter you can afford makes a noticeable difference in flavor and texture. Using proper butter, rather than margarine, is crucial, as margarine’s softer consistency can compromise the pastry’s structure and flakiness.
Shortcrust Pastry Ingredients
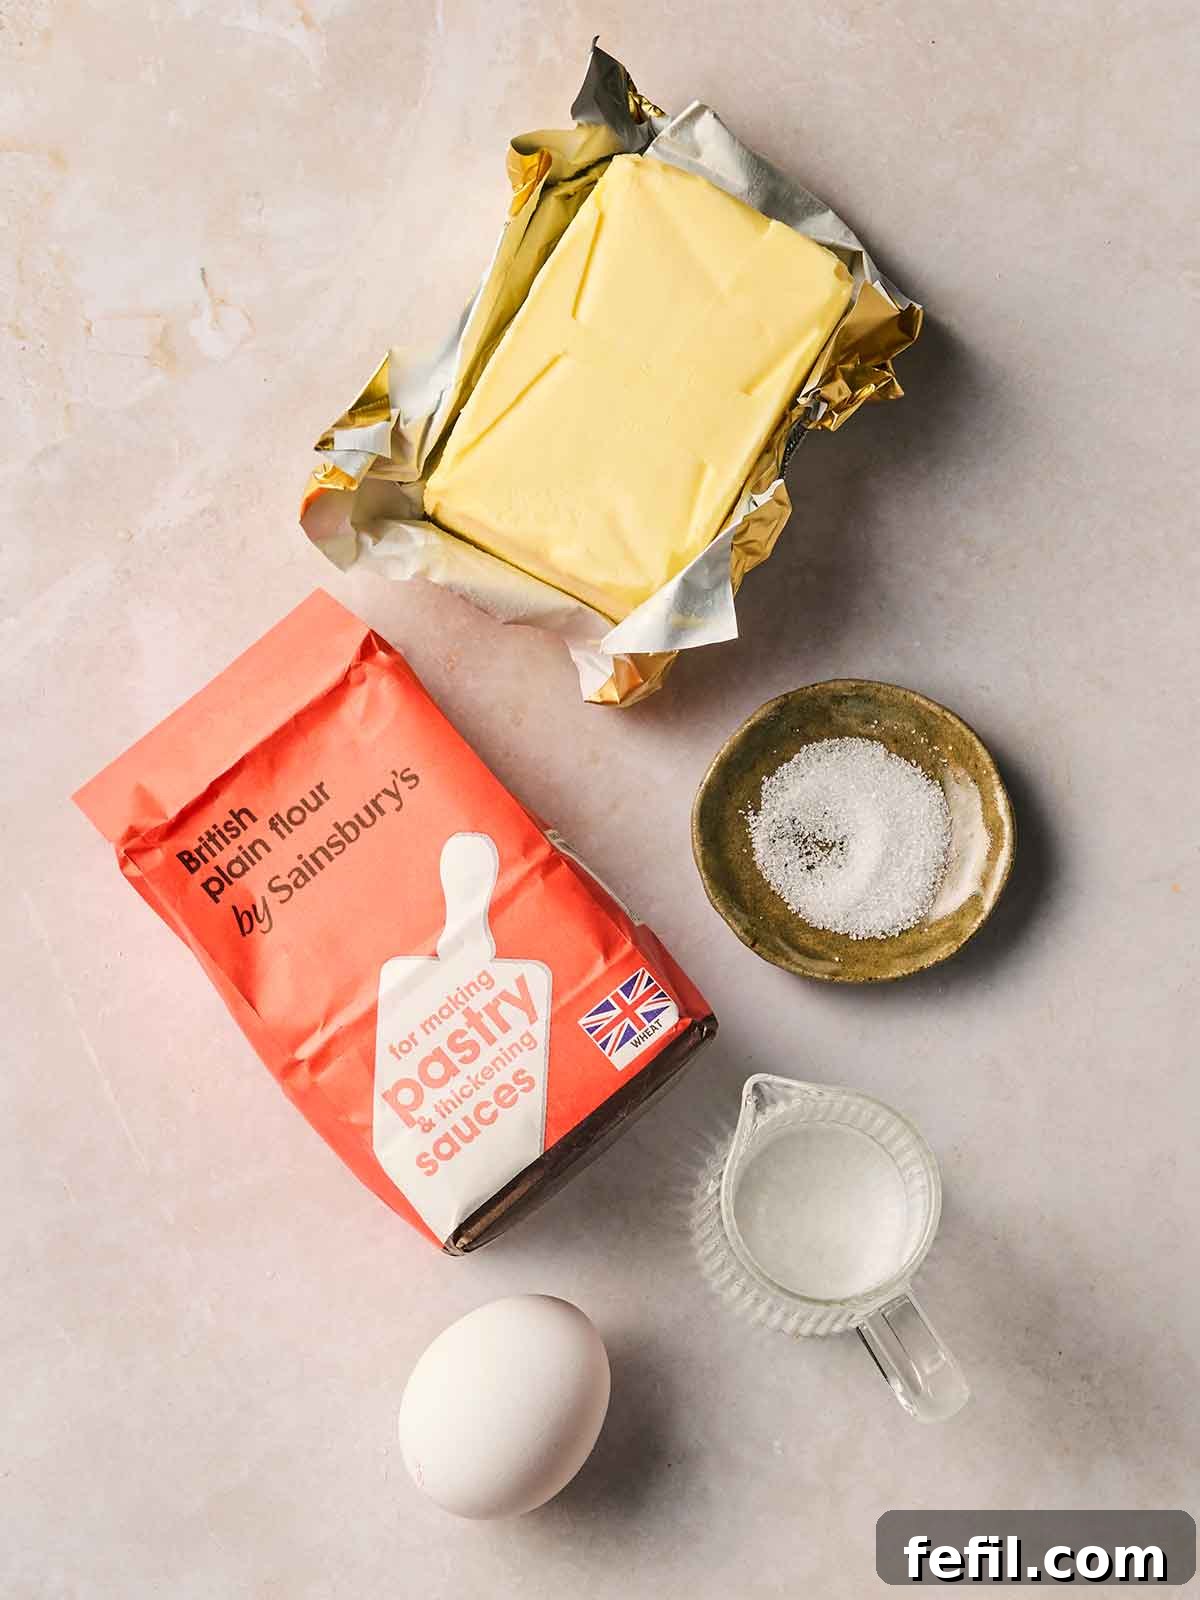
- Plain Flour: Also known as all-purpose flour in the US. This forms the structure of your pastry.
- COLD Unsalted Butter: Essential for flavour and creating flaky layers. Ensure it’s very cold and sliced into 1-centimeter cubes before adding to the bowl.
- Fine Salt: A small pinch enhances the overall flavour of the pastry, whether sweet or savoury.
- Egg: One medium egg to help bind the dough and add a touch of richness. You’ll need another egg, beaten, for the egg wash.
- COLD Water: Start with 1 tablespoon and add up to 2 tablespoons as needed, just enough to bring the dough together without making it sticky. The colder, the better!
- For Sweet Shortcrust: Add 4 teaspoons of icing sugar (confectioners’ sugar) along with the flour and salt.
- For the Tart Case: Extra plain flour for dusting your work surface and a beaten egg for the egg wash.
How to Make Shortcrust Pastry: A Step-by-Step Guide
Step 1: Begin by sifting the plain flour into a spacious bowl. Incorporate the fine salt (and icing sugar if you’re making a sweet pastry). Add the cubed cold butter to the flour mixture. Using your fingertips, gently rub the butter into the flour until the mixture resembles fine breadcrumbs or ground almonds. Be quick and light-handed to prevent the butter from melting.
Step 2: In a separate small bowl, lightly beat one egg. Add the beaten egg to the flour and butter mixture, stirring with a fork until just combined. Gradually add 1 tablespoon of cold water, continuing to mix with the fork. Only add more water, a teaspoon at a time, if the dough is too dry to come together. The goal is a dough that just holds when pinched. Once it forms a cohesive mass, turn it out onto a lightly floured surface and gently bring it together with your hands, shaping it into a flattened disk. Wrap the disk tightly in cling film and refrigerate for at least 1 hour.
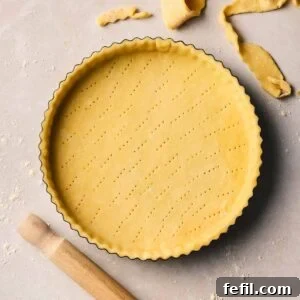
Step 3: After chilling, remove the pastry from the fridge and let it sit for about 10 minutes to soften slightly, making it easier to roll. Lightly flour your work surface and rolling pin. Roll the pastry out evenly into a large circle, approximately 3mm thick, ensuring it’s large enough to comfortably fit your 23cm fluted flan dish with some overhang. Carefully lift the rolled pastry and drape it over your tart dish. Gently press the pastry into the sides and base of the pan using your fingertips, taking care not to stretch it. Use your rolling pin to roll over the top edge of the dish, trimming away any excess pastry. Prick the base of the pastry all over with a fork (this is called “docking” and prevents air bubbles) and refrigerate again for at least 30 minutes.
Step 4: Preheat your oven to 180°C fan/200°C/400°F/Gas Mark 6. Line the chilled tart case with a crumpled piece of parchment paper, then fill it with baking beans or dry rice, distributing the weight evenly. This is your first blind bake. Bake for 12-15 minutes, or until the edges of the pastry are lightly golden. Carefully remove the parchment paper and baking beans. Return the tart case to the oven for a second bake, another 10-15 minutes, until it’s golden all over. For a final seal and extra crispness, gently brush the inside of the tart case with a beaten egg and bake for just 2 more minutes. This creates a protective layer, preventing leaks from wet fillings. Once baked, transfer the tart case to a cooling rack and let it cool completely before filling.
Storing Your Homemade Shortcrust Pastry
Proper storage ensures your hard work doesn’t go to waste and keeps your pastry fresh and ready for use:
- Baked Pastry Case: Once fully cooled, store your baked pastry shell in an airtight container at room temperature. It will remain crisp for 2-3 days.
- Freezing Unbaked Shell: You can freeze an unbaked pastry shell directly in its flan dish. Once completely frozen solid, carefully remove it from the dish and wrap it tightly in cling film, then foil, to protect it from freezer burn. When you’re ready to use it, you can bake it from frozen, adding a few extra minutes to the initial blind baking time specified in the recipe.
- Freezing Unrolled Pastry Dough: For ultimate convenience and space-saving, wrap the unrolled pastry dough disk tightly in cling film and freeze. Ensure it is fully defrosted in the refrigerator overnight before attempting to roll it out.
Adjusting Baking Times for Different Fillings
The duration of your blind bake needs to be considered in conjunction with your chosen filling’s baking time:
- If your tart case will be used for a dish that requires baking for 30 minutes or more with its filling (e.g., a deep-dish quiche), reduce the second blind bake time (without weights) to just 5-10 minutes. This prevents the base from becoming overcooked or too brittle.
- Alternatively, for very long-bake recipes, you might opt to not blind bake it at all, allowing the pastry to cook entirely with the filling.
Great Recipes to Use Your Homemade Shortcrust Pastry For…
Family Dinner Ideas
Hearty Steak Pie (Adapt with Shortcrust!)
Desserts
Irresistible Banoffee Pie
Comfort Food
Creamy Chicken & Bacon Pie (Perfect with Shortcrust!)
Desserts
Classic Apple and Blackberry Crumble (Serve with a Pastry Top!)
Frequently Asked Questions About Shortcrust Pastry
Can I use a different kind of flour?
Plain flour (all-purpose flour) is specifically recommended and has been used to test this recipe, offering the best results for a tender, flaky crust. While you could experiment with plain wholemeal flour for a nuttier flavor, it may alter the texture slightly and require minor adjustments to the water content.
How long does it take to blind bake shortcrust pastry?
The total blind baking process, including both stages (with and without weights), typically takes between 20 to 30 minutes in a preheated oven. However, oven temperatures can vary, so always keep an eye on your pastry and adjust baking times as needed until it’s golden brown and fully cooked. Remember, if your tart will be filled and baked for 30 minutes or more, reduce the second blind bake time to 5-10 minutes.
Help! My base is a little soggy. What went wrong?
A soggy bottom is usually a sign that the pastry wasn’t fully cooked during the blind baking stage, or the filling was too wet and seeped in. To salvage it, carefully remove any filling, place the pastry shell back in the oven without weights, and bake for a little longer until the base is crisp and dry. Using an egg wash as a sealant (as detailed in Step 4) is highly recommended to prevent this issue.
Why did my pastry shrink in the oven?
Shrinking pastry is a common issue often caused by overworking the dough, which develops the gluten too much. Insufficient chilling time is another culprit, as the butter needs to firm up and the gluten needs to relax before baking. Ensure you don’t stretch the pastry when lining the dish, as this also contributes to shrinkage.
My dough feels tough after baking. What can I do next time?
Tough pastry is almost always a result of overworking the dough. Excessive kneading or handling develops too much gluten, leading to a chewy, rather than flaky, texture. Always handle the dough gently and work quickly. Ensuring your butter is very cold and not over-hydrating the dough with too much water also helps.
We hope you enjoyed this guide to creating flawless Shortcrust Pastry! We’d love to hear how you got on with the recipe and your thoughts. Please take a moment to rate the recipe using the stars below and share your feedback. Your insights help us create more recipes you’ll truly love.
Also, we would LOVE to see your culinary creations! If you’d like to share your homemade pastry masterpieces with us, you can tag me on Instagram (@tamingtwins).
Classic Shortcrust Pastry (Pie Crust)
Sarah Rossi
This Shortcrust Pastry recipe guides you through the basics, step-by-step, making it easy for anyone to create. The reward is delicious, homemade pie crusts perfect for a wide variety of sweet and savoury dishes.
15 minutes
30 minutes
1 hour 30 minutes
2 hours 15 minutes
1 x 23cm tart tin
Ingredients
- 200 g (1.5 cups) Plain flour
- 100 g (3.5 oz) Cold unsalted butter, cut into 1cm cubes
- Pinch of fine salt
- 1 Egg, beaten (for the dough)
- 1-2 tbsp Cold water (start with 1 tbsp)
For Sweet Shortcrust:
- 4 tsp Icing sugar (confectioners’ sugar)
For the Tart Case (Blind Baking):
- 2 tbsp Plain flour, for dusting
- 1 Egg, beaten (for egg wash)
Instructions
Making the Pastry Dough:
- Dry Ingredients In: Sift the plain flour into a large bowl. Add the salt, and if making sweet pastry, also sift in the icing sugar. Stir to combine.
- Rubbing-In Method: Add the cubed cold butter to the flour mixture. Using only your fingertips, rub the butter into the flour until the mixture resembles fine breadcrumbs or ground almonds. Work quickly and lightly to keep the butter as cold as possible.
- Wet Ingredients In: Add the beaten egg to the mixture. Use a fork to stir it in until just combined.
- Add 1 tablespoon of cold water and continue mixing with the fork. Bring everything together to form a dough, only adding more water (a teaspoon at a time) if needed, until the pastry just holds together when you pinch it between your thumb and finger. Avoid overworking the dough.
- Shape & Chill: Tip the dough onto a lightly floured worktop and gently bring it together with your hands, shaping it into a flattened disk. Wrap the disk tightly in cling film and refrigerate for at least 1 hour. This resting period is crucial for the gluten to relax and the butter to firm up.
To Make and Blind Bake a 23cm Tart Case:
- Out of the Fridge: Remove the pastry dough from the fridge and let it sit at room temperature for about 10 minutes to make it more pliable for rolling.
- Roll With It: Lightly flour your worktop and rolling pin. Roll the pastry out evenly to a large circular shape, approximately 3mm (⅛ inch) thick, ensuring it’s large enough to cover your tart dish.
- Into the Dish: Carefully lift the rolled pastry and drape it over your 23cm fluted tart dish. Gently press the pastry into the sides and base of the pan, using your hands. Take care not to stretch the pastry during this process, as stretching can cause it to shrink when baked. Use your rolling pin to roll off the excess pastry from the top edge of your tart case.
- Docking & Chill Again: Use a fork to prick the base of the tart case all over. This “docking” prevents the pastry from puffing up unevenly. Place the prepared tart case back in the fridge for at least 30 minutes for a second chill. This step helps prevent shrinkage.
- Preheat the Oven: Preheat your oven to 180°C fan / 200°C / 400°F / Gas Mark 6.
- Weigh It Down: Line the chilled tart case with a crumpled piece of baking paper (parchment paper), then fill it generously with baking beans or dry rice.
- First Bake: Place the tart case in the preheated oven and bake for 12-15 minutes, or until the edges of the pastry begin to turn a light golden color.
- Second Bake: Carefully remove the parchment paper and baking beans from the tart case. Return the pastry shell to the oven and bake for another 10-15 minutes, or until it is golden all over and looks dry. (If your tart filling requires a long baking time (30 minutes or more), reduce this second blind bake to just 5-10 minutes, or omit it if the filling is very long-cooking, e.g., 60+ minutes.)
- Third Bake (Egg Wash Seal): For an extra crisp and sealed base, gently brush the beaten egg (from the ‘For the Tart Case’ ingredients) all over the inside surface of the warm tart case. Place it back in the oven for just 2 minutes. This creates a protective layer, preventing any liquid fillings from making the base soggy.
- Cool It: Carefully remove the tart case from the oven and transfer it to a wire cooling rack. Allow it to cool down completely before filling and proceeding with your recipe. Cooling is vital for structural integrity.
Did you make this recipe? We’d love to know how it went! Share your experience and give it a ⭐️ rating below. Your feedback helps us continue to create the recipes you truly desire.
Notes
- Nutrition: The nutritional information provided is for the entire tart dish/pastry base only. Actual portion values will depend heavily on the type and quantity of filling you choose.
- Tools for the Job: A 23cm fluted flan dish, baking beans or pie weights (dried rice or lentils work too), a sturdy rolling pin, and parchment/baking paper are highly recommended.
- Chill the Dough: Remember the two crucial chilling stages: 1 hour after forming the dough disk, and another 30 minutes after rolling it into the dish. This prevents shrinkage and ensures flakiness.
- Cold is Good: The most important rule for shortcrust pastry is to keep everything cold – your butter, water, hands, and even the workspace. Cold ingredients prevent the butter from melting too quickly and the gluten from developing excessively, leading to a tender, flaky result.
- Cool Completely Before Using: Always allow your blind-baked pastry shells to cool down entirely before adding any filling. This prevents a soggy, greasy, or easily broken crust.
- Good Ingredients: For a recipe with only a few components, using the best quality ingredients you can find makes a significant difference. Proper butter is essential; margarine is too soft for ideal shortcrust pastry.
- Storing: Baked pastry cases can be stored in an airtight container at room temperature. Unbaked shells can be frozen in their dish, then wrapped and stored. Unrolled dough disks can also be frozen, provided they are fully defrosted before use. See the “Storing” section above for detailed instructions.
- Baking Time Adjustments: If your chosen filling requires 30 minutes or more of baking, reduce the second blind bake (without weights) to 5-10 minutes, or consider omitting blind baking entirely for very long-cooking fillings.
Nutrition
Nutrition information is automatically calculated and should only be used as an approximation. Nutritional values are per tart case unless otherwise stated.
Additional Info
Enjoyed this recipe? Leave a comment and rating below!
Mention @tamingtwins or tag #shortcrustpastry!