
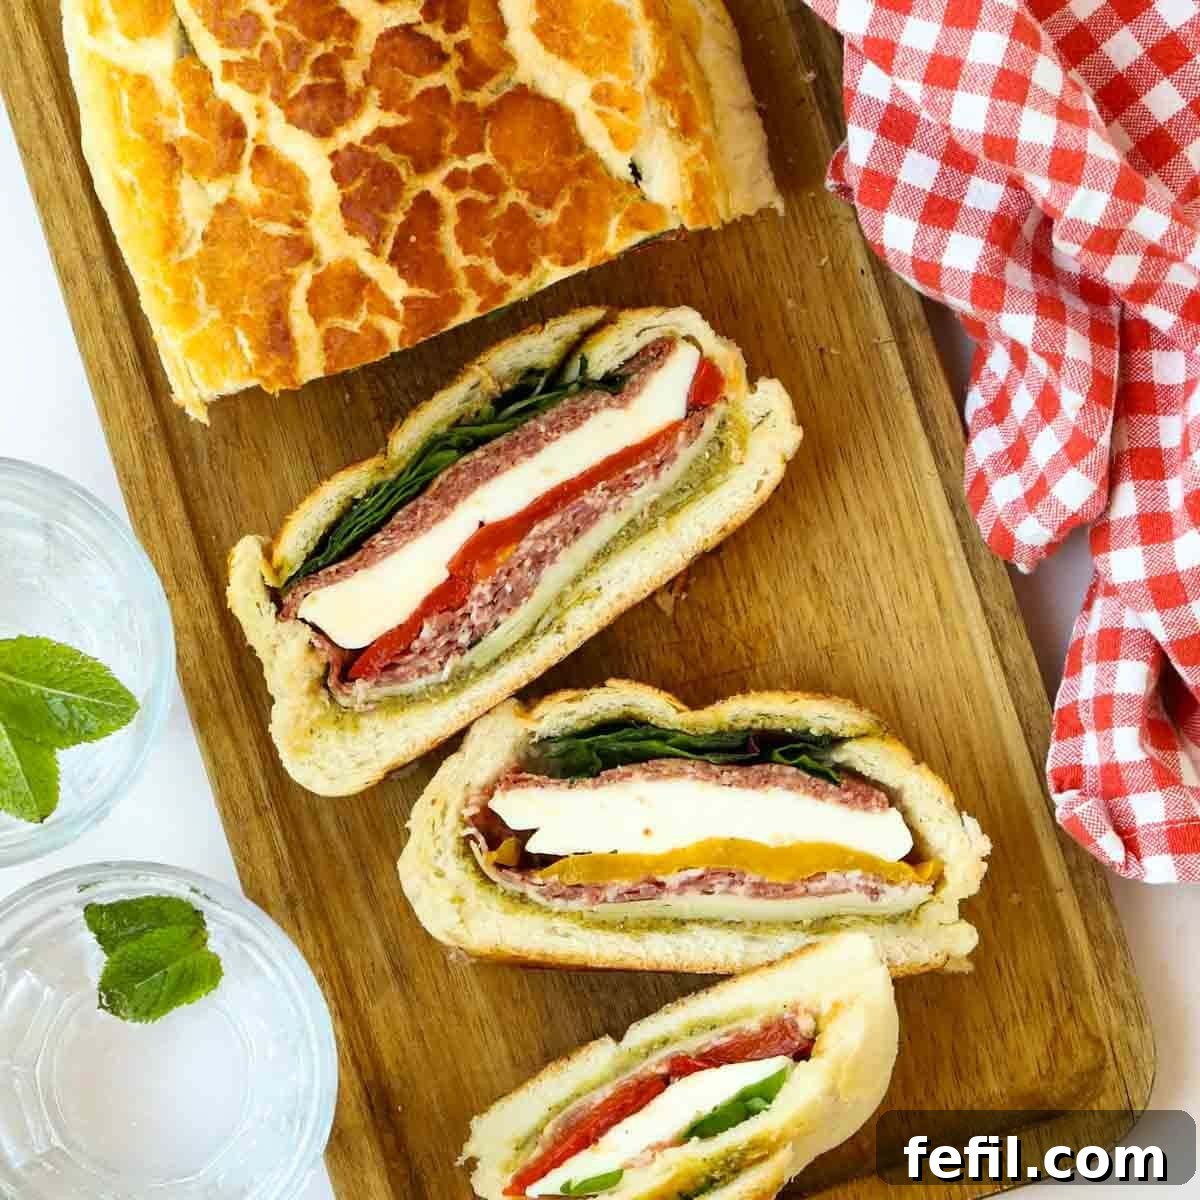
Craft the Ultimate Stuffed Bread Sandwich: The Mouthwatering Muffaletta Picnic Loaf
Prepare to elevate your sandwich game with a **Muffaletta**, also affectionately known as a Stuffed Picnic Loaf. More than just a sandwich, it’s an experience – a delightful medley of deli classics generously packed into a crusty loaf of your favorite bread. This recipe promises not only an impressive visual feast but also incredible flavor with minimal effort. Forget pre-cooking; this easy, no-fuss creation delivers a real ‘wow’ factor that’s perfect for any occasion.
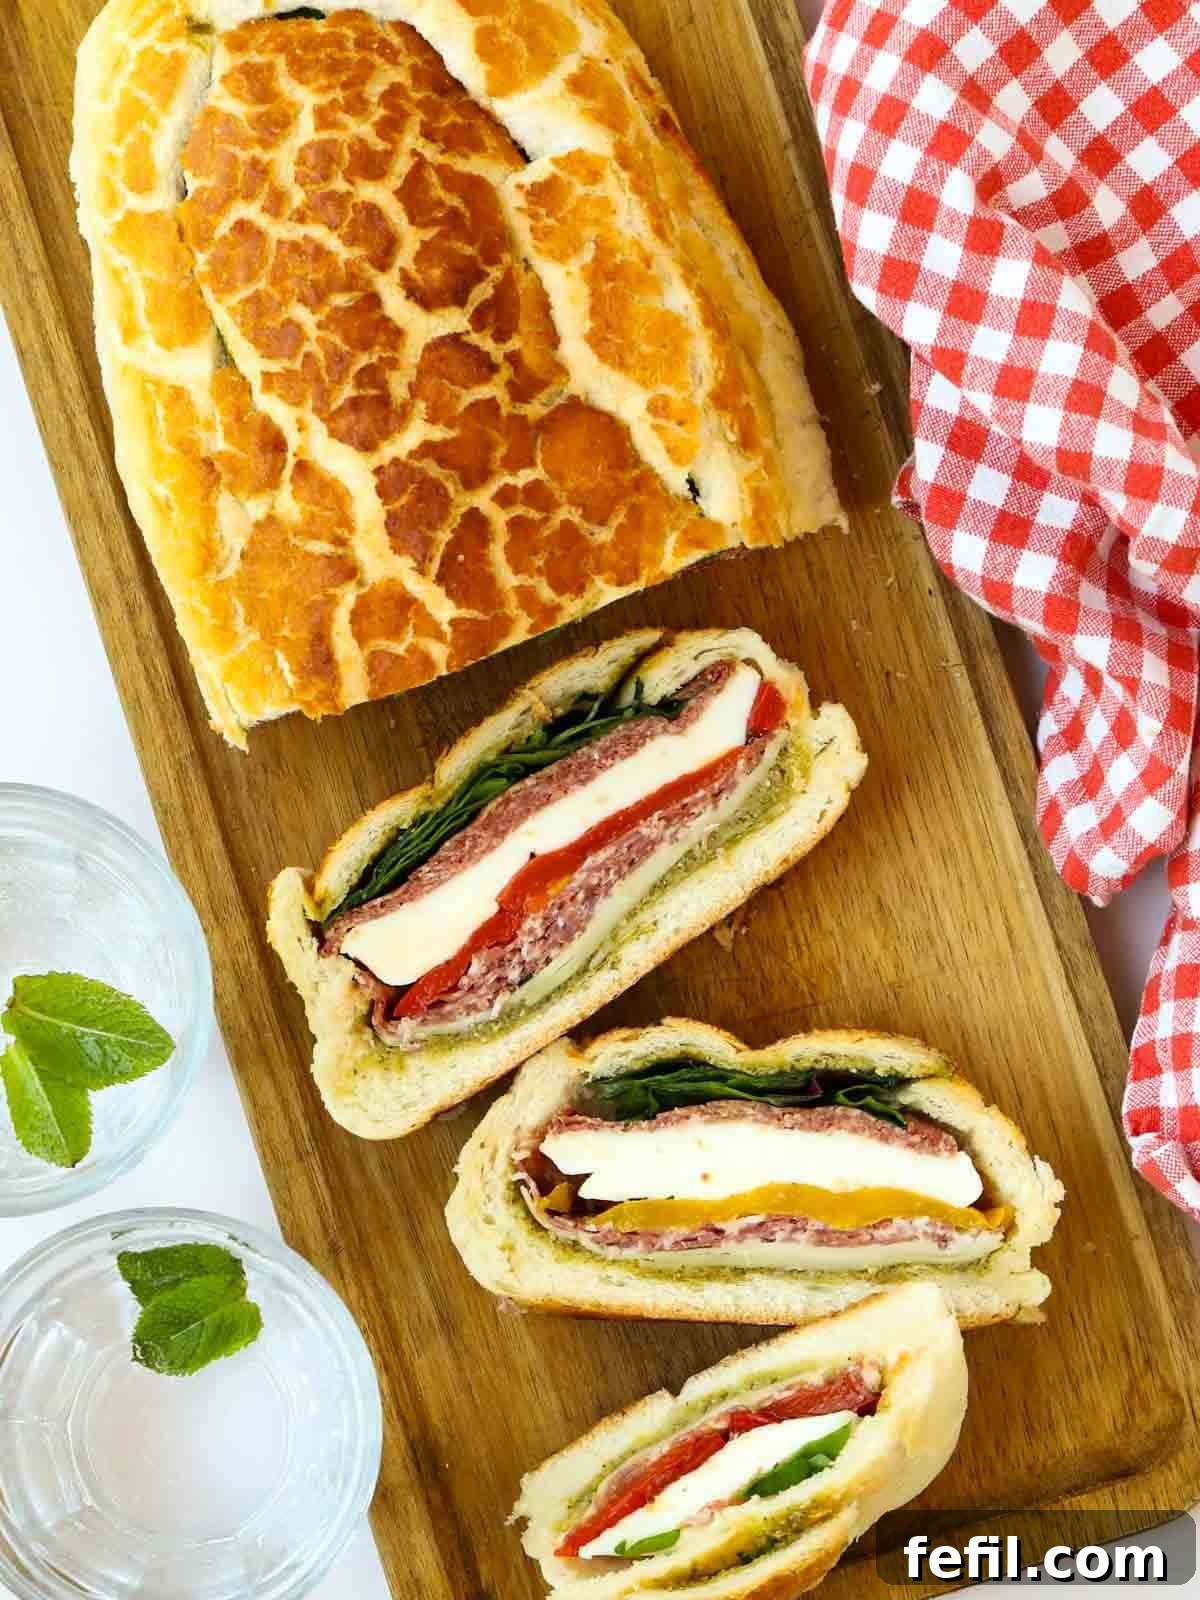
The Muffaletta Picnic Loaf has become one of my go-to recipes for countless reasons. Whether I’m planning a special yet simple lunch, a chic outdoor picnic, or assembling a lavish buffet-style spread for guests, this stuffed bread masterpiece consistently steals the show. Its unparalleled combination of visual appeal and exquisite taste makes it an instant crowd-pleaser.
Beyond its charm, a major advantage of this recipe is its make-ahead versatility. While it’s perfectly acceptable to assemble and serve in a mere 15 minutes for a quick main meal, its flavors truly deepen and meld when given time to rest. This makes it an ideal choice for busy hosts or those who appreciate preparing delicious food in advance, allowing for more relaxed entertaining.
Through careful experimentation, we’ve fine-tuned this version of the classic Muffaletta, ensuring optimal results from the bread selection to the ideal balance of filling flavors and textures. Here are some of our key findings that will help you achieve perfection:
- A **400g fresh, medium-sized loaf** works wonders for serving 4 people. We particularly recommend a tiger loaf for its ideal shape and crust-to-crumb ratio. Larger loaves tend to require an excessive amount of filling to maintain their structure, while smaller, shallower options like baguettes prove challenging to hollow out effectively.
- Certain fillings, such as fresh tomato or cucumber slices, can unfortunately lead to a soggy bread texture if the loaf isn’t consumed almost immediately. Our carefully curated filling combination in this recipe is specifically designed to prevent this issue, ensuring a delightful bite every time.
Why You’ll Fall in Love with This Muffaletta Picnic Loaf Recipe
This isn’t just another sandwich; it’s a culinary creation designed to impress and simplify your meal planning. Here’s why this Stuffed Picnic Loaf is destined to become a staple in your recipe collection:
- ⭐️ Effortlessly Quick & Make-Ahead Friendly: Whether you need a speedy lunch ready in 15 minutes or a gourmet dish you can prepare the night before, this recipe adapts perfectly to your schedule. Its flavors only improve with a little chill time.
- ⭐️ Impressive Buffet or Picnic Centerpiece: With its vibrant layers and inviting appearance, the Muffaletta instantly elevates any spread. It’s a guaranteed conversation starter and a memorable addition to parties, potlucks, and outdoor gatherings.
- ⭐️ Fun to Assemble & Visually Stunning: The process of hollowing out the bread and layering the colorful ingredients is surprisingly enjoyable. The result is a beautifully structured loaf that looks as fantastic as it tastes, making you look like a culinary genius with minimal effort.
- ⭐️ Customizable to Your Taste: While our recipe offers a delicious combination, the beauty of the picnic loaf lies in its flexibility. Easily swap ingredients to suit dietary preferences, seasonal availability, or simply your current cravings.
- ⭐️ Minimal Cleanup: Unlike complex recipes that dirty every pan in your kitchen, this assembly-style meal keeps cleanup to a minimum, allowing you more time to enjoy your creation.
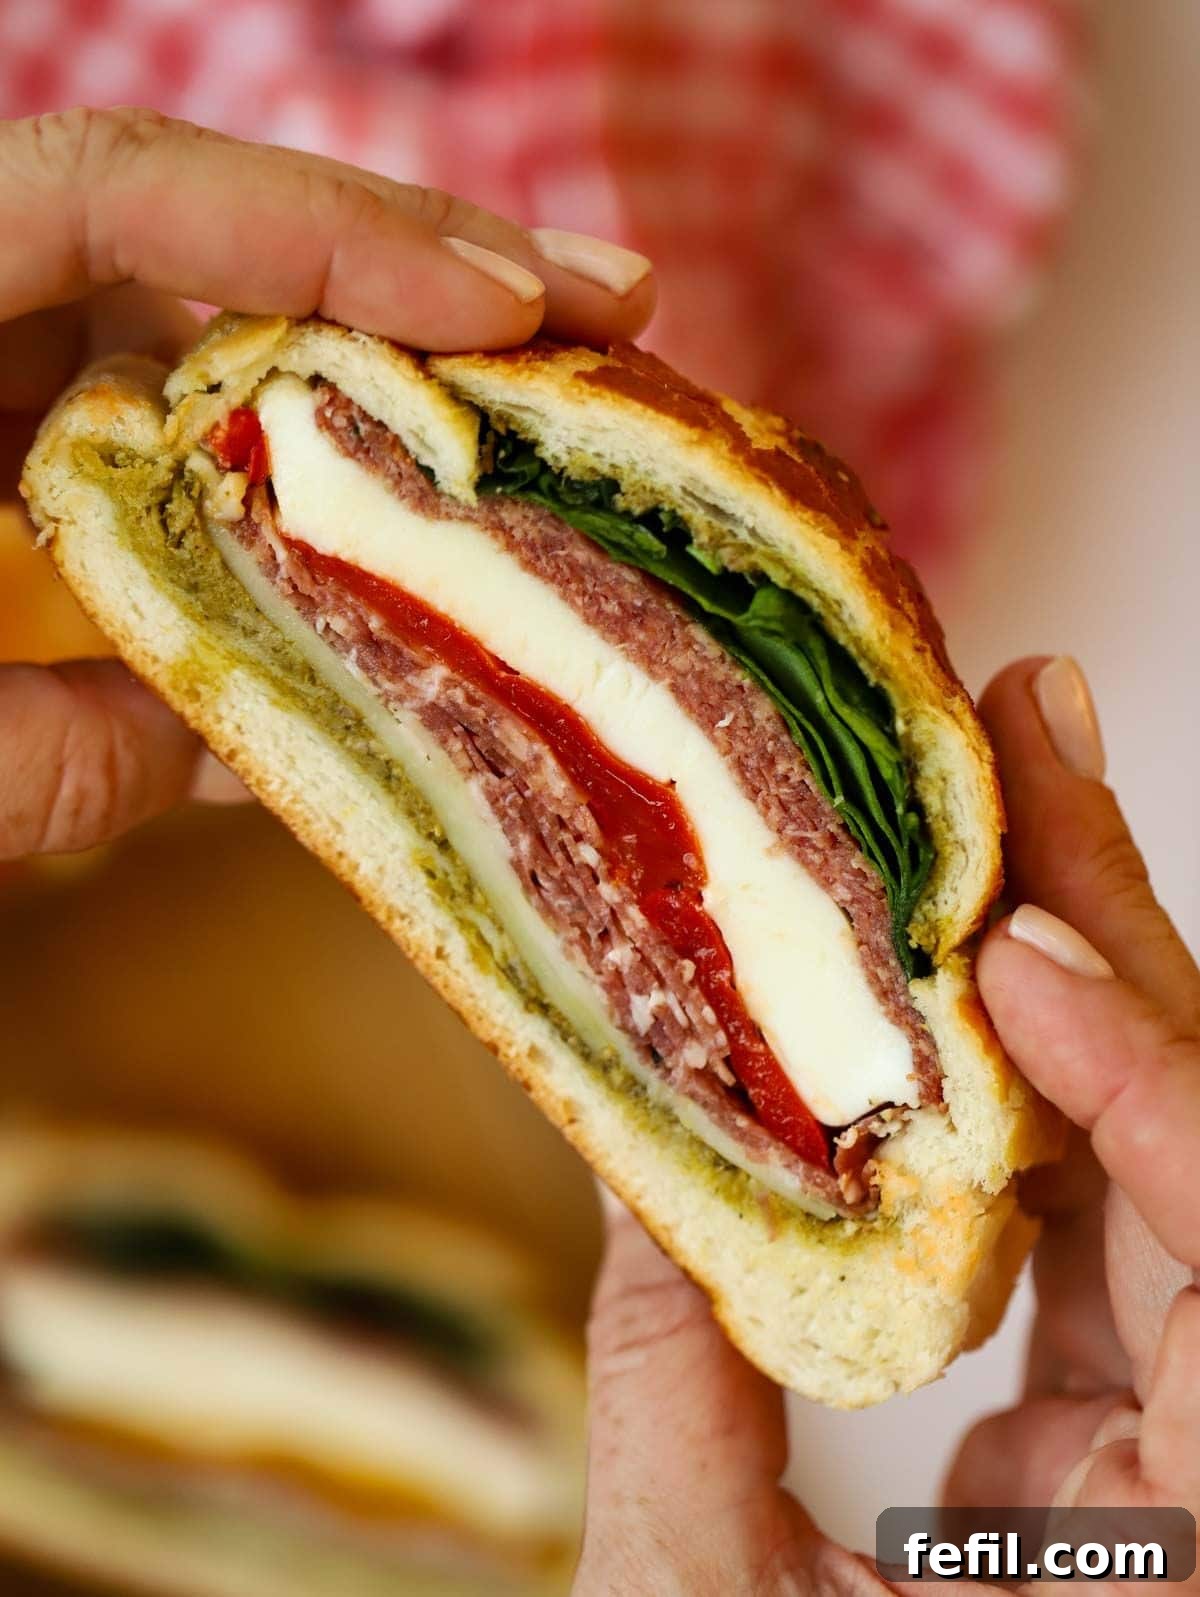
What Exactly is a Muffaletta? Unpacking the History of This Iconic Sandwich
The Muffaletta is a culinary invention steeped in history, tracing its origins back to the early 1900s. It was in New Orleans, USA, that Sicilian immigrants first introduced their distinctive round sesame loaf – also called “Muffaletta” bread – to the local food scene. This unique bread, along with traditional Sicilian deli meats and olive salad, laid the foundation for what would become an iconic American sandwich. You can delve deeper into its fascinating origins here.
At its heart, a Muffaletta involves a simple yet ingenious technique: **hollowing out a large, round loaf of bread**, leaving a sturdy crust. This hollowed space is then lavishly filled with successive layers of savory ingredients. Traditionally, these include various Italian cured meats like ham, salami, and mortadella, alongside different cheeses such as provolone or Swiss, fresh salad components, and critically, a pungent olive salad (often a mix of green and black olives, capers, giardiniera, and garlic). The “lid” of the bread is then replaced, and the entire loaf is gently pressed, allowing the flavors to meld beautifully. Once rested, it’s typically sliced into wedges or thick segments and served. In our modern twist, we’re substituting the classic olive spread with vibrant green pesto for a fresh, aromatic alternative.
Muffaletta Ingredients: Crafting Your Flavorful Layers
The beauty of this picnic loaf lies in its simplicity and the quality of its components. Here’s a detailed look at the ingredients that come together to create this incredible stuffed sandwich, along with tips for selection:
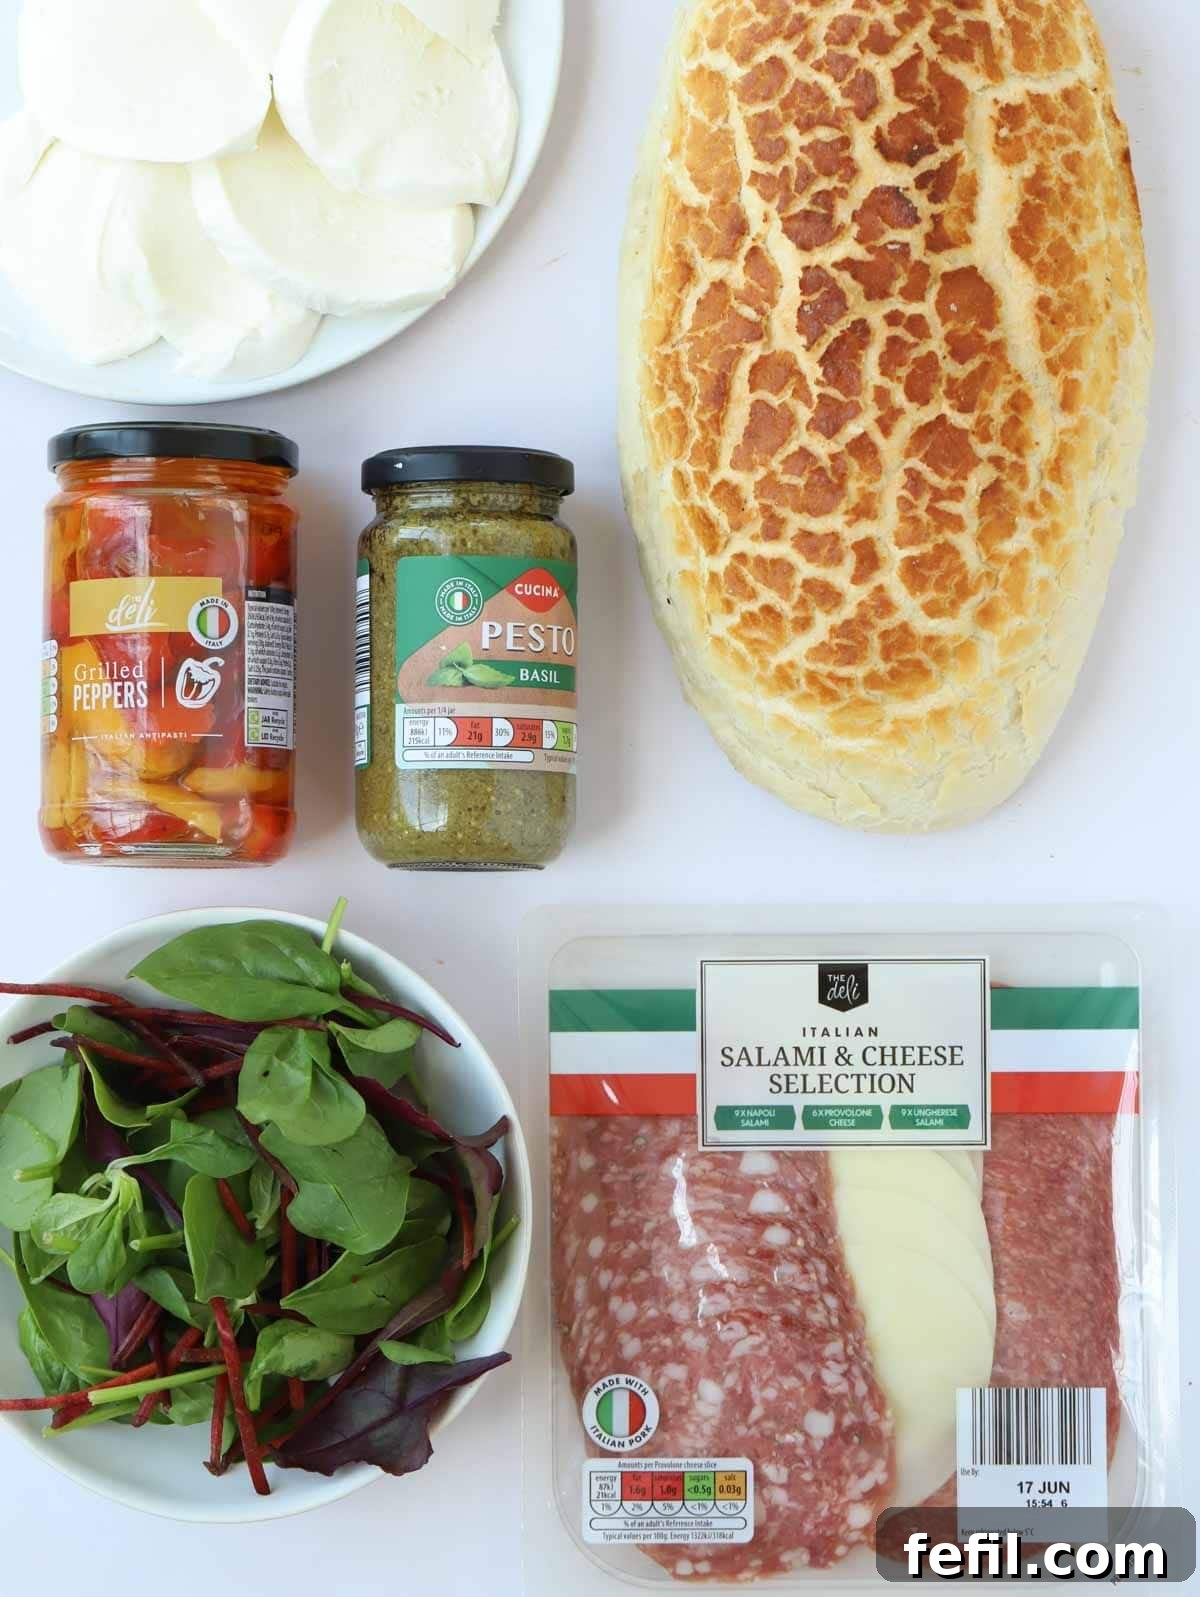
- 400g Fresh Crusty Bread: The foundation of your muffaletta! A day-old tiger loaf (also known as Dutch crunch or giraffee bread) is absolutely perfect due to its unique texture – a soft interior and a deliciously crisp, distinctive crust. This size provides enough structure for generous fillings without becoming unwieldy.
- Mixed Charcuterie: We recommend a selection that combines savory and slightly spicy notes, like a good quality salami and a complementing cheese. Pre-packaged mixed charcuterie is a time-saver, offering a delightful variety of flavors and textures in one go. Feel free to choose your favorite cold cuts.
- Green Pesto: Our chosen spread for this rendition, green pesto offers a vibrant, herbaceous, and slightly nutty flavor profile. It acts as a delicious binder for the layers and adds a burst of freshness. If you prefer, a robust red pesto can also work wonderfully, offering a sweeter, sun-dried tomato tang.
- Buffalo Mozzarella Balls: Opt for fresh buffalo mozzarella, known for its creamy texture and mild, milky flavor. Slicing it into thick, even rounds ensures each bite gets a substantial portion of this delightful cheese, adding richness and moisture.
- Grilled Peppers in Sunflower Oil: These jarred peppers are a fantastic addition, bringing a smoky sweetness and a tender texture. They are typically sold in 280g jars (around 170g drained weight). Their oil-packed nature also helps keep the loaf moist without making it soggy.
- Pre-prepared Salad Bag: A crisp, fresh blend of salad leaves provides a crucial contrasting texture and a healthy, vibrant element. Using a pre-prepared bag saves time. Any leftover leaves can be served alongside your muffaletta.
- Sea Salt: A sprinkle of sea salt enhances all the flavors, balancing the richness of the meats and cheeses and brightening the vegetables. Use sparingly, as many charcuterie meats are already quite salty.
How to Assemble Your Delicious Muffaletta Picnic Loaf: Step-by-Step Guide
Creating this impressive stuffed bread is incredibly straightforward. Follow these simple steps to build your perfect picnic loaf:
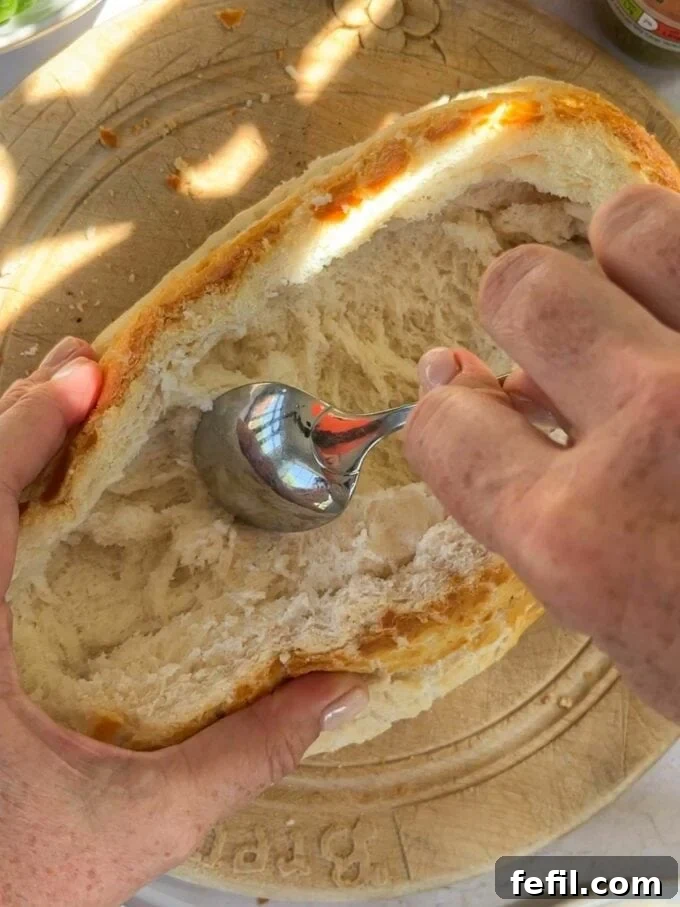
1. Using a serrated knife, carefully slice off the top crust of your bread loaf horizontally, aiming for a depth of about 5cm (approximately 2 inches). This creates your “lid.” Then, using clean hands or a spoon, gently hollow out the soft interior bread from both the main loaf and the lid, leaving a sturdy crust and a thin layer of crumb on the inside. Set aside the scooped-out bread for another use (see tips below).
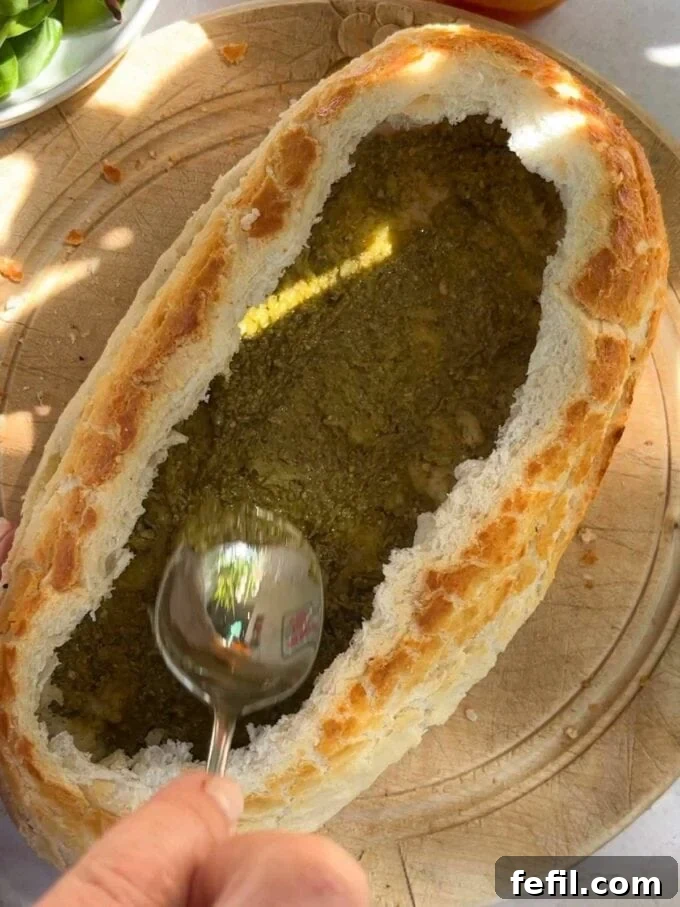
2. Spread a generous, even layer of green pesto across the bottom and up the inner sides of your hollowed-out bread loaf. This not only adds flavor but also creates a protective barrier for the bread.
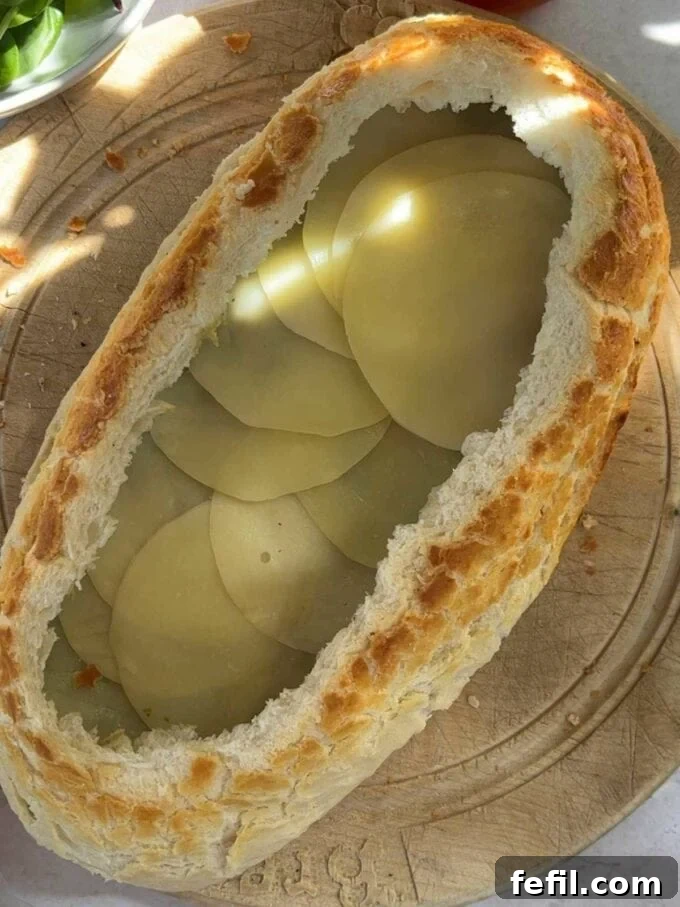
3. Now, begin neatly layering your chosen fillings into the hollowed loaf. There’s no strict order, but try to distribute the ingredients evenly for balanced bites. Continue layering until the loaf is almost full, gently pressing down each layer to eliminate air pockets.
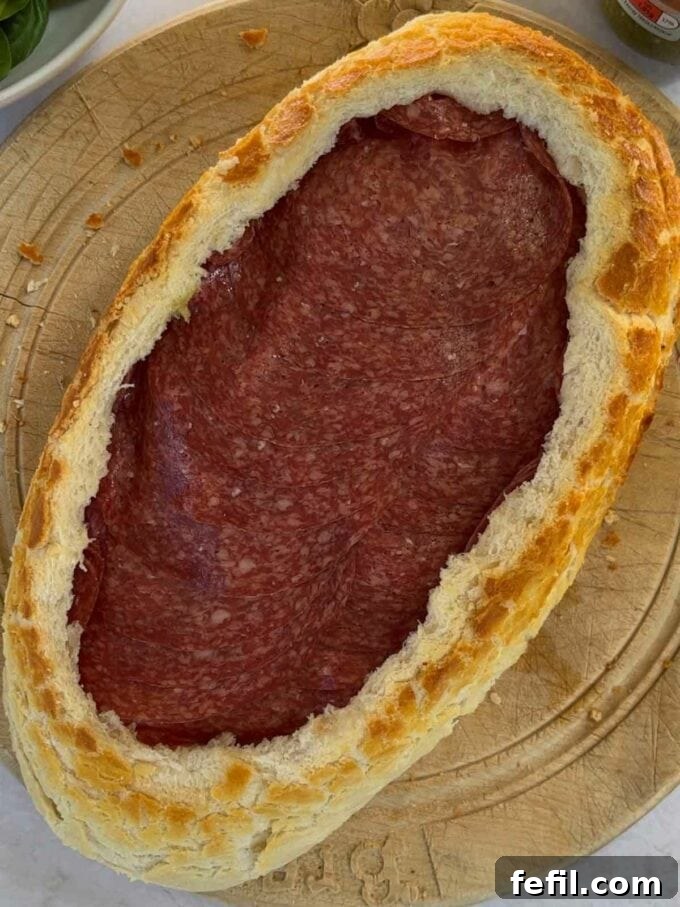
4. Take your hollowed-out lid and spread a thin layer of pesto on its underside. Add a generous final layer of fresh salad leaves to the top of your filled loaf, sprinkle lightly with sea salt, then carefully replace the pesto-coated lid. Press down firmly but gently to compact the fillings. Your Muffaletta is now ready to be served or stored!
Expert Tips for Crafting the Ultimate Muffaletta Picnic Loaf
Achieving Muffaletta perfection is all about a few key techniques. These tips will ensure your stuffed bread sandwich is flavorful, structurally sound, and a joy to eat:
Slicing Ingredients for Uniform Layers
Precision in slicing your fillings, particularly ingredients like buffalo mozzarella, makes a significant difference. Aim for uniform thickness across all slices. This not only contributes to the visual appeal of the finished loaf when sliced but also ensures an even distribution of flavors and textures in every bite. Consistent slicing also makes the loaf easier to cut cleanly later.
The Magic of Making Ahead (And Preventing Sogginess)
While this recipe is delicious served immediately, allowing your Muffaletta to rest in the fridge for anywhere from an hour to overnight will vastly improve its quality. The flavors have time to meld, the bread slightly compresses around the fillings, and slicing becomes much cleaner and easier. To enjoy this make-ahead benefit without risking a soggy loaf, avoid adding wetter ingredients like fresh tomatoes or cucumbers if you plan to store it for an extended period. These are best added just before serving if desired, or substituted with less watery alternatives like roasted peppers or marinated artichokes as used in this recipe.
Pressing for Perfection
A crucial step for an authentic Muffaletta experience is pressing the loaf. Once assembled, wrap the entire loaf tightly in foil or plastic wrap. Place it on a flat surface and weigh it down with something heavy, like a cutting board topped with a few cans or books, for at least 30 minutes, or even better, a few hours in the refrigerator. This compression helps fuse the layers, allowing the flavors to truly penetrate the bread and creating that characteristic dense, cohesive texture of a well-made Muffaletta.
Unleashing Your Creativity with Fillings
The beauty of the Muffaletta is its adaptability. Don’t hesitate to experiment with different types of charcuterie (prosciutto, turkey breast), cheeses (provolone, cheddar), or vegetables (roasted zucchini, spinach, sun-dried tomatoes). Just remember the “soggy bread” warning for high-moisture fresh vegetables if making ahead. The pesto can also be swapped for a traditional olive salad for an authentic New Orleans flavor profile.
Substitutions & Creative Variations for Your Picnic Loaf
This Muffaletta recipe is wonderfully forgiving and adaptable. Don’t be afraid to get creative with your fillings to suit your taste, dietary needs, or what you have on hand:
- Spreads: While green pesto offers a vibrant, fresh flavor, you can certainly swap it for red pesto or, for a more traditional touch, a robust olive tapenade or even an authentic olive salad.
- Meats: Experiment with different cooked meats like sliced turkey breast, roast beef, or thinly sliced chicken. For a vegetarian option, layers of grilled halloumi or marinated tofu slices can be fantastic.
- Cheeses: Instead of buffalo mozzarella, consider provolone, Swiss cheese, or a creamy Havarti for different flavor profiles and textures.
- Vegetables: Beyond grilled peppers, try marinated artichoke hearts, roasted zucchini or eggplant slices, or even a layer of fresh spinach (though blanch and drain spinach if making ahead to reduce moisture). Just be mindful of high-moisture vegetables like fresh tomatoes or cucumbers if you plan to store the loaf before serving, as they can lead to sogginess. These are best added fresh, right before eating.
- Spice It Up: Add a thin layer of finely chopped pickled jalapeños or a sprinkle of red pepper flakes for a kick.
Storage & The Magic of Make-Ahead
This Muffaletta is an excellent candidate for advance preparation, making it perfect for parties or busy days. Once assembled and tightly wrapped in foil or cling film, you can keep this delicious recipe in the fridge overnight. In fact, letting it rest allows all the beautiful flavors to meld together even more deeply, resulting in a more cohesive and intensely flavored loaf. Just slice and serve when you’re ready!
Don’t Waste That Crumb! Using Your Leftover Breadcrumbs!
The bread you scoop out from the loaf is a treasure, not trash! Put these delicious remnants to one side and, if you have a moment, transform them into versatile breadcrumbs. These can be frozen in bags and pulled out later for an array of recipes such as crispy Popcorn Chicken, homemade Fish Fingers, flavorful Courgette Fritters, crunchy Cauliflower Tacos, or a comforting Easy Fish Pie.
How to Make Breadcrumbs: It’s incredibly simple! Just whizz the broken-up bread in a food processor until it reaches your desired consistency. For exceptionally dry and crispy breadcrumbs, you can spread the broken bread pieces on a baking tray and lightly toast them in a low oven for 10-15 minutes before processing.
Recipe Tips for Muffaletta Success
Even Slicing for Perfect Presentation
When preparing your fillings, especially softer ingredients like buffalo mozzarella or deli meats, aim for slices of consistent thickness. This attention to detail ensures that when you slice your finished loaf, each piece will have beautifully even layers, making for a more appealing and satisfying presentation.
The Power of Preparing Ahead
While you can certainly enjoy this Muffaletta immediately after assembly, its flavors truly deepen and meld if given time to rest. Storing the wrapped loaf in the refrigerator for anywhere from an hour to overnight allows the fillings to settle and the bread to absorb some of the delicious juices, resulting in a significantly enhanced flavor and much cleaner slices. However, if you opt for advance preparation, remember to avoid very wet ingredients like fresh tomatoes or cucumber, as they can make the bread soggy during storage. These are fine if you’re eating straight away!
More Easy (But Special) Sandwich Recipes You’ll Love…
Under 15 minutes
Philly Cheesesteak {15 Minute Meal}
Under 15 minutes
Best Ever Tuna Melt {10 Minute Meal}
Lunch Ideas
Coronation Chicken {Easy Recipe}
Under 15 minutes
French Bread Pizza
Frequently Asked Questions About the Muffaletta Picnic Loaf
What kind of bread should I use if I want to make a big serving?
The bread size specified in this recipe, a 400g tiger loaf, is designed to serve 4 people. If you’re looking to serve a larger crowd, such as 8 people, buying a single, much larger loaf will require a considerably greater amount of filling to adequately fill the hollowed space. For the best bread-to-filling ratio and overall result, we highly recommend making two separate 400g loaves instead of one giant one. This ensures better structural integrity and easier handling.
Can I add some roasted vegetables to the picnic loaf?
Absolutely! Roasted vegetables are a fantastic addition, adding depth of flavor and a lovely tender texture. Make sure to slice your chosen vegetables (like bell peppers, zucchini, or eggplant) thinly. Roast them in the oven at 200℃ (400℉) for approximately 15-20 minutes, or until they are soft and slightly caramelized. The crucial step is to allow them to cool completely before layering them into your stuffed loaf. Adding warm vegetables can create steam, leading to a soggy bread, which we want to avoid.
Is this Muffaletta recipe vegetarian-friendly?
This particular recipe includes charcuterie, so it’s not vegetarian as written. However, it’s incredibly easy to adapt! You can substitute the mixed charcuterie with layers of grilled halloumi, marinated tofu or tempeh, or an assortment of roasted vegetables like zucchini, eggplant, and mushrooms. Ensure your pesto is also vegetarian (some contain Parmesan cheese made with animal rennet). The result will be a delicious and satisfying vegetarian picnic loaf.
How long does the Muffaletta Picnic Loaf last in the fridge?
When properly wrapped tightly in foil or plastic wrap, your Muffaletta Picnic Loaf can be stored in the refrigerator for up to 2-3 days. Its flavors will continue to develop and meld, making it a fantastic make-ahead option. Remember to avoid fresh, high-moisture ingredients like raw tomatoes or cucumbers if storing for more than a few hours, as they can cause the bread to become soggy.
I genuinely hope you enjoyed making and devouring this incredible Muffaletta Picnic Loaf! Your feedback helps us create even more recipes you’ll love. Please take a moment to rate the recipe using the stars below.
I would also **LOVE** to see your magnificent cooking creations! If you’d like to share yours, please tag me on Instagram (@tamingtwins). Happy eating!
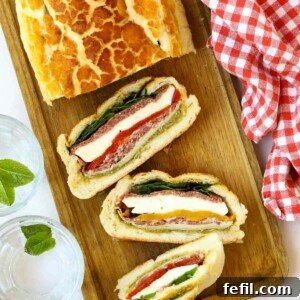
Muffaletta {Picnic Loaf}
By Sarah Rossi
This easy and delicious stuffed Picnic Loaf – AKA Muffaletta – originates from Sicily via New Orleans, and it’s an impressive addition to any cold meal or buffet. Ready in 15 minutes, you can eat this fresh and colourful creation straight away or leave it in the fridge overnight for flavors to deepen.
Prep Time: 15 minutes
Total Time: 15 minutes
Servings: 4
Ingredients
- 400 g Crusty loaf (e.g., Tiger bread, about 1-2 days old for best results)
- 240 g Mixed charcuterie (e.g., salami and cheese mix)
- 4 tsp Green pesto (or red pesto, if preferred)
- 250 g Buffalo mozzarella balls (2 x 125g packs, sliced thickly)
- 170 g Grilled peppers in sunflower oil (drained from a 280g jar)
- 90 g Salad leaves (pre-prepared bag)
- Sea salt (to taste)
Instructions
- Carefully cut the top off your bread horizontally with a serrated knife, roughly 5cm (2 inches) deep.
- Scoop out the soft interior bread from both the main loaf and the lid using your hands or a spoon, leaving a sturdy crust. Discard the scooped-out bread or save for breadcrumbs (see notes above).
- Generously coat the bottom and inner sides of the hollowed loaf with green pesto.
- Begin layering your chosen fillings neatly into the loaf, compressing each layer slightly until the loaf is almost full.
- Scoop out the interior bread from your lid and spread a thin layer of pesto on its underside.
- Layer in the salad leaves on top of your fillings until the loaf is full.
- Sprinkle lightly with sea salt.
- Replace the pesto-coated lid on top of the loaf, pressing down firmly to compact all the layers.
- Serve immediately, sliced width-ways. Alternatively, wrap very tightly in foil or cling film and refrigerate for at least an hour (or overnight) for flavors to meld and for easier slicing before serving.
Did you make this recipe? We’d love to hear how it went! Share your thoughts and give it a star rating!
Notes
- Nutritional value: The charcuterie is not included in the nutritional total as values vary significantly by brand and type.
- Slicing: Ensure ingredients like cheese are sliced evenly for best results. Refrigerating the loaf before slicing will also help achieve cleaner cuts.
- Breadcrumbs: Don’t discard the scooped-out bread! Re-purpose it into breadcrumbs for other recipes (instructions detailed above).
- If using vegetables: If adding roasted vegetables, slice them, roast for 15-20 minutes until soft, and allow them to cool completely before layering into the loaf.
Nutrition
Nutrition information is automatically calculated and should only be used as an approximation. Nutritional values are per portion unless otherwise stated.
- Calories: 477 kcal
- Carbohydrates: 57 g
- Protein: 24 g
- Fat: 18 g
- Saturated Fat: 9 g
- Polyunsaturated Fat: 1 g
- Monounsaturated Fat: 4 g
- Cholesterol: 48 mg
- Sodium: 912 mg
- Potassium: 299 mg
- Fiber: 4 g
- Sugar: 7 g
- Vitamin A: 2202 IU
- Vitamin C: 36 mg
- Calcium: 1464 mg
- Iron: 4 mg
Additional Info
Course: Lunch, Main Course
Cuisine: Family Food, Mediterranean