
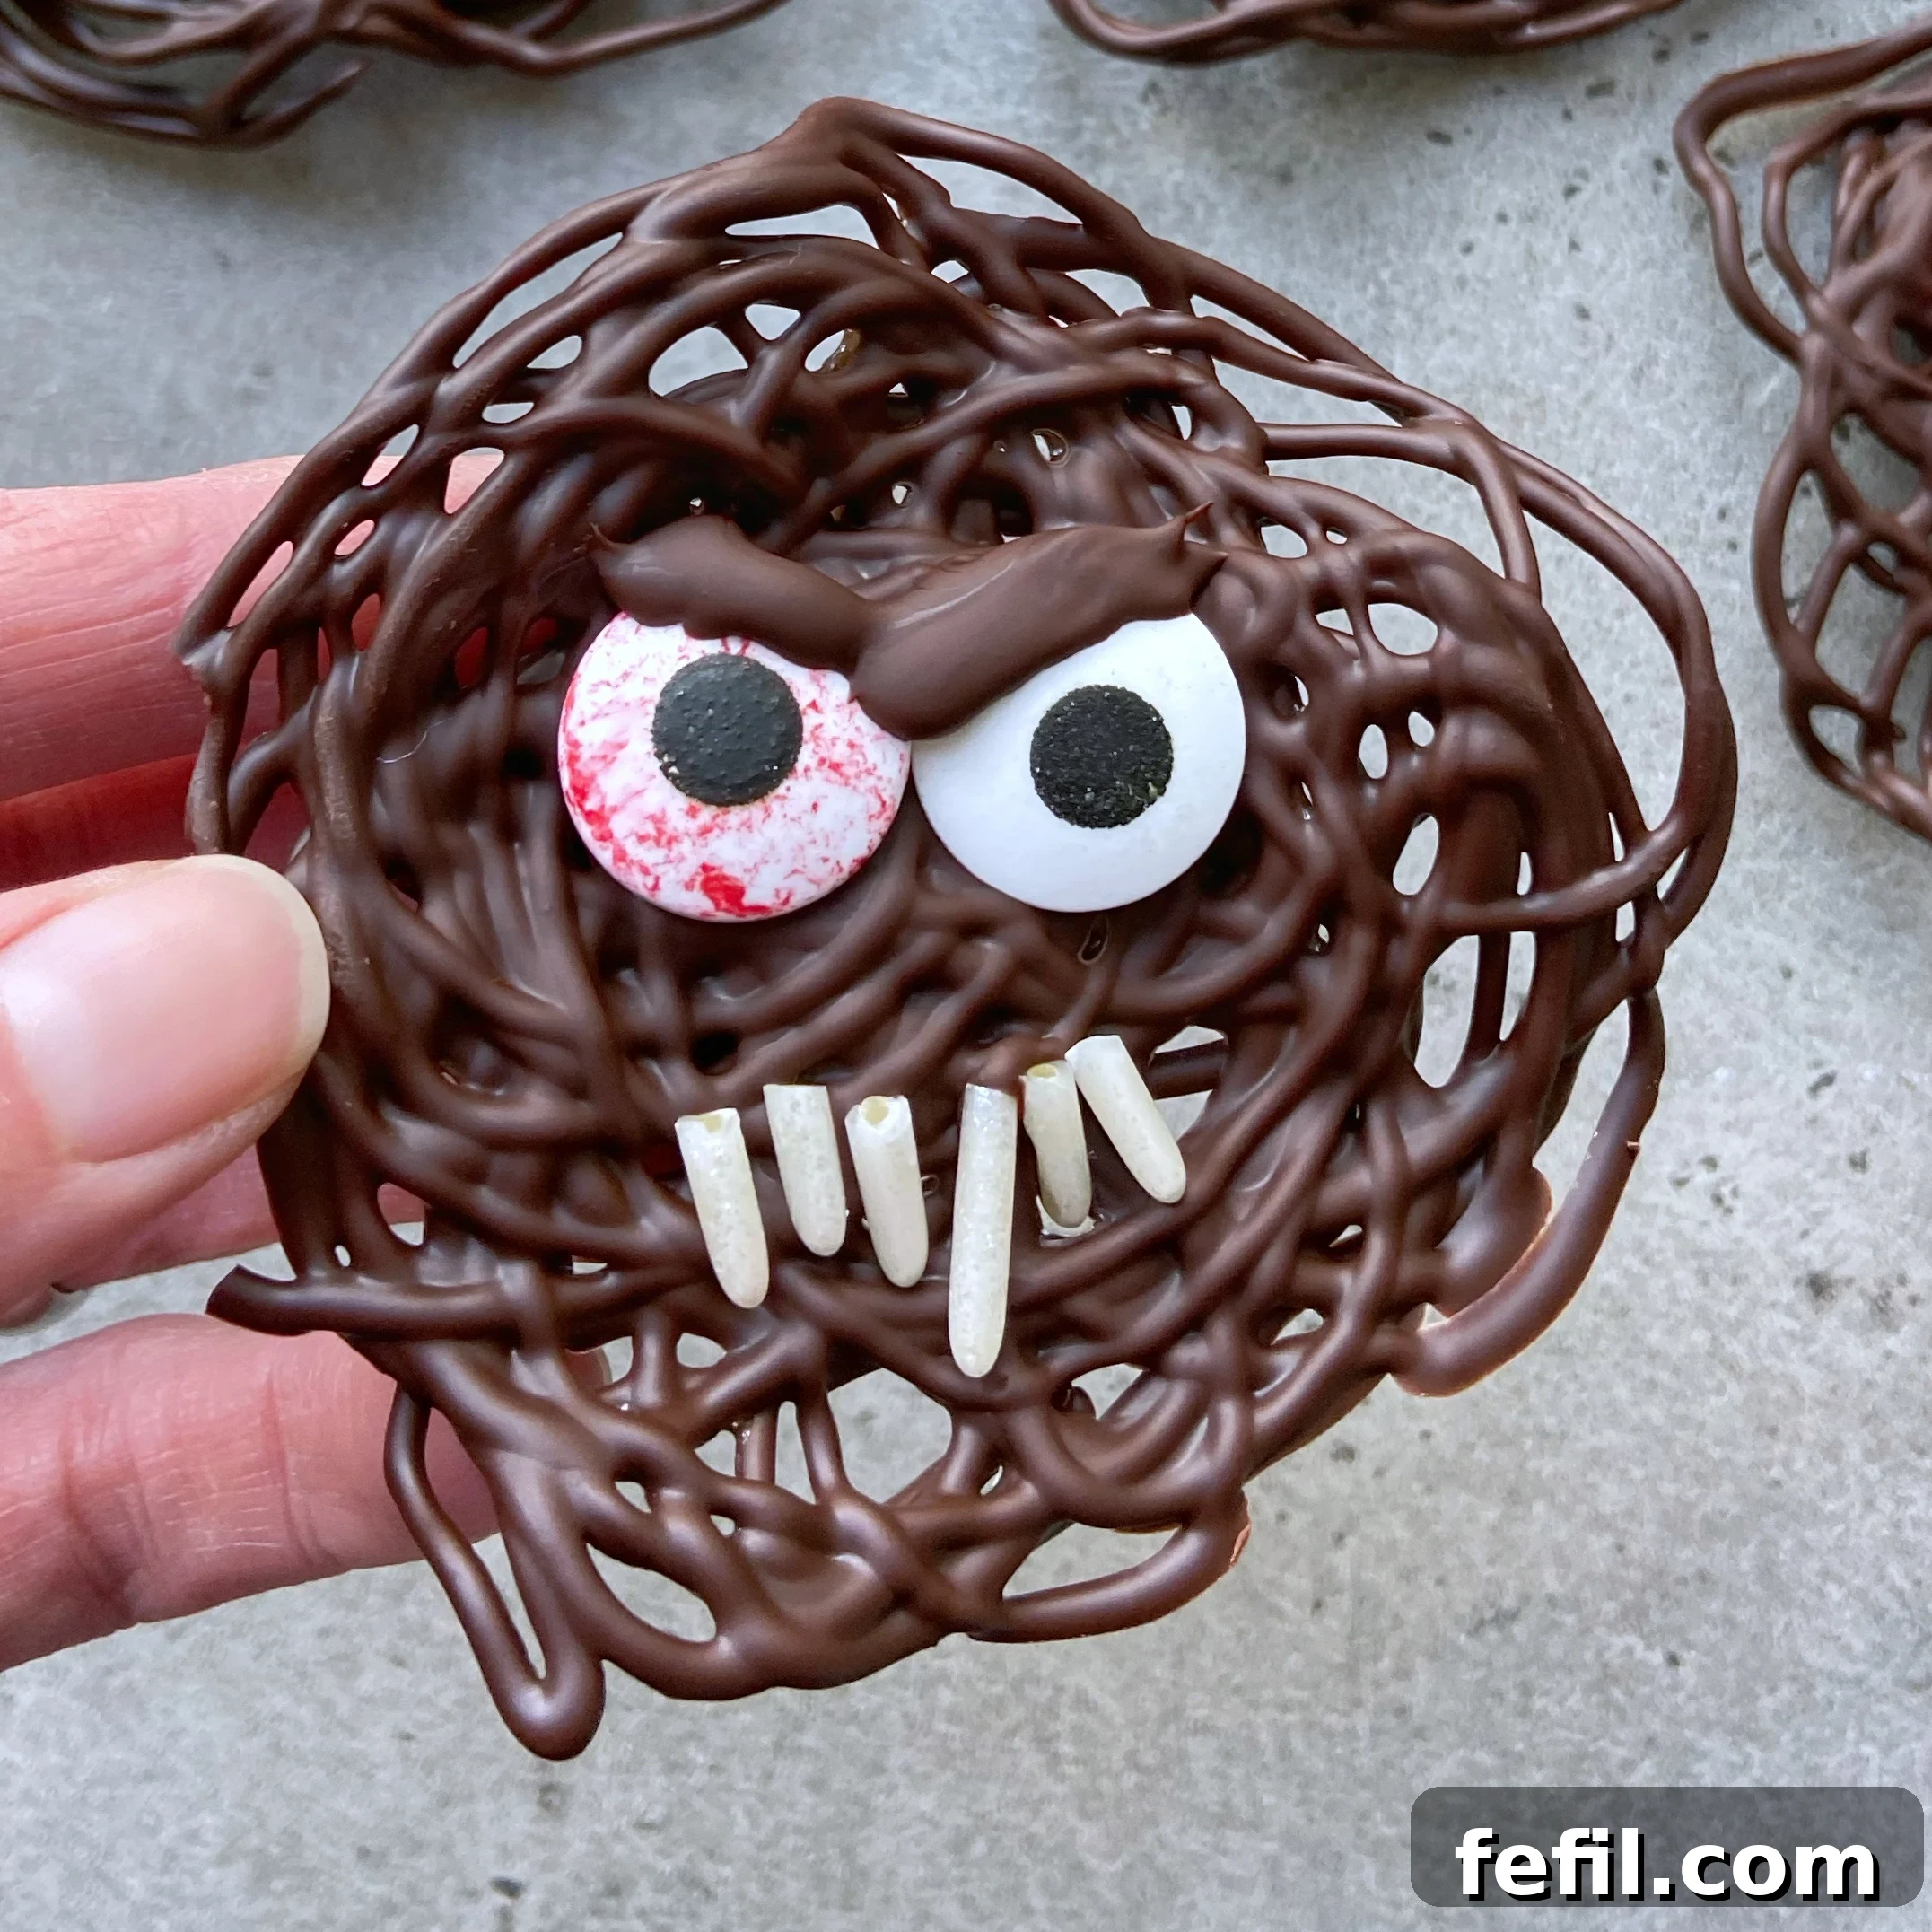
Spooky & Easy Chocolate Monsters: The Ultimate No-Bake Halloween Treat
Get ready to unleash your inner mad scientist and create some truly terrifyingly delicious treats this Halloween season! These Chocolate Monsters are not only incredibly easy to make, but they’re also a fantastic no-bake option that brings loads of fun to the kitchen. Whether you’re planning a ghoulish gathering, looking for a simple school party snack, or just want a festive activity with the kids, these spooky chocolate delights are an absolute must-try. Forget complicated baking – with just a few ingredients and a clever ice bath technique, you’ll have a batch of unique, edible monsters ready in minutes. This recipe is designed for maximum fun and minimal fuss, making it a perfect choice for Halloween enthusiasts of all ages.
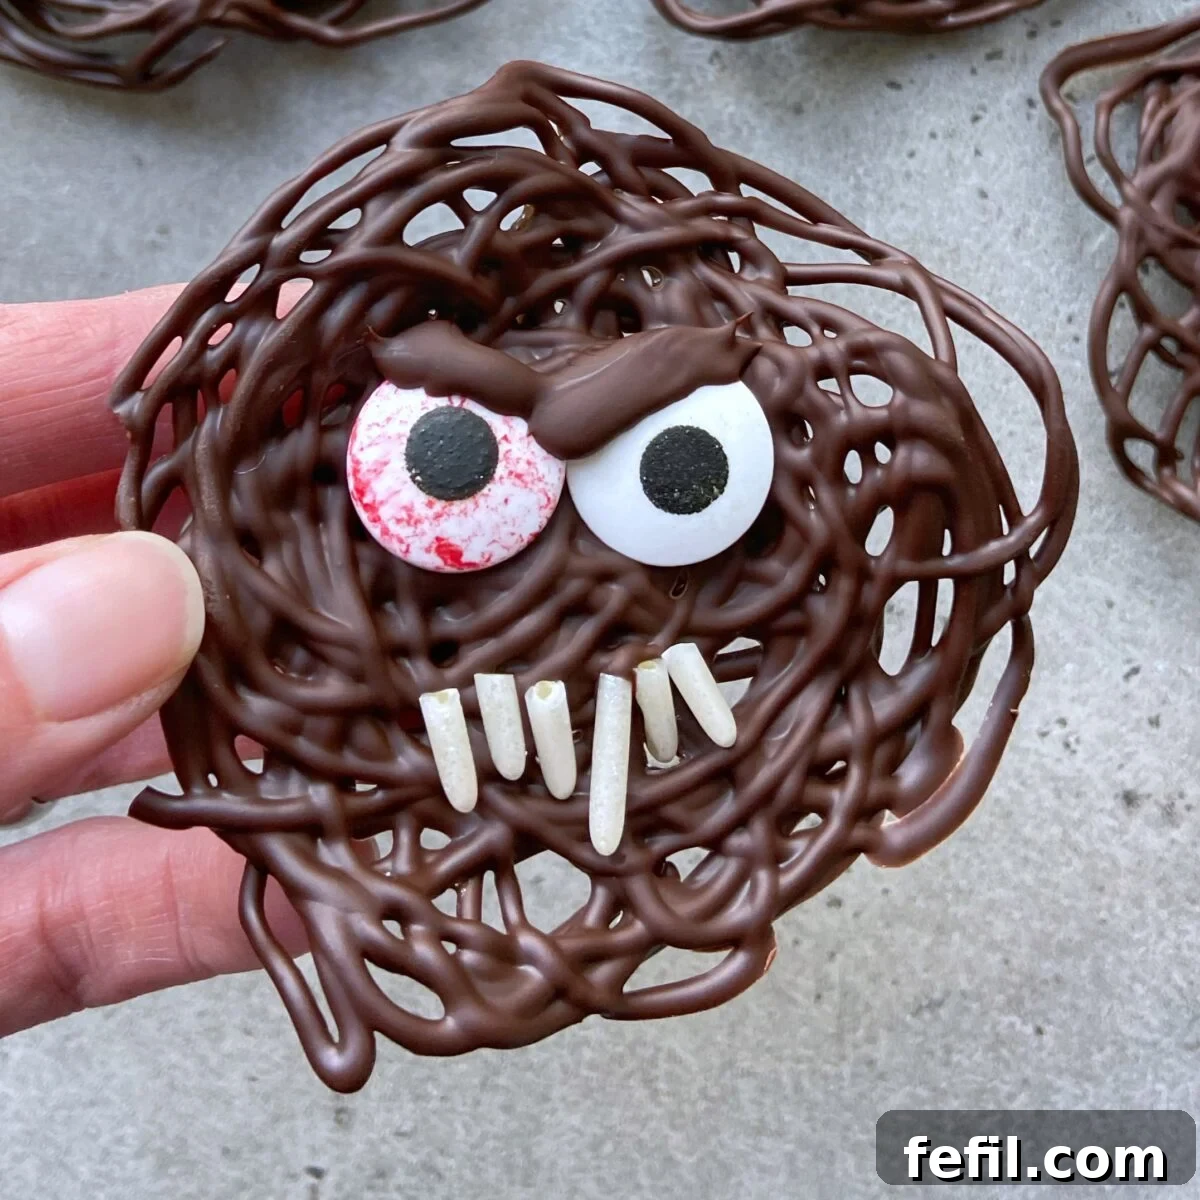
Why These Easy Chocolate Monsters Will Be Your New Halloween Favorite
There are countless reasons to fall in love with these delightful chocolate creatures. First and foremost, they are incredibly simple to prepare, requiring no baking whatsoever. This makes them perfect for busy schedules and a fantastic entry point for beginner decorators, even the littlest hands in the family. The core technique involves melting chocolate and drizzling it onto an ice bath, a method that instantly hardens the chocolate into intriguing, organic shapes. This rapid cooling process is not just efficient; it’s genuinely fascinating to watch, especially for younger helpers, turning the kitchen into a fun, edible science lab.
Beyond their simplicity, these monsters offer unparalleled customization. Each one can be a unique character, adorned with an assortment of candies, sprinkles, and edible details. This creative freedom makes the process a joyful activity for the whole family, allowing everyone to design their own monstrous masterpiece. From googly eyes to jagged teeth, the possibilities are limited only by your imagination, ensuring every monster is a one-of-a-kind creation. Plus, they double as both a delicious treat and an impressive, conversation-starting centerpiece for any Halloween spread, guaranteed to elicit smiles and maybe a few joyful screams.
They’re also wonderfully versatile in presentation. Serve them as individual spooky bites, use them as charming toppers for cupcakes, or even dissolve them into hot milk for a magically transforming hot chocolate experience. Their unique texture and instant hardening property make them stand out from typical Halloween treats, providing a fresh and exciting option for your festive celebrations.
The Magic Behind the Method: Instant Chocolate Hardening on an Ice Bath
The secret to creating these uniquely textured Chocolate Monsters lies in a simple yet incredibly effective technique: the ice bath. To bring these creepy-crawly confections to life, you’ll start by filling a large bowl generously with ice and very cold water. This creates an incredibly cold surface that instantly chills and hardens melted chocolate upon contact. When you drizzle your chosen dark chocolate (or milk chocolate, or even white chocolate, if preferred) onto this icy surface, it solidifies almost immediately. This rapid solidification allows you to build up whimsical, squiggly, and surprisingly sturdy monster shapes with ease, giving each monster a truly organic and spontaneous look.
This quick hardening prevents the chocolate from spreading too thin, giving your monsters a delightful, slightly rugged texture that truly enhances their spooky charm. It also means you can create multiple layers and dimensions for your monsters without waiting for each layer to set, drastically speeding up the decorating process. It’s a quick, clean, and incredibly satisfying way to work with chocolate, bypassing the need for elaborate molds, tempering, or extensive chilling times in the refrigerator. The ice bath essentially does all the heavy lifting, allowing you to focus purely on the creative fun of monster-making. Just pipe, decorate, and watch your edible creations come to life right before your eyes!
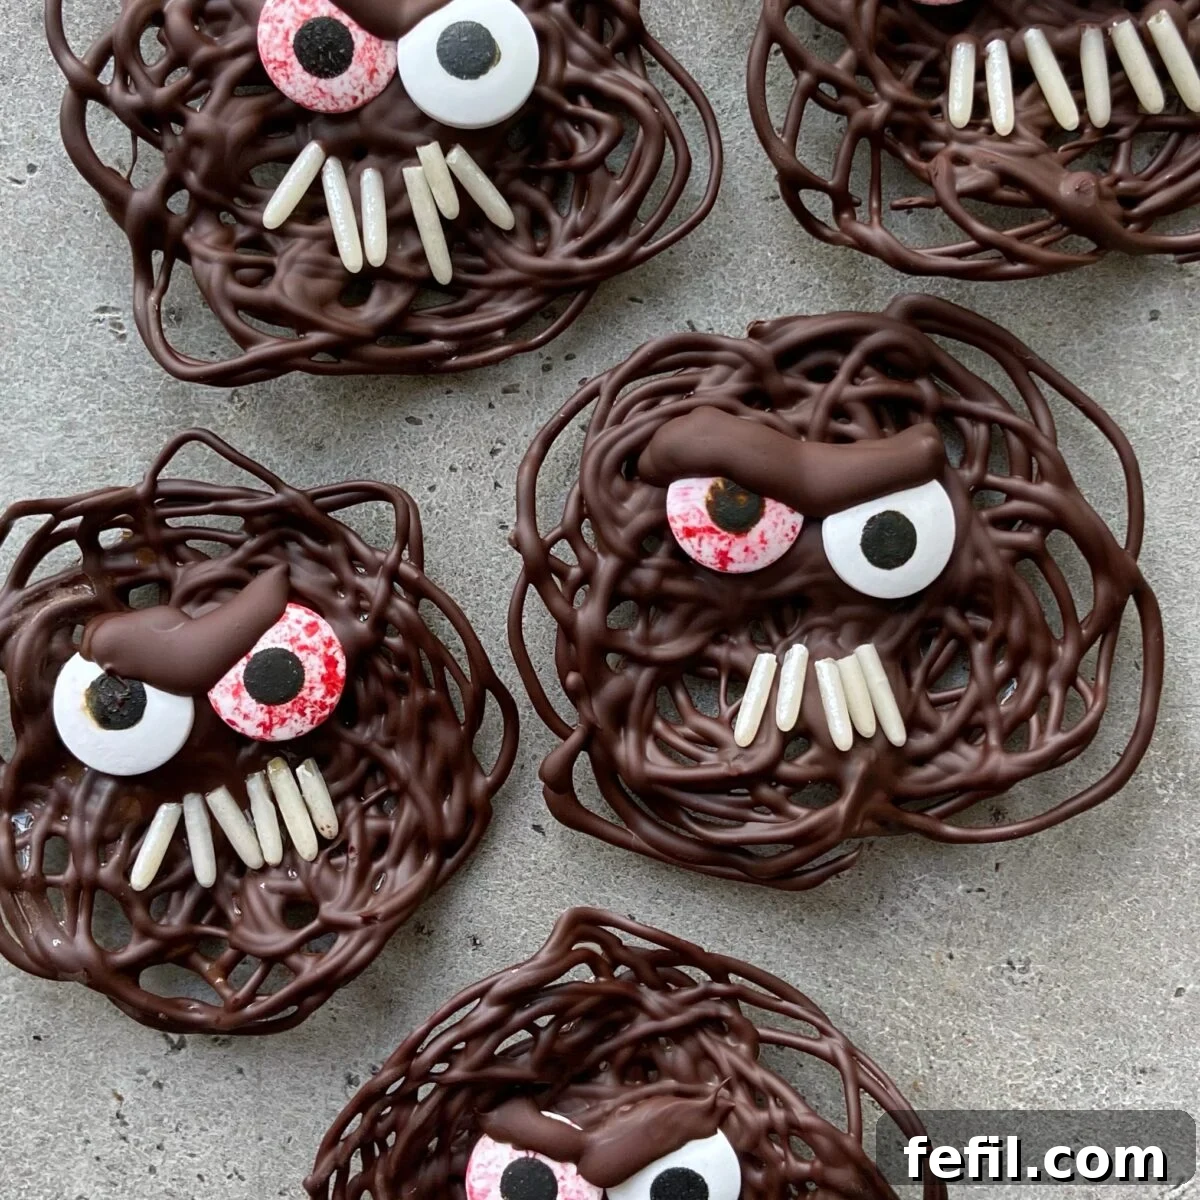
Unleash Your Inner Artist: Decorating Your Chocolate Monsters
Once your chocolate has taken shape on the ice bath, the real fun begins: decorating! This is where you can truly let your imagination run wild and give each monster a distinct and memorable personality. Think beyond basic candy eyes and embrace a wide array of edible embellishments to make your creatures truly unique. Want a furry monster? Add a generous sprinkle of colorful jimmies, shredded coconut, or finely crushed cookies. Dreaming of a horned beast or a multi-limbed creature? Break off pretzel sticks, small pieces of candy corn, or even Pocky sticks to create horns, jagged claws, or creepy antennae. Edible glitter can give them a mystical shimmer, while mini marshmallows can form adorable, chubby cheeks, extra eyes, or even ghost-like bodies.
Consider using various types of candy for different features: thin white rod sprinkles or slivered almonds make excellent sharp, vampire-esque teeth, while chocolate chips can serve as button noses or additional eyes for a truly unsettling gaze. You can even use a toothpick dipped in a contrasting melted chocolate color (perhaps white chocolate tinted red with food coloring) to draw on eyebrows, scars, stitches, or mischievous smiles. Don’t be afraid to experiment with food coloring mixed into melted white chocolate to create vibrant, technicolor monsters – green for a swamp creature, purple for an alien, or orange for a pumpkin-inspired ghoul. This step is super fun and engaging, and kids will absolutely love to help, bringing their unique, spooky ideas to each monstrous creation, fostering both creativity and a love for cooking.
For even more detail, edible markers can be used on hardened white chocolate to draw intricate patterns or finer facial features. Small gumdrops or jelly beans can be cut into shapes for ears, tongues, or other anatomical oddities. The key is to have a variety of small edible items ready to go, as the chocolate sets quickly, requiring swift decoration. Gather your supplies, get your creative juices flowing, and prepare for a decorating frenzy!
Creative Serving Suggestions & Spooky Applications
These versatile Chocolate Monsters can be served in a multitude of ways, making them perfect for any Halloween occasion, from a casual family treat to an elaborate themed party. Simply arrange them on a platter for a festive dessert table, where their quirky appearances are sure to be a conversation starter and a visual delight. They make fantastic additions to individual treat bags for trick-or-treaters, delightful party favors, or even unique garnishes for other Halloween desserts like cupcakes or brownies.
But wait, there’s a truly chilling and comforting experience waiting to be discovered! For a magical touch, consider dropping one of these monsters into a mug of hot milk. As the hot chocolate monster slowly dissolves, it will magically transform into a rich, decadent cup of hot chocolate, perfect for warming up on a crisp autumn evening. The candy eyes might even float to the surface, creating a playful, slightly eerie visual as you sip your delicious concoction. Imagine serving these at a Halloween movie night, where a treat literally becomes a drink – it’s an interactive delight that adds an extra layer of fun to your festivities! You can also serve them alongside a bowl of fruit or a scoop of ice cream for an extra sweet and spooky dessert.
Recipe Tip: Transform Your Monsters into Fun Lollies!
Elevate your Chocolate Monsters by turning them into fun and easy-to-eat lollies! Simply place a wooden ice lolly stick (or any food-safe lollipop stick) onto the surface of the ice bath before you begin piping your chocolate monster on top. Ensure the chocolate covers a good portion of the stick for a secure hold, making sure the stick is embedded within the chocolate as it hardens. Once fully hardened, carefully remove them from the ice bath by gently lifting the stick. You now have adorable, easy-to-handle monster lollipops. These are absolutely perfect for adding a special, grab-and-go touch to Halloween gift bags, party favors, or simply for kids to enjoy without getting chocolate all over their hands. They’re also great for a “bobbing for monsters” game!
More Hauntingly Delicious Halloween Treats to Try
If you’re looking to expand your repertoire of spooky delights and keep the Halloween spirit alive in your kitchen, here are a few more fantastic Halloween-themed recipes that are just as fun and delicious as these chocolate monsters:
- Spooky Chocolate Spiders: These creepy-crawly delights are surprisingly tasty and make for a wonderfully eerie addition to any dessert spread.
- Poison Apple Rice Cakes: A healthier-ish and visually striking treat, these rice cakes with a mysterious twist are both fun to make and eat.
- Strawberry Chocolate Monsters: Offering a fruity and fun alternative, these monsters incorporate fresh strawberries for a different texture and flavor profile to complement your chocolate collection.
Exploring these recipes will ensure your Halloween table is brimming with a variety of imaginative and delectable treats that everyone will enjoy.
5 monsters
Chocolate Monsters
20 mins
0 mins
20 mins
Rate
Equipment
-
Piping utensil or bag (a sturdy ziploc bag with a corner snipped off works perfectly)
-
Large bowl for the ice bath
-
Microwave-safe bowl or double boiler setup (for melting chocolate)
-
Spatula or spoon (for stirring chocolate and carefully removing monsters)
-
Kitchen roll or parchment paper (for drying the finished monsters)
Ingredients
- 100 grams dark chocolate (use high-quality melting chocolate or chocolate chips for best results; milk chocolate or white chocolate can also be used)
- 10 large candy eyes (plus extra for more multi-eyed or unique monster designs)
- 1 tablespoon white rod sprinkles (also known as jimmies; alternatively use slivered almonds, mini marshmallows, or other small candies for teeth)
- Ice (sufficient quantity of ice cubes for the ice bath)
- Cold Water (to fill the large bowl for the ice bath)
- Optional Decorations: Assorted sprinkles, colorful jimmies, edible glitter, pretzel sticks (for horns/arms), mini chocolate chips, food coloring (for white chocolate), edible markers.
Instructions
-
1. Prepare the Ice Bath: Fill a large bowl generously with ice cubes, ensuring there’s plenty of ice. Then, add enough cold water to just cover the ice, creating an extremely cold surface. This is the crucial step for instantly hardening your chocolate, so make sure your ice bath is ready before melting the chocolate. Set it aside close to your workspace.
-
2. Melt the Chocolate: Break your chosen dark chocolate (or milk/white chocolate) into small, uniform pieces. Melt it carefully using either a microwave or a double boiler method:
- Microwave Method: Place chocolate pieces in a microwave-safe bowl. Heat on medium power in 20-30 second intervals, stirring thoroughly after each interval, until the chocolate is completely smooth and melted. Be extremely cautious not to overheat the chocolate, as it can seize and become unusable.
- Double Boiler Method: Place the chocolate in a heat-proof bowl that fits snugly over a saucepan of simmering water. Ensure the bottom of the bowl does not touch the water. Stir the chocolate gently and continuously until it is fully melted and silky smooth. This method provides more gentle, even heat.
-
3. Prepare for Piping: Carefully transfer the melted chocolate into a piping utensil. This could be a professional piping bag fitted with a small round tip, a simple sturdy ziploc bag with one corner snipped off (creating an opening of about 1/8 inch), or even a squeeze bottle designed for confectionery. A smaller opening allows for more intricate designs and squiggles.
-
4. Pipe Your Monsters: Hold your piping bag or utensil above the surface of the ice bath, approximately an inch or two away from the water. Begin to pipe squiggles directly onto the cold water in a circular, oval, or irregular shape to form the base of your monsters. The chocolate will harden almost instantly upon contact with the icy water. Create various sizes and shapes to give each monster a truly unique and quirky look. You can create multiple layers for a thicker, more robust monster or pipe thin, wispy strands for a ghostly, ethereal effect. Don’t worry about perfection; the charm is in their imperfection!
-
5. Decorate Immediately: As the chocolate hardens rapidly, you need to work quickly! While the piped chocolate is still slightly wet (or immediately after it hardens on the surface), swiftly place your candy eyes onto the monster. Arrange white rod sprinkles (or your chosen alternatives like slivered almonds or mini marshmallows) below the eyes to create jagged, spooky teeth. This is also the time to add any other immediate embellishments like colorful sprinkles, edible glitter, or small candies to make them extra spooky or quirky.
-
6. Add Scary Details (Optional): For an even more terrifying or expressive look, use a toothpick or a very fine piping tip (if using a different color chocolate) to add small details. A tiny dark chocolate V-shape or menacing eyebrows just above the candy eyes can create the illusion of furrowed brows or fierce expressions. You can also draw small scars, stitches, or other creepy facial features to enhance their monstrous appeal.
-
7. Remove and Dry: Once your monster is fully hardened and decorated (this should happen almost immediately after piping and decorating), carefully remove it from the ice bath. Use a spatula, slotted spoon, or your fingers to gently lift the chocolate from the water. Place the finished monsters on a piece of kitchen roll or parchment paper to allow any excess water to dry off completely. This ensures they maintain their crisp texture and prevents them from sticking together or becoming soggy.
-
8. Serve and Enjoy: Your delightful and spooky Chocolate Monsters are now ready to scare and delight your guests! Arrange them creatively on a platter, use them as decorative toppers, or prepare them for that magical hot chocolate transformation. Store any leftover monsters in an airtight container at cool room temperature for up to a week.
Video Tutorial: Watch Your Monsters Come to Life!
For a visual guide on how to create these fantastic treats, watch this helpful video tutorial. It demonstrates the ice bath technique, various piping methods, and provides inspiration for decorating, making the recipe even easier to follow and master.
This video is an excellent resource to see the rapid hardening process in action and get ideas for your own monstrous creations!
Make-Ahead Tips and Proper Storage for Your Spooky Treats
These Chocolate Monsters are fantastic for making ahead, which is a huge advantage when planning for busy Halloween parties or events. You can easily prepare them a few days in advance without compromising their quality. Once fully dry after removing them from the ice bath, ensure they are completely free of moisture. Then, gently place them in an airtight container, preferably in a single layer or separated by parchment paper to prevent sticking. Keep the container at cool room temperature, away from direct sunlight, humidity, or heat sources, which could cause the chocolate to melt, soften, or develop a white “bloom” on its surface.
When stored correctly, your Chocolate Monsters will stay fresh, crisp, and delicious for up to a week. Generally, avoid refrigerating them, as the cold temperature can sometimes cause condensation to form when brought back to room temperature, affecting their texture and appearance. However, if you live in a very warm or humid climate, a brief stint in the refrigerator (ensuring they are in a sealed, airtight container to prevent moisture absorption) might be necessary before serving. Just let them come to room temperature for a few minutes before indulging. This make-ahead capability allows you to enjoy the decorating process without last-minute stress, ensuring your Halloween celebrations are as smooth as possible.
Endless Customization and Flavor Variations
The true beauty of these Chocolate Monsters lies in their endless customization possibilities. Don’t feel limited to just dark chocolate – milk chocolate works wonderfully for a sweeter profile, and white chocolate can be a blank canvas for vibrant colors. Imagine a ghostly white chocolate monster with bright red candy eyes, or a neon green alien monster! Here are some ideas to spark your creativity:
- Chocolate Type & Color: Experiment with different types of chocolate. Use white chocolate and tint it with oil-based food colorings (gel or powder is best, liquid food coloring can seize chocolate) to create monsters in vivid green, orange, purple, or even blue hues. Marbled monsters can be created by briefly swirling two different melted chocolate colors together before piping.
- Flavor Infusions: Add a drop or two of food-grade essential oils or extracts to your melted chocolate for an extra kick. Peppermint, orange, almond, coffee, or even a hint of chili extract can transform the flavor profile and add an unexpected layer of deliciousness to your monsters.
- Spooky Shapes Beyond Squiggles: While squiggles are fun, try piping specific shapes like ghosts, bats, tiny pumpkins, or even skull outlines onto the ice bath. The rapid hardening allows for surprisingly precise control, making it easier to achieve detailed forms.
- Diverse Toppings & Textures: Go beyond standard sprinkles! Consider crushed Oreos or chocolate wafers for a “dirt monster” or a fuzzy texture. Mini chocolate chips can create textured fur, while edible metallic dust (gold, silver, copper) can turn your creatures into truly fantastical beasts. Small pieces of dried fruit, candied ginger, or chopped nuts can also add unique textures and flavor contrasts.
- Allergy-Friendly Options: If you’re catering to dietary restrictions or allergies, ensure your chocolate and decorations are free from common allergens. Many brands offer delicious dairy-free, nut-free, and gluten-free chocolate options, allowing everyone to enjoy these spooky treats safely.
Encourage everyone involved to embrace their inner monster artist. Provide a wide array of options and let creativity take over. Remember, no two monsters should ever look exactly alike – their individuality is part of their charm!
Nutrition Information (Approximate Per Monster)
Carbohydrates: 11g,
Protein: 2g,
Fat: 9g,
Saturated Fat: 5g,
Polyunsaturated Fat: 0.3g,
Monounsaturated Fat: 3g,
Trans Fat: 0.01g,
Cholesterol: 1mg,
Sodium: 4mg,
Potassium: 143mg,
Fiber: 2g,
Sugar: 7g,
Vitamin A: 8IU,
Calcium: 15mg,
Iron: 2mg
Nutrition information is automatically calculated and is an approximation based on the ingredients listed. Actual values may vary depending on specific brands and ingredient modifications. It should only be used as a guide.
Did you make this recipe? Share your creations and leave a comment below!Your feedback and photos help fellow Halloween enthusiasts and inspire new ideas!