

Master the Art of Homemade Flatbreads: An Effortless, Yeast-Free Recipe
Discover the simple joy of baking fresh bread at home with this incredibly easy, yeast-free flatbread recipe. Forget complicated techniques or long proofing times – with just a few pantry staples and minimal effort, you can create the most delicious, soft, and versatile flatbreads that will elevate any meal. Homemade flatbreads are not only superior in taste and texture to their store-bought counterparts, but they also offer a fresh, wholesome accompaniment to a vast array of dishes.

Imagine warm, fluffy bread, hot off the pan, ready to soak up rich curries, cradle succulent kebabs, or serve as the perfect base for a speedy pizza. This recipe makes that dream a reality with astounding ease. A quick mix, a brief knead, a simple roll, and a few minutes on the stove – that’s truly all it takes to achieve homemade flatbread perfection. Once you try these, you’ll wonder why you ever bought them from the supermarket!
The best part? This recipe is entirely yeast-free, making it incredibly quick and foolproof. The main ingredients – natural yogurt, flour, and baking powder – come together to create a light, tender crumb that’s both nutritious and wonderfully fresh. It’s an all-rounder recipe perfect for spontaneous weeknight dinners or planned feasts.
Why You’ll Fall in Love with This Easy Flatbread Recipe
This isn’t just another recipe; it’s a culinary game-changer. Here’s why these homemade flatbreads will become a staple in your kitchen:
- Unmatched Versatility: These flatbreads are incredibly adaptable. Serve them with robust curries, alongside grilled meats at a barbecue, as wraps for flavorful kebabs, or even as a unique base for homemade pizzas. Their neutral yet delightful flavor complements nearly any cuisine.
- Surprisingly Simple & Quick: Say goodbye to the complexities of traditional bread making. This recipe requires no yeast, meaning no waiting for dough to rise. The entire process, from mixing to serving, can be completed in under 30 minutes, making it ideal for busy schedules.
- Healthier & Tastier: When you make flatbreads at home, you control every ingredient. This ensures a fresher, healthier product free from preservatives and unnecessary additives often found in store-bought options. Plus, the taste of warm, homemade bread is simply unparalleled and profoundly satisfying.
- Budget-Friendly: Making your own flatbreads is significantly more cost-effective than buying pre-made versions. The ingredients are inexpensive and common, allowing you to enjoy delicious bread without breaking the bank.

What Exactly Are Flatbreads? A Global Culinary Canvas
Flatbreads are a universal culinary concept, found in countless variations across cultures worldwide. From Indian naan and chapati to Middle Eastern pita, Mexican tortillas, and Italian focaccia, each region boasts its unique version. While some flatbreads are yeast-leavened and others are not, this particular recipe focuses on creating a versatile, all-rounder flatbread that isn’t specific to one cuisine. This adaptability means you can enjoy it with an incredible range of meals, bridging geographical culinary divides with ease.
Serving Suggestions: Elevate your dining experience by pairing these flatbreads with a variety of dishes. Transform them into a Greek-inspired meal by serving with Tzatziki, tender Doner Kebab, flavorful Chicken Souvlaki, or Sheet Pan Kebabs. They are also absolutely perfect with rich curries like a hearty Chickpea Curry or a savory Lamb Keema. Don’t limit yourself – consider them for dipping into hummus, alongside hearty stews, or even as a quick sandwich wrap.
Essential Ingredients for Perfect Flatbreads
The beauty of this recipe lies in its simplicity and the readily available ingredients. You likely have most of these in your pantry right now!
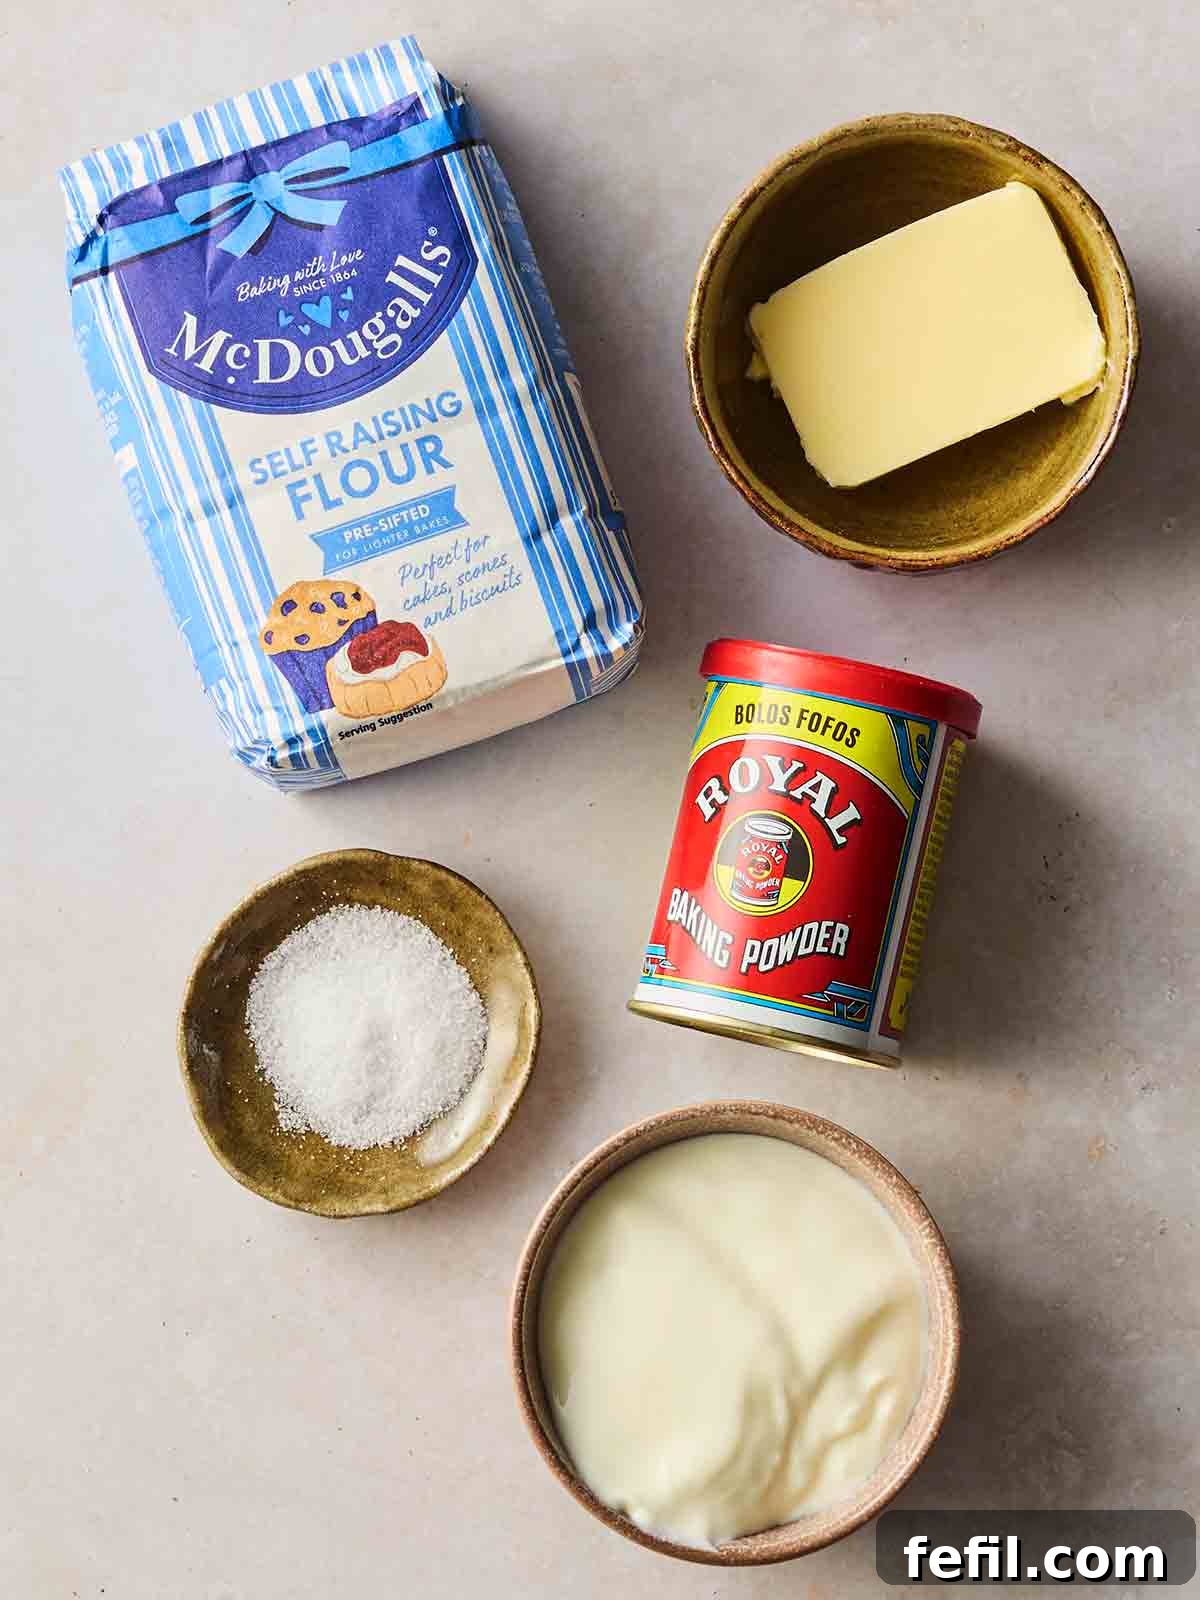
- Natural Yogurt: This is the secret ingredient that gives our flatbreads their incredible tenderness and subtle tang, replacing the need for yeast. Plain or Greek yogurt works equally well.
- Self-Raising Flour: This flour already contains a leavening agent, simplifying the recipe. If you only have all-purpose (plain) flour, you can easily substitute it by adding an extra teaspoon of baking powder for every cup of flour.
- Baking Powder: A crucial leavening agent that reacts with the yogurt to create light and fluffy flatbreads without yeast. Just a teaspoon is all it takes!
- Fine Sea Salt: A touch of salt enhances all the flavors in the dough. Fine grain dissolves more easily.
- Extra Flour: Keep a small amount handy for dusting your work surface and rolling pin. This prevents the dough from sticking and ensures a smooth rolling process.
- Butter (Optional): Melted butter brushed over the hot flatbreads at the end adds a rich flavor and a beautiful glossy finish. It’s optional but highly recommended for an extra touch of indulgence.
Step-by-Step Guide: How to Make Irresistible Flatbreads
Follow these straightforward steps, and you’ll be enjoying warm, homemade flatbreads in no time. The process is designed to be quick and easy, even for novice bakers.
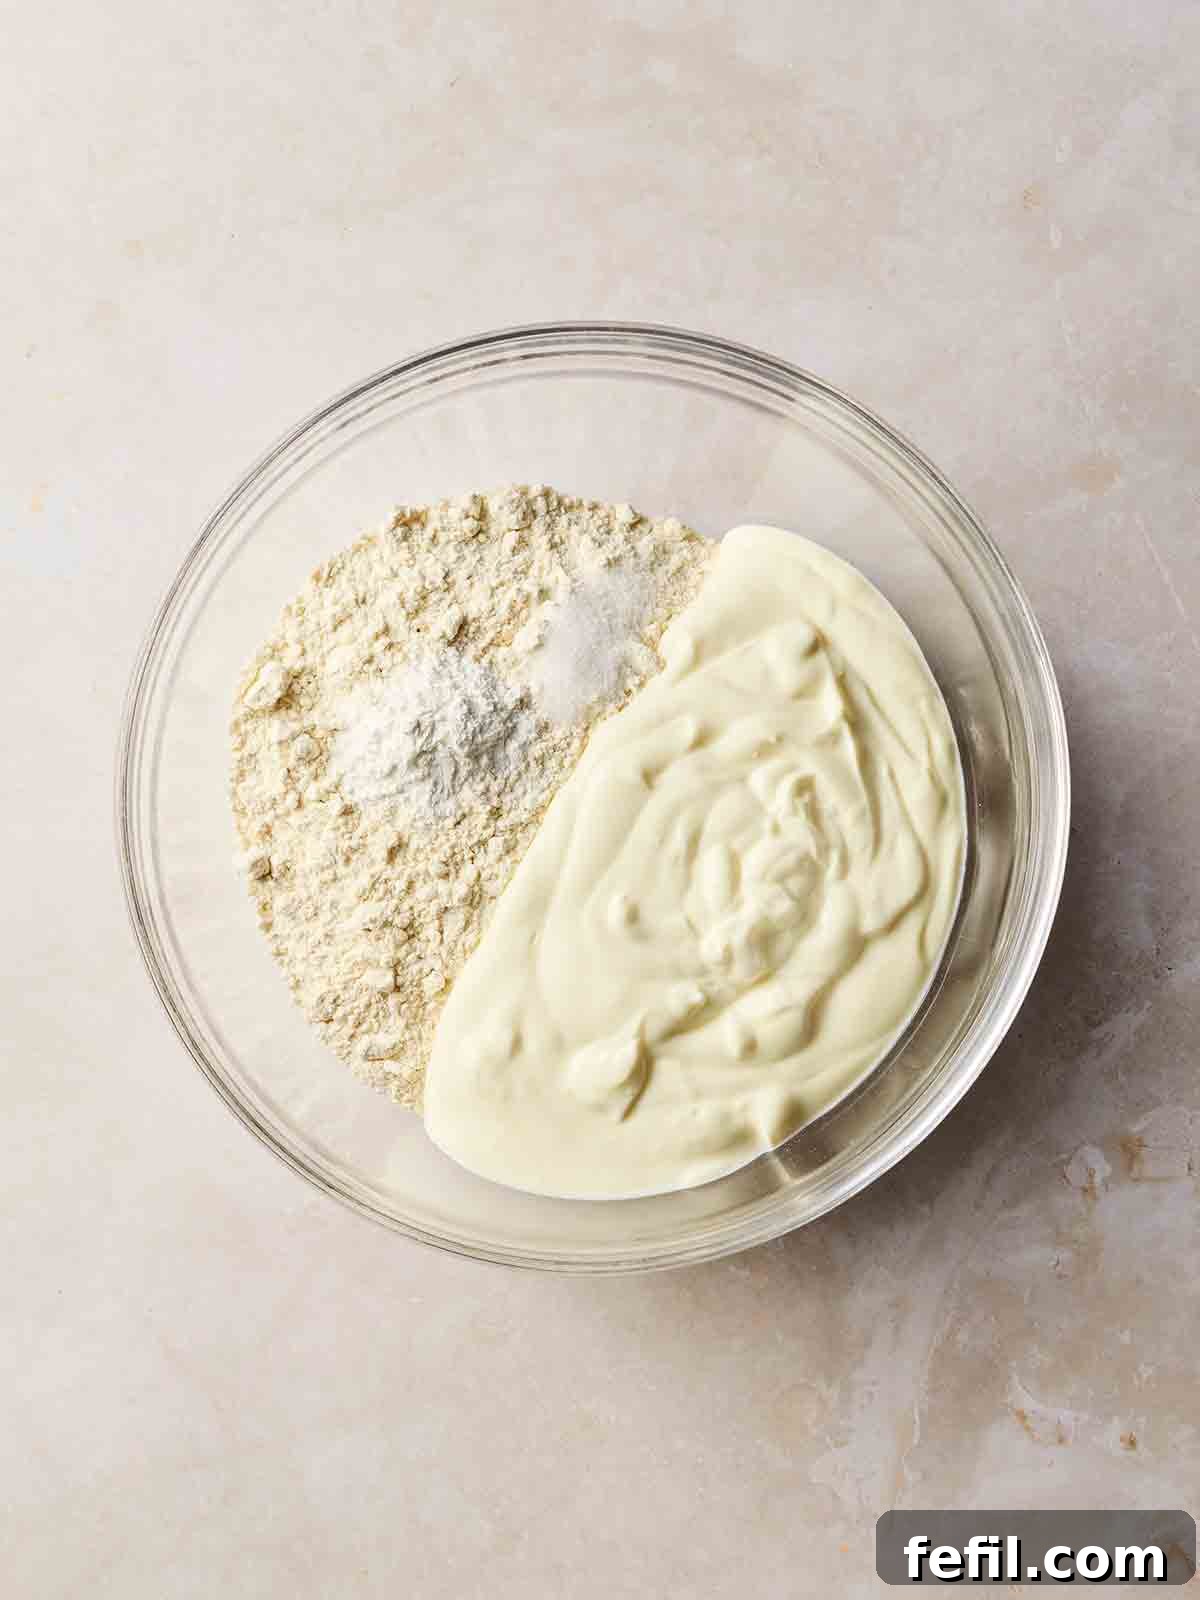
1. Mix the Dough: In a large mixing bowl, combine the natural yogurt, self-raising flour, baking powder, and sea salt. Stir with a spoon or your hands until the ingredients come together to form a sticky ball of dough. Don’t worry if it looks a bit shaggy at this stage.
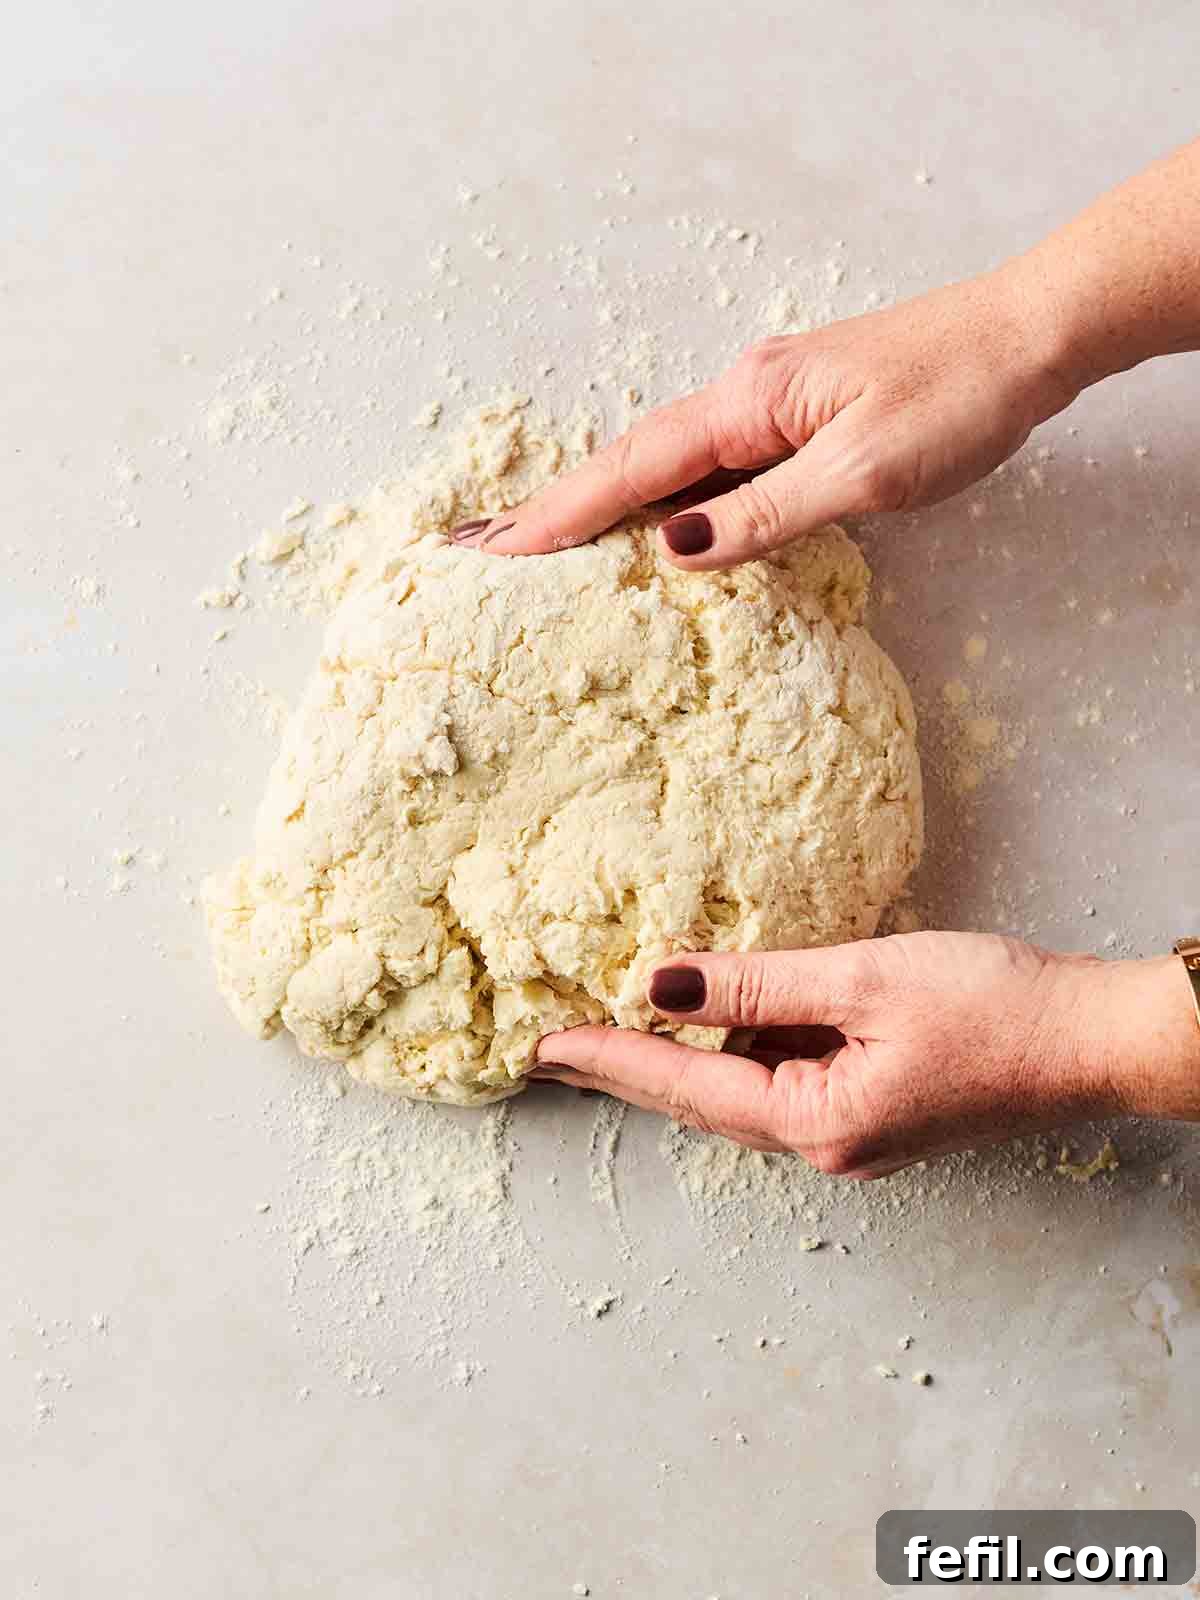
2. Knead the Dough: Lightly flour your clean work surface with a little extra flour. Tip the sticky dough onto the floured surface. Knead the dough gently for about 1-2 minutes until it becomes smooth, cohesive, and less sticky. Avoid over-kneading, as this can make the flatbreads tough.
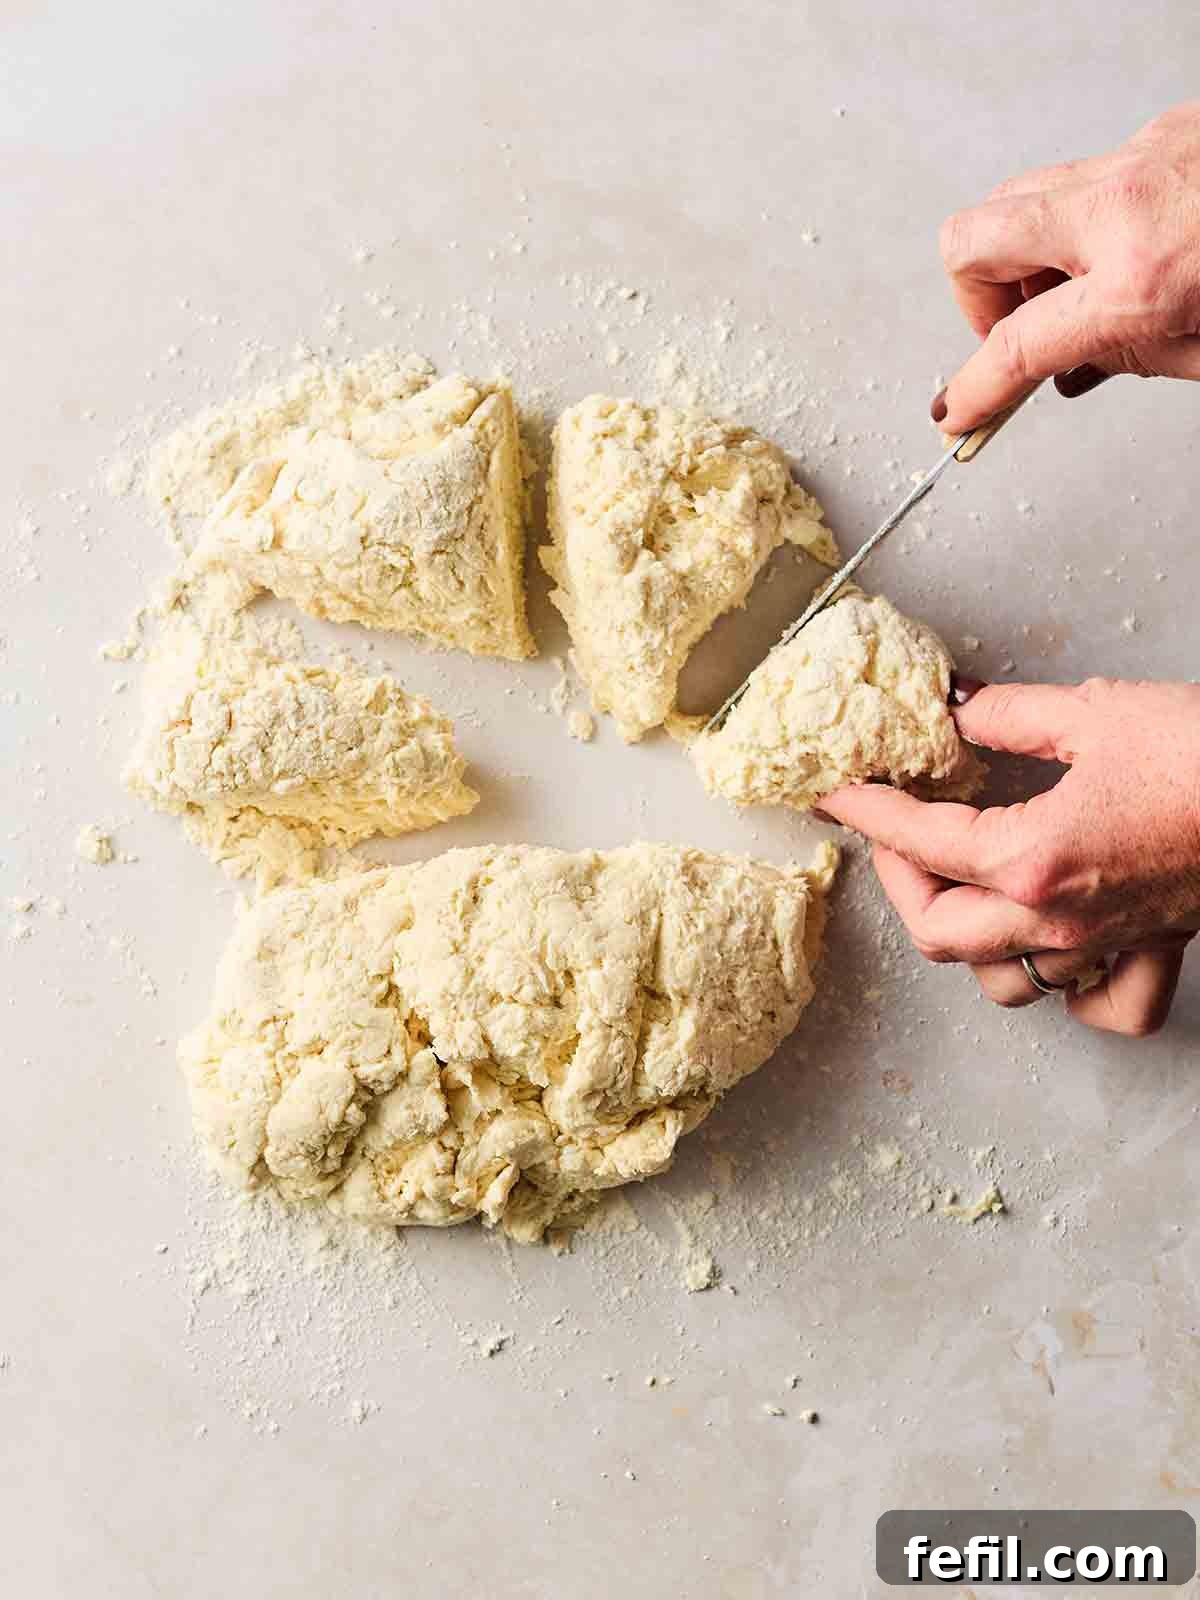
3. Portion the Dough: Using a knife or a dough scraper, cut the dough in half. Then cut each half in half again, and each of those pieces in half one more time. This should give you 8 relatively equal pieces of dough. Gently roll each piece into a ball.
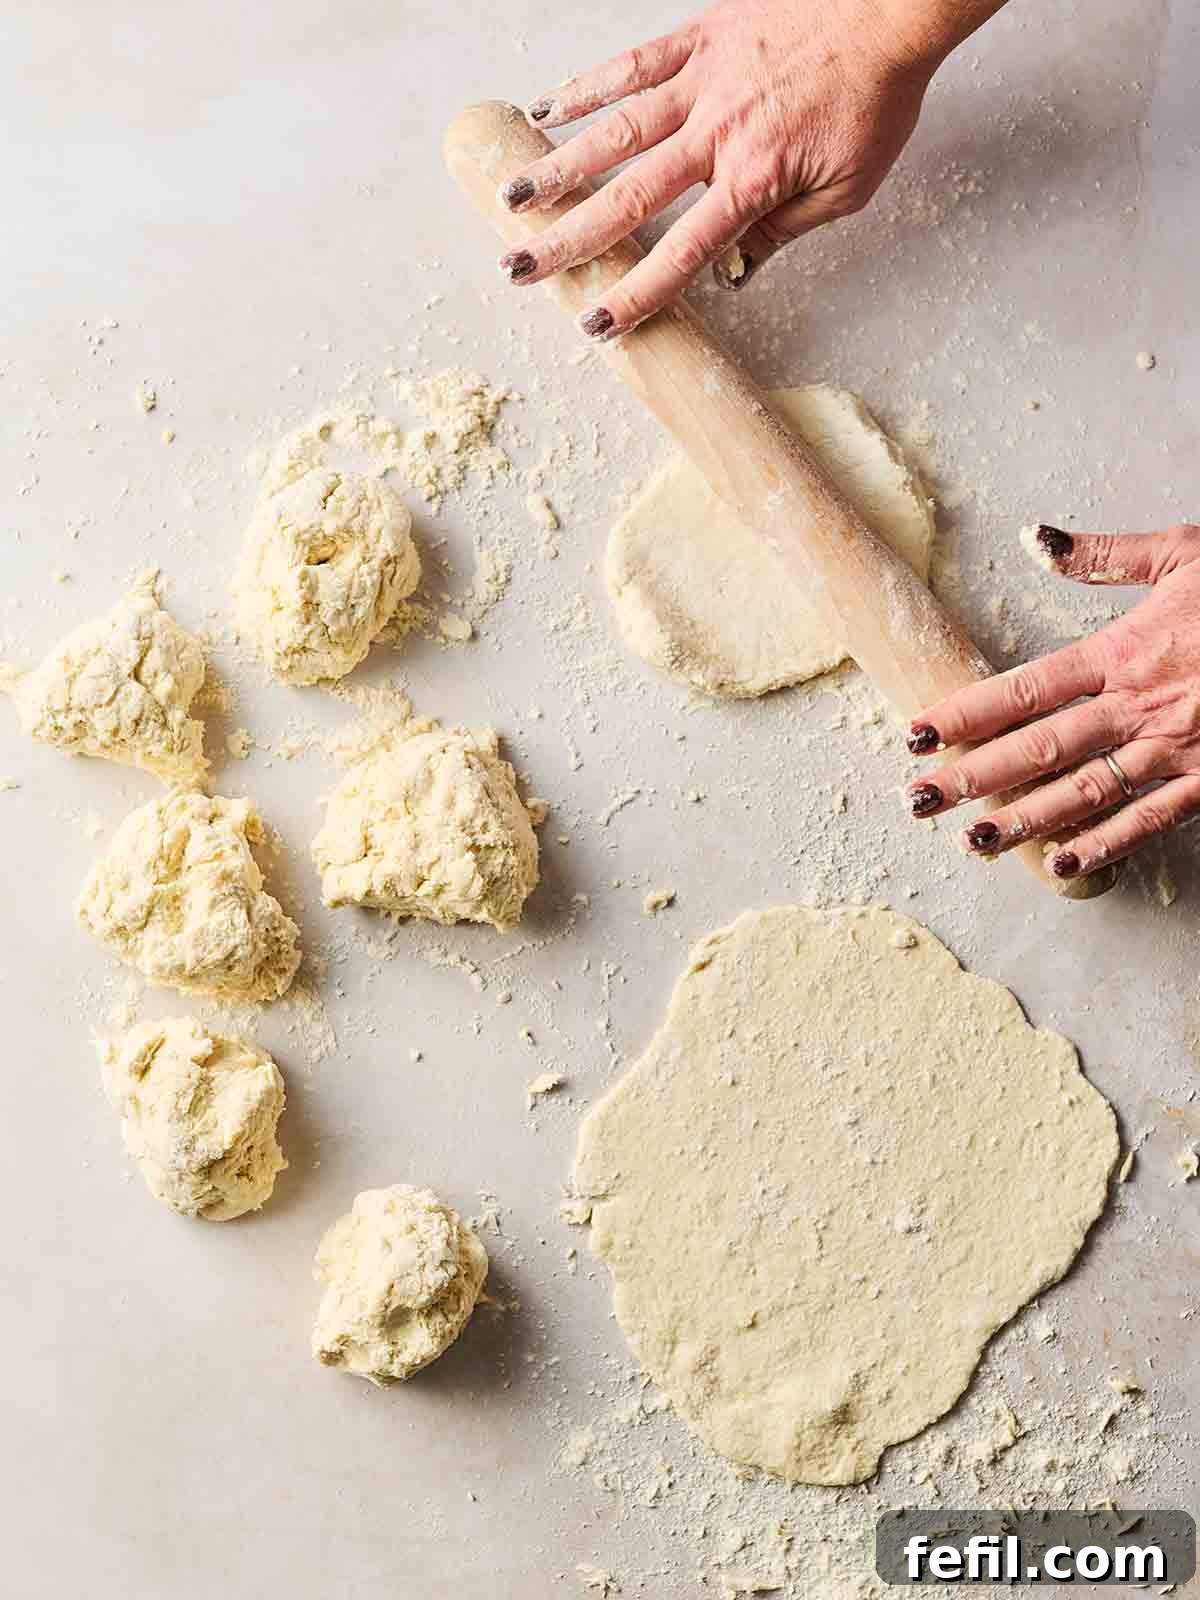
4. Roll and Cook: Generously flour your work surface and rolling pin. Take one ball of dough and roll it out into a flat, round shape, about 6-8 inches in diameter and roughly ⅛ to ¼ inch thick. Heat a griddle pan or a heavy-bottomed frying pan over medium-high heat until hot. Cook each flatbread for about 2-3 minutes per side, or until golden brown spots appear and the bread is cooked through and slightly puffed. (Cook 1-2 at a time, rolling out the next while others cook.)
5. Finish with Butter (Optional): As each flatbread comes off the pan, brush it lightly with a little melted butter for extra flavor and a beautiful sheen. Serve immediately or keep warm in a low oven while you cook the remaining flatbreads.
Tips & Tricks for Flatbread Success
- Don’t Over-Knead: Unlike yeast doughs that benefit from extensive kneading, this yogurt-based dough needs only a minute or two of gentle kneading until it’s smooth. Over-kneading can develop too much gluten, resulting in tougher flatbreads.
- Flour Generously: Don’t be shy with the extra flour when rolling out the dough. This prevents sticking and makes the process much smoother. Just brush off any excess flour before cooking.
- Even Thickness is Key: Try to roll your flatbreads to an even thickness. This ensures they cook uniformly and develop a consistent texture.
- Pan Temperature Matters: Ensure your griddle or frying pan is properly heated before adding the flatbreads. A hot pan helps them puff up and develop those desirable golden-brown spots quickly. If the pan isn’t hot enough, they might dry out before cooking through.
- Batch Cooking Strategy: To keep things moving efficiently, roll out one or two flatbreads while the others are cooking. This way, you’ll have a continuous supply of fresh, warm flatbreads.
- Embrace Imperfection: Homemade flatbreads aren’t meant to be perfectly circular. Embrace their rustic charm – it’s part of their appeal!
Flavorful Variations to Explore
While these flatbreads are delicious as is, they also serve as a fantastic canvas for additional flavors. Experiment with these ideas to customize your batch:
- Garlic Flatbreads: This is a highly popular and easy variation. Simply add one or two crushed garlic cloves to your melted butter before brushing it over the hot flatbreads. A pinch of salt and fresh chopped parsley can further enhance the flavor.
- Herb Flatbreads: Mix finely chopped fresh herbs like cilantro, chives, rosemary, or oregano into the dough during the kneading stage, or sprinkle them over the melted butter.
- Spiced Flatbreads: For an extra kick, knead in a pinch of chili flakes, cumin powder, black pepper, or Nigella seeds (kalonji) into the dough. These are particularly good when serving with curries.
- Cheesy Flatbreads: Before folding, sprinkle a small amount of grated cheese (like cheddar or mozzarella) onto the dough, then fold it over, seal the edges, and roll it out again. Cook as usual for a delightful cheesy center.
- Sweet Flatbreads: For a dessert twist, omit the salt, add a teaspoon of sugar to the dough, and serve brushed with honey or cinnamon sugar.
Storing and Reheating Your Homemade Flatbreads
These flatbreads are undoubtedly at their best when served immediately, warm off the pan. However, they can also be prepared in advance and stored for later enjoyment, making them excellent for meal prepping.
In the Fridge: Allow cooked flatbreads to cool completely. Store them in an airtight container or a zip-lock bag in the refrigerator for up to 3 days. This prevents them from drying out.
In the Freezer: For longer storage, flatbreads freeze exceptionally well. Once cooled, stack them with parchment paper in between to prevent sticking, then wrap them tightly in plastic wrap and foil, or place them in a freezer-safe bag. They can be kept in the freezer for up to 2-3 months.
To Reheat:
- Microwave: For a quick reheat, warm individual flatbreads in the microwave for 20-30 seconds until soft and warm. Be careful not to overcook, as they can become chewy.
- Pan: Reheat in a dry hot pan for 30-60 seconds per side, until warmed through and slightly crisp.
- Oven: If reheating a larger batch, stack them in foil and warm in a preheated oven at 180°C (350°F) for 5-7 minutes.
Frequently Asked Questions (FAQs) About Flatbreads
Can I use plain (all-purpose) flour instead of self-raising flour?
Yes, you absolutely can! If you’re using plain (all-purpose) flour, simply add 2 teaspoons of baking powder for every 2 cups (approximately 250g) of plain flour. The baking powder will provide the necessary lift for fluffy flatbreads.
How can I make my flatbreads even softer?
To ensure maximum softness, avoid over-kneading the dough. Also, ensure you don’t overcook them; they should be golden brown and slightly puffed, not crispy. Using full-fat natural or Greek yogurt can also contribute to a richer, softer texture.
Can I make a larger batch of these flatbreads?
Yes, this recipe is easily scalable. Simply double or triple the ingredients proportionally. Remember to work in manageable batches when rolling and cooking to maintain quality.
Is it possible to make these flatbreads gluten-free?
While this specific recipe uses wheat flour, you can experiment with a 1:1 gluten-free flour blend that includes xanthan gum. The texture might vary slightly, but many gluten-free blends work well for flatbreads.
Can I add yeast to this recipe?
This recipe is specifically designed to be yeast-free for quick preparation. If you prefer a yeast-leavened flatbread (like a traditional naan), you would need a different recipe that incorporates yeast and allows for proofing time. This particular recipe relies on baking powder and yogurt for its leavening.
Homemade Flatbreads: The Full Recipe Card

Homemade Flatbreads {Super Easy Recipe!}
By Sarah Rossi
Basic ingredients and a simple method make homemade Flatbreads SO worth it. This recipe is quick and easy, giving you super fresh and totally delicious breads to serve in lots of different ways.
15 minutes
10 minutes
30 minutes
8 Flatbreads
Ingredients
- 450 g (2 cups) Natural yogurt
- 450 g (2 cups) Self-raising flour (or all-purpose flour + 2 tsp baking powder)
- 1 tsp Baking powder
- 1/2 tsp Fine sea salt
- Extra flour for rolling
- 30 g (1 oz) Butter, melted (for brushing over at the end, optional)
Instructions
- Mix the yogurt, flour, baking powder, and salt together in a bowl until it comes together in a sticky ball.
- Dust your work surface with a little extra flour and tip the dough onto it. Then knead for a minute or two until it all comes together nicely and is smooth.
- Cut the dough in half, then both pieces in half again, and each piece in half again, so you end up with 8 even pieces. Roll each piece into a small ball.
- Using plenty of extra flour and a well-floured rolling pin, roll the balls of dough into flat round shapes (about 6-8 inches in diameter). Cook 2 at a time, rolling the next ones whilst they cook.
- Heat a griddle pan or heavy frying pan until hot. Cook each flatbread for about 2-3 minutes on each side, until golden brown and cooked through. You can keep them warm in a low oven if you’re not serving them immediately.
- Brush with a little melted butter immediately after cooking.
Did you make this recipe? We’d love to hear how it went! Share your feedback and give it a star rating.
Notes
- Storing & Reheating: Keep cooked and cooled flatbreads in a zip-lock bag in the fridge for up to 3 days, or in the freezer for up to 3 months. To reheat, pop in the microwave for 20-30 seconds, or warm in a dry pan.
- Size of Flatbreads: Don’t worry about trying to get your flatbreads to be perfect circles; they’re homemade after all!
Nutrition
Carbohydrates: 45g
Protein: 10g
Fat: 4g
Saturated Fat: 2g
Polyunsaturated Fat: 1g
Monounsaturated Fat: 1g
Trans Fat: 0.1g
Cholesterol: 9mg
Sodium: 214mg
Potassium: 251mg
Fiber: 1g
Sugar: 4g
Vitamin A: 99IU
Vitamin C: 1mg
Calcium: 143mg
Iron: 1mg
Nutrition information is automatically calculated and should only be used as an approximation. Nutritional values are per portion unless otherwise stated.
Additional Info
Cuisine: Family Food
Share Your Flatbread Creations!
We’d love to know how your homemade flatbreads turned out and what you thought of the recipe! Please take a moment to rate the recipe using the stars above. Your valuable feedback not only helps us improve but also guides other home cooks.
Also, if you’re proud of your cooking creations, we’d absolutely LOVE to see them! Tag us on Instagram @tamingtwins or use the hashtag #tamingtwinsrecipes. Happy cooking!
This recipe was first published on October 19th, 2018, and was fully updated with a new and improved recipe on January 7th, 2026.